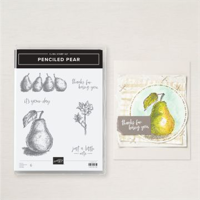
I adore the simplicity of the pear image in the Stampin’ Up! Penciled Pear stamp set. The images in the stamp set have the perfect amount of artful shading “built in.” It looks so chic stamped with Pecan Pie ink on Old Olive card stock.
WHAT I LOVE! The Stampin’ Up! Countryside Corners die collection offers six different sizes of octagons (plus a mini flag die). They are proportioned to “nest” when you layer and formed the focal point for my pretty pear.


NEED SKETCH INSPIRATION? The layout of today’s thank you card was inspired by the newest addition to my Stampin’ Pretty Sketchbook, Sketch #90 shown above!
Enjoy FREE sketch ideas with coordinating project tutorials in my Stampin’ Pretty Sketchbook here.
my simple card tutorial
CUT YOUR CARD STOCK – DIMENSIONS:
- Pecan Pie Card Stock:
- Card Base – 4 1/4 x 11, scored at 5 1/2
- Die-Cut Octagon – 3 1/2 x 4 3/4 (before die-cutting)
- Old Olive Card Stock:
- Layer – 4 x 5 1/4
- Die-Cut Octagon – 3 1/4 x 4 1/2 (before die-cutting)
- Very Vanilla Card Stock:
- Layer – 3 3/4 x 5
- Sentiment – 1 3/4 x 1/2
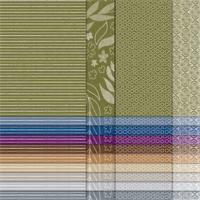
- Pecan Pie Neutrals Designer Series Paper:
- Envelope Flap – 5 3/4 x 2 1/2 (before snipping)

PROJECT TUTORIAL:
Burnish the fold of the Pecan Pie card base with a Bone Folder.
Layer and adhere the Very Vanilla and Old Olive layers together and to the card with Multipurpose Liquid Glue.
Use a Mini MISTIstamp tool to stamp and position the pear (Penciled Pear stamp set) in Pecan Pie Classic Ink onto the 3 1/4 x 4 1/2 Old Olive card stock. Watch my 1 Minute to WOW video: The Magic of the Mini MISTI for a quick product demonstration here.
Use a Stampin’ Cut & Emboss Machine (Standard or Mini) and the Countryside Corner dies to crop the Pecan Pie card stock with the 3 x 4 1/2 die and the Old Olive card stock with the 2 3/8 x 4 die.

Wrap the Pecan Pie die-cut with the Linen Thread, securing with a bow as shown.
Adhere to the card with Stampin’ Dimensionals.
Use a Mini MISTIstamp tool to stamp and position the sentiment (Penciled Pear stamp set) in Pecan Pie Classic Ink onto the 1 3/4 x 1/2 piece of Very Vanilla card stock.
Adhere to the card as shown with Stampin’ Dimensionals.

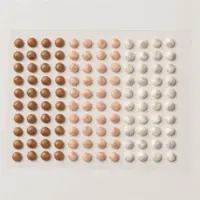
POP OF PERSONALITY! Embellish with 1 Pecan Pie Adhesive-Backed Swirl Dots.
PERFECT POLISH! Adhere the 5 3/4 x 2 1/2 Designer Series Paper to the Basic White Note Card envelope flap with Multipurpose Liquid Glue. Add glue to the flap. Flip to the inside of the flap and carefully snip away the excess with Paper Snips. Learn how with my 1 Minute to WOW video here.
stampin’ up! product spotlight!


how i organize my stamping studio
Catch my entire Stampin’ Pretty blog series showcasing how I organize craft supplies in my studio – including my favorite Stamp-n-Storage products! Binge the whole series, or pick out a post below and learn how to make your craft space better than ever!

promos, specials, & important updates


don’t forget your tulip rewards!

MY CUSTOMER EXCLUSIVE! Tulip Loyalty Rewards are my way of personally saying thank you to my frequent online shoppers. Earn a tulip for every $50 increment you spend on Stampin’ Up! products (purchased through me). Redeem tulips for a free stamp set (5 tulips) or bundle (10 tulips)!
my project supply list – click products to shop online!


Sale: $56.70
Price: $63.00