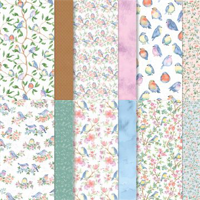
TECHNIQUE TIP! Consider where you want a designer series paper pattern with images to “land” on your card before you cut. I stamped and cropped the sentiment first (a SNEAK PEEK of the Happy Little Things bundle available March 5) and decided where I wanted to put the sentiment in order to show off those two birds. Then I cut.
my simple card tutorial
CUT YOUR CARD STOCK – DIMENSIONS:
- Crumb Cake Card Stock:
- Layer – 4 3/4 x 3 1/4
- Basic White Card Stock:
- Sentiment Die-Cut – 2 x 1 (before die-cutting)
- Flight & Airy Designer Series Paper:
- Layer – 4 1/4 x 3 (cut for perfect bird & sentiment placement)
- Envelope Flap – 5 1/8 x 1 7/8

PROJECT TUTORIAL:
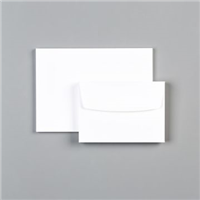
Begin by burnishing the fold of the Basic White Note Card Base with a Bone Folder.
Use a Clear Block G to stamp the sentiment (Happy Little Things Stamp Set) in Misty Moonlight Classic Ink onto the Basic White sentiment layer.
Crop with a Stampin’ Cut & Emboss Machine (Standard or Mini) and the coordinating Happy Little Things die.
Use the cropped sentiment to find the perfect placement among the images from the Flight & Airy Designer Series Paper, then use a Paper Trimmer to cut that section of the Designer Series Paper to 4 1/4 x 3.
Adhere the Designer Series Paper to the Crumb Cake layer with Multipurpose Liquid Glue

Wrap with Crumb Cake Baker’s Twine Essentials, securing with a bow as shown.
Adhere to the card base with Stampin’ Dimensionals.
Adhere the sentiment to the card as shown with Stampin’ Dimensionals.
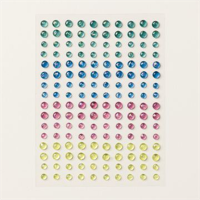
POP OF PERSONALITY! Embellish with three Blueberry Bushel Tinsel Gems 4-Pack.
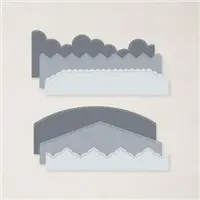
PERFECT POLISH! Adhere the 5 1/8 x 1 7/8 Designer Series Paper (DSP) to the Basic White Note Card envelope flap with Multipurpose Liquid Glue. IMPORTANT: Add glue to the flap, not the DSP. Center, line up, and tape (Post-It Tape) the Basic Borders edge die in place to secure. Zip through a Stampin’ Cut & Emboss Machine (Standard).
stampin’ up! product spotlight!


NEW ONLINE EXCLUSIVES COMING SOON! Stampin’ Up! is releasing several NEW Online Exclusive products to customer on March 5, 2024! Get ready to add all these fabulous products to your collection, you are going to LOVE THEM!

STAMP-n-STORAGE MAGNET CARDS & STORAGE POCKETS. My dies stay securely in place on 6 x 7 Magnet Cards and are slipped into a coordinating 6 x 7 Storage Pocket. They are kept in a Creative Crate along with my Embossing Folders!

how i organize my stamping studio
Catch my entire Stampin’ Pretty blog series showcasing how I organize craft supplies in my studio – including my favorite Stamp-n-Storage products! Binge the whole series, or pick out a post below and learn how to make your craft space better than ever!

promos, specials, & important updates
don’t forget your tulip rewards!

MY CUSTOMER EXCLUSIVE! Tulip Loyalty Rewards are my way of personally saying thank you to my frequent online shoppers. Earn a tulip for every $50 increment you spend on Stampin’ Up! products (purchased through me). Redeem tulips for a free stamp set (5 tulips) or bundle (10 tulips)!


