
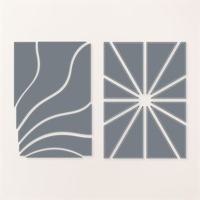
I’m diggin’ this Groovy Kind of Love Card. How about you? I came up with a retro color palette of Very Vanilla, Petal Pink, Early Espresso and Coastal Cabana and used the Stampin’ Up! Patchwork Pieces Dies (you WANT these) and my mighty Stampin’ Cut & Emboss Machine to cut the pieces. Don’t miss that each wavy section has darling die cut “stitching” that fit perfectly together.
SNEAK PEEK! You are also getting a peek of the Stampin’ Up! Rainbow Adhesive Backed Dots (Petal Pink) that will be available for purchase Jan. 4 when the Spring Mini begins! Add them to your wish list. The colors are”fresh for spring” in Balmy Blue, Petal Pink, Fresh Freesia, Bubble Bath, Pool Party, Flirty Flamingo, Lemon Lolly, Azure Afternoon
my simple card tutorial
CUT YOUR CARD STOCK – DIMENSIONS:
- Very Vanilla Thick Card Stock:
- Card Base – 4 1/4 x 11, scored at 5 1/2
- Very Vanilla Card Stock:
- Layer – 4 x 5 1/4
- Layer Below Die-Cut Layers – 3 1/8 x 4 5/8
- Die-Cut “Love” – 2 1/2 x 1 1/2 (before die-cutting) – Adhered to an Adhesive Sheet
- Petal Pink, Early Espresso, Coastal Cabana and Very Vanilla Card Stock:
- Die-Cut Layer (one of each color)- 3 1/2 x 5 (before die-cutting)
- Early Espresso Card Stock:
- Die-Cut “Love” Base – 2 3/4 x 2 1/2 (before die-cutting)

PROJECT TUTORIAL:
Begin by burnishing the fold of the Very Vanilla Thick card base with a Bone Folder.
Adhere the largest 4 x 5 1/4 Very Vanilla layer to the card base with Stampin’ Dimensionals.
Use the Patchwork Pieces die and a Stampin’ Cut & Emboss Machine (Standard) to crop a layer of Petal Pink, Early Espresso, Coastal Cabana and Very Vanilla.
Adhere the die-cut pieces as shown (you will have extra to use on other cards) to the 3 1/8 x 4 5/8 Very Vanilla layer with Multipurpose Liquid Glue.
Adhere to the card with Stampin’ Dimensionals.

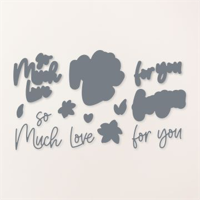
Crop the Very Vanilla (adhered to an Adhesive Sheet) and the Early Espresso pieces with a Stampin’ Cut & Emboss Machine (Standard or Mini) and the Love For You dies.
Remove the Adhesive Sheet backing from the Very Vanilla die-cut and adhere to the Early Espresso die-cut.
Adhere to the card with Stampin’ Dimensionals.
POP OF PERSONALITY! Embellish with Petal Pink Rainbow Adhesive-Backed Dots as shown.


2 Minute Technique Tip: I cut vellum card stock to 4 x 5 1/4 and will use it as a very classy protective layer for covering the front when mailing. Thank you Cathy Schroeckenthaler (a member of my Stampin’ Pretty Pals) for sending me a hand stamped birthday card with a vellum layer that got my wheels turning.
stampin’ up! product spotlight!


oh, so pretty card idea!


OH, SO PRETTY! The card above also showcases the Patchwork Pieces Dies by Stampin’ Up! You can see the original blog post, with tips, tricks and project tutorial here.
promos, specials, & important updates
don’t forget your tulip rewards!

MY CUSTOMER EXCLUSIVE! Tulip Loyalty Rewards are my way of personally saying thank you to my frequent online shoppers. Earn a tulip for every $50 increment you spend on Stampin’ Up! products (purchased through me). Redeem tulips for a free stamp set (5 tulips) or bundle (10 tulips)!








Oh , I love it MsMary, love it all. ♥️♥️♥️♥️♥️
Hugs Frenchie 🌹
Soooo groooovy! I love the colors you selected – so warm and yet so bright. Love!