
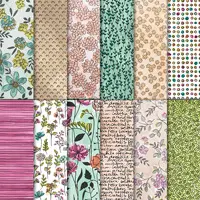
The Stampin’ Up! Share What You Love Promotion introduced on yesterday’s post (details here), includes many of the products used on today’s card. I LOVE that customers get a chance to order new products NOW (bundled with freebies) before the annual catalog release on June 1.

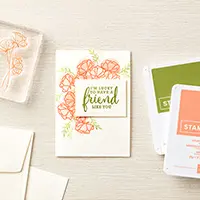
Today’s card was assembled by me and designed by Stampin’ Up! as part of our make and take at On-Stage in Las Vegas last month. It really shows off the freshness and beauty of the Share What You Love products.

STAMPIN’ PRETTY STEP-BY-STEP TUTORIAL:
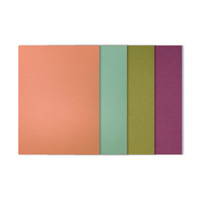
Create a 4 1/4″ x 5 1/2″ card base using Mint Macaron card stock and the Stampin’ Up! Stampin’ Trimmer. Mint Macaron is back starting June 1. Learn about the Color Revamp here.

Cut vellum to 3 1/4 x 4 1/4. Adhere a 3″ x 4″ piece of Share What You Love Specialty Designer Series Paper as shown. Adhere both pieces with Stampin’ Dimensionals to card base.

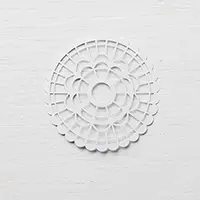
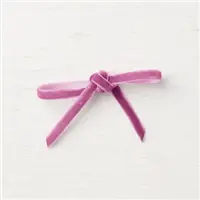
Layer and adhere a 4 1/8″ piece of Rich Razzleberry 1/4″ Velvet Ribbon to a 4″ x 3/4″ pattern from Share What You Love Specialty Designer Series Paper and a Pearlized Doily. Adhere with Snail Adhesive to center of pattern on card base.
Stamp sentiment from Share What You Love photopolymer stamp set in Tuxedo Black Memento Ink on a 2 1/2 x 1 1/2″ piece of Whisper White card stock. Adhere as shown using Stampin’ Dimensionals.
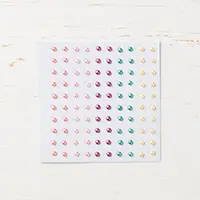
 Adhere pearls from Share What You Love Artisan Pearls on the sentiment and card.
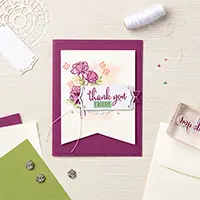
Personalize the back of the card using the Make a Difference photopolymer stamp set. I stamped “handstamped by” in Tranquil Tide ink on Mint Macaron card stock. I used the pretty letters and awesome font of the stamp set to build “Mary” and add a couple stems (also Tranquil Tide ink). The Make a Difference letters are designed to easily connect to each other!

Crop with the Big Shot, Magnetic Platform and an oval from the Stitched Shapes Framelits Dies. Adhere to the back of the card with Stampin’ Dimensionals.
Enjoy my FREE PDF Step-By-Step Tutorials (and supply list) for the Love What You Do card here.

I love hearing from you! Please leave me your questions or comments about the project for today.

If you enjoyed this post, please be sure to . . .
- Receive a FREE PDF tutorial when you subscribe to my daily blog updates here.
- Click for my Monthly Host Code and how you can earn up to a $50 shopping spree with my Tulip Rewards Loyalty Program.
- Check out the clearance rack and save up to 70%.
- Save 10% on coordinating product bundles!
- The $99 Starter Kit is the best deal of ALL! Discounts & benefits here.
- Visit my gallery for 1000+ paper crafting ideas.
- View my FREE PDF Project Tutorials.
- Follow me on Pinterest.
- Subscribe to my YouTube paper crafting video tutorials.


My project supply list. Click products to shop on-line!


This card is sweet and so beautiful, the colors and all the details are placed perfectly, love the vellum peeking from behind that gorgeous paper, the ribbon and the doily just add to the charm and delightfulness of this card.
Thank you for sharing Mary.
XO
Maria.
The card is very pretty.
Thanks so much, Milinda. The pearlized doilies are divine!
This bundle and card projects are ‘SO ON MY LIST’.
Agreed . . . hope you enjoyed placing your pre-order, Kadie!
I really love this card! Beautiful!
Thanks so much! Loved using these new products and embellishments.
Love love it , ooooooh ….. I get mine today , yayyyyyy
Can’t Waite ♥️♥️ I love that dsp ♥️♥️♥️
Tfs hugs Frenchie
I can’t wait to see what you create, Frenchie!
Beautiful card! I always look forward to your email! Fabulous inspiration! Just wondering how did get all the letters to line up so perfectly on the back tag ?
Fortunately, they are photopolymer and I can see thru the block. They are designed so that you can look for the “tail” of the previous letter and stamp to connect the next letter. It took me a couple tries to get the feel but much easier now!
I love all the elements on this pretty card, Mary. The vellum peeking out from the back to the strip of Rich Razzleberry ribbon across the front and the beautiful DSP really makes a great card. The alphabet set has great little sayings that make it very versatile. Love your “handcrafted by Mary” on the back. Have a fun day!
I’m with you, Hilda. All those pretty pieces combine for a WOW! effect. Stampin’ Up! really makes it easy to coordinate within this suite!