
PICTURE THIS! Have you noticed the Picture This Dies at the back of the 2022-2023 Annual Catalog? They are front and center as part of today’s jolly holiday card! The Picture This Dies are just ONE of over 250 products that are part of the Stampin’ Up! Super Seasonal Sale. The sale runs through tomorrow, Friday, November 18!
LOVE THIS! Each time you run the Picture This circle die through a Stampin’ Cut & Emboss Machine, you get 6 die-cut circles of each color (as long as you start with a 3 3/4 x 5 piece of colored card stock). Mix the die-cut circles up and use all sizes of every color to make 6 full cards!

SAVE $6.80 when you purchase the Picture This Dies during the Stampin’ Up! Super Seasonal Sale!
WOW! SALE INCLUDES OVER 250 PRODUCTS FROM THE STAMPIN’ UP! ANNUAL CATALOG – ENDS FRIDAY, NOV 18!
- 10% off Annual Catalog punches
- 15% off Annual Catalog stamps (host stamp sets are not included in this sale)
- 20% off Annual Catalog dies
- 20% off Annual Catalog embossing folders
- 20% off Annual Catalog non-specialty Designer Series Paper


Take a peek at some of my favorite products included in the sale here.

CUT YOUR CARD STOCK – DIMENSIONS:
- Crumb Cake Card Stock:
- Card Base – 4 1/4 X 11, scored at 5 1/2
- Die-cut Layer – 3 3/4 x 5 (before cropping)
- Layer – 3 1/2 x 4 3/4
- Sentiment Strip – 3 1/2 x 1/2
- Sentiment Die-cut (card interior) – 3 1/2 x 1 1/4 (before cropping)
- Evening Evergreen, Soft Sea Foam, Cherry Cobbler, Early Espresso, Pear Pizzazz, and Real Red Card Stock:
- Die-cut Layer – 3 3/4 x 5 (each color before cropping)

PROJECT TUTORIAL:
Begin by burnishing the fold on the card base with a Bone Folder.
Use a Stampin’ Cut & Emboss Machine (Standard) to crop each 3 3/4 x 5 card stock layer with the Picture This circle die.
Adhere the die-cut Crumb Cake card stock layer to the slightly smaller layer with Multipurpose Liquid Glue.
Adhere the colored circles to the respective cut-out on the Crumb Cake layer with Stampin’ Dimensionals.
Use a Stamparatus to position and stamp the sentiment in Early Espresso Classic Ink onto the sentiment layer as shown.

Adhere with strategically placed Stampin’ Dimensionals and Multipurpose Liquid Glue
Tie a bow of Linen Thread and adhere as shown with a Mini Glue Dot.
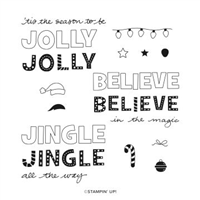
Use a Stamparatus to position and stamp the JOLLY outline in Early Espresso Classic Ink and the JOLLY interior in Cherry Cobbler Classic Ink onto the sentiment layer as shown.
Use a Stampin’ Cut & Emboss Machine (Standard) to crop the JOLLY sentiment with the Picture This center rectangle die (a perfect fit).

Adhere to the inside of the card with Stampin’ Seal.
POP OF PERSONALITY! Embellish with two Rustic Metallic Adhesive-Backed Dots as shown.

Stampin’ Pretty Tulip Rewards! A customer favorite! Earn up to a $50 shopping spree on me for being a frequent shopper!
What are Tulip Rewards? Tulip Rewards are my way of personally saying thank you to my frequent shoppers. You earn a tulip for every $50 increment you spend on Stampin’ Up! products through me and can redeem for up to a $50 shopping spree when you reach 10 tulips. I cover shipping, handling and tax on your spree, too!
![]()
Mary


My project supply list. Click products to shop on-line!


I love this fun mix of colors. Such a great use of this die!
What a neat way to use the Picture This dies for a card. Thank you for the great idea. Judith Mack