
Today’s holiday card with a masculine vibe was composed with three products from the Stampin’ Up! Super Seasonal Sale that runs through Friday, November 18! I just love how gorgeous Night of Navy and Crumb Cake are when paired together. How about you?


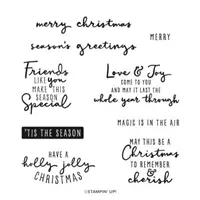
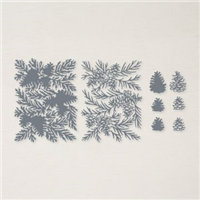
SAVE $14.85 When you purchase these three products (Christmas Pinecone Dies , Christmas to Remember Stamp Set and Banners Pick a Punch) used in today’s card during the Stampin’ Up! Super Seasonal Sale!
WOW! SALE INCLUDES OVER 250 PRODUCTS FROM THE STAMPIN’ UP! ANNUAL CATALOG – ENDS FRIDAY, NOV 18!
- 10% off Annual Catalog punches
- 15% off Annual Catalog stamps (host stamp sets are not included in this sale)
- 20% off Annual Catalog dies
- 20% off Annual Catalog embossing folders
- 20% off Annual Catalog non-specialty Designer Series Paper


Take a peek at some of my favorite products included in the sale here.

CUT YOUR CARD STOCK – DIMENSIONS:
- Crumb Cake Card Stock:
- Card Base – 4 1/4 X 11, scored at 5 1/2
- Die-cut Layer – 4 1/4 x 5 1/2 (before cropping)
- Flagged Sentiment – 4 1/4 x 3/4 (before flagging)
- Night of Navy Card Stock:
- Die-cut Layer –Adhered to an Adhesive Sheet– 4 1/4 x 5 1/2 (before cropping)
PROJECT TUTORIAL:
Begin by burnishing the fold on the card base with a Bone Folder.
Use a Stampin’ Cut & Emboss Machine (Standard) to crop the Crumb Cake and Night of Navy card stock layers with the Christmas Pinecone dies.
Adhere the two die-cuts together by removing the protective backing from the Adhesive Sheet (Night of Navy).

Adhere to the card base with strategically placed Stampin’ Dimensionals.
Use a Stamparatus to position and stamp the sentiment in Night of Navy Ink onto the center of the sentiment layer.
Flag the end with the Banners Pick a Punch.
Adhere with Stampin’ Dimensionals.

Tie a bow of Crumb Cake Baker’s Twine Essentials and adhere as shown with a Mini Glue Dot.
Adhere the sentiment to the card with Stampin’ Dimensionals.
POP OF PERSONALITY! Embellish with two Rustic Metallic Adhesive-Backed Dots as shown.
OH, SO PRETTY! The cards below were also created with the Christmas Pinecone Dies and the Christmas to Remember Stamp Set. Click on the image to view the original post and print the Project Tutorials.


Subscribe to my daily email & BE FIRST to receive my simple card ideas, FREE tutorials, sweet Stampin’ Up! deals & new products!
Mary


My project supply list. Click products to shop on-line!


Just my opinion : That blue and white one is so so pretty, unfortunately I have those dies and they DO NOT cut, I’ve tried everything possible, watched many You tube demonstrations and mine does not cut. I cannot return it as I’ve had it a while. I have other demonstrator friends who have had the same issue I will not recommend anyone buying that die and it’s so sad because it is one the most beautiful – so disappointed
I highly recommend calling Stampin’ Up! Demonstrator Support 1-800-782-6787 with your issue so they can work with you on it. I have no issues with mine, they cut with one run through the Stampin’ Cut & Emboss Machine. Sounds like your dies may have a fault or you may need to add a shim below your cut plate so that the rollers have more pressure.
Good luck!
Mary
Oooooh, all beautiful , love them ,
Tfs ,
Hugs Frenchie ♥️♥️♥️♥️