
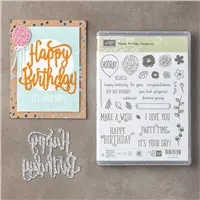
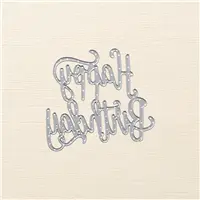
Today’s crisp, clean and modern birthday card features the new Happy Birthday Thinlit Die. It’s available June 1 when the 2017-2018 Annual Catalog begins. Request a new catalog here.
I love hearing from you! Please leave me your questions or comments about the project for today.

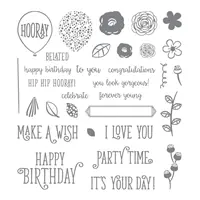
SAVE 10% Besides being able to stand alone beautifully, the Happy Birthday Thinlit Die is also available as a bundle along with the Happy Birthday Gorgeous photopolymer stamp set (available June 1). Print and track your favorite new products with this FREE wish list!

STAMPIN’ PRETTY TIPS:
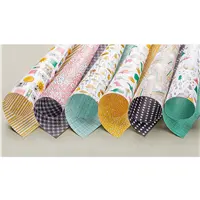
- How awesome is the black and white pattern from the new Pick a Pattern Designer Series Paper (available June 1)? It’s matted on Crushed Curry card stock and mounted with Stampin’ Dimensionals on a 4 1/4″ x 5 1/2″ Whisper White card base.

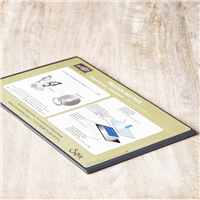
- Happy Birthday is cropped three times using the Precision Base Plate (a “must” for best results with detailed dies) and stacked for a 3-D effect.

- The inside sentiment is from the other half of this bundle, Happy Birthday Gorgeous photopolymer stamp set. Just one look at those fonts and you’ll agree that this set is aptly named!


- Hover and Pin it! The photo below shows key products for today’s happy birthday card that you can save or pin to Pinterest. If you are viewing this post by email, you’ll need to click the title of the post to access my blog and pin. See ALL my labeled product photos in one spot on my How to Make Simple Cards board on Pinterest. This project was created by my Stampin’ Pretty Design Group.

Receive a FREE PDF tutorial when you subscribe to my daily blog updates here.
I love hearing from you! Please leave me your questions or comments about the project for today.

If you enjoyed this post, please be sure to . . .
- Receive a FREE PDF tutorial when you subscribe to my daily blog updates here.
- Click for my Monthly Host Code and how you can earn up to a $50 shopping spree with my Tulip Rewards Loyalty Program.
- Check out the clearance rack and save up to 70%.
- Save 10% on coordinating product bundles!
- The $99 Starter Kit is the best deal of ALL! Discounts & benefits here.
- Visit my gallery for 1000+ paper crafting ideas.
- View my FREE PDF Project Tutorials.
- Follow me on Pinterest.
- Subscribe to my YouTube paper crafting video tutorials.


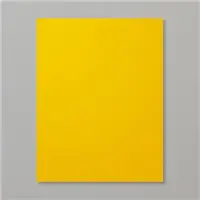
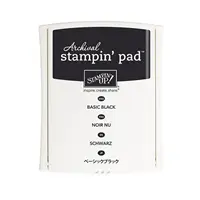
My project supply list. Click products to shop on-line!





Where can I get the happy birthday die
The “Happy Birthday” looks like it is elevated. If so, how did you do it? Also,what DSP did you use for the background?
Hi Helen: It’s cropped 3 times and adhered for height. The designer series paper is called Pick a Pattern. It retires after May 31.
What do you use to stick the Happy Birthday to the card? I just received mine and am having a hard time ! Thanks
There are several ways to do this. You could use mini stampin’ dimensionals and snip to fit below the wider areas. That gives a nice 3-D effect. Or you can use a toothpick and glue to just dot some adhesive on the back. Or you can use 2-sided adhesive sheets. Adhere to card stock before cutting. Once you cut with the die, you peel back the adhesive and you have even coverage. Hope this helps, Barbara.
Love your Cards Mary! They are clean and classy. I see a card and can tell it’s one of yours. Thank you for the inspiration you give.
Love it!
Thanks for your sweet feedback, Avis!
Hi Mary, I always enjoy your work, designs and talent. Thank you for sharing. I have been working with HB Gorgeous for a Expo with my team. I have used two layers of the HB, some the same colors and other different with some offset. Love it. Thanks again. & I will try three to achieve your idea.
I enjoy working for SU but my sales are zip. I have a Pinterest under S. D. Designs and a FB page. I have tried two craft fairs etc. Any advice appreciated on how to achieve some sales.
Hi Sharon: Please send me an email: mary@stampinpretty.com and we can discuss 🙂 Hugs, M
Beautiful card–crisp and clean.
MsMary such a pretty card so neat and clean and let’s not forget classy!
I love it
Tfs hugs Frenchie
How do you adhere the words to the front of your card?
Hi Syl: The Stampin’ Up! Fine Tip Glue is a good option or even using glue with a toothpick or paper piercing tool. We are coming back with adhesive sheets in the new catalog (June 1) which I think it’s the best overall option if you want even adherence.. M
What a stunning card. Love the Happy Birthday die. What a nice way to celebrate someone’s special day!
This card is stunning. The 3-D effect is really eye catching. The dsp works really well with the font of the framelits.
Thank you for such a clean yet striking card.
So beautiful, so simple and so striking for a masculine birthday. Love the color combo.Enjoy your day!
I love how simple it is but it still pops. Thanks for sharing your ideas with us.
Beautiful..the simplicity of this card makes it so striking. love all your work-you are an inspiration! Thank you.