
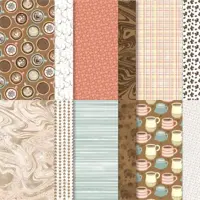
Hit the “yum” button for the fabulous patterns in A Little Latte Designer Series Paper (DSP) . The swirled “coffee” pattern on today’s card oozes with simple sophistication.

The NEW coffee themed A Little Latte DSP is a limited release and only available as part of newly released On-Line Exclusives. The style and retro vibe of the collection is creating a lot of coffee “buzz!” It’s one of My Favorite Things from the latest On-Line Exclusive product release!

- A Little Latte Suite Collection:
- Latte Love Bundle (Save 10% when you purchase the bundle)
- A Little Latte 12 x 12 Designer Series Paper
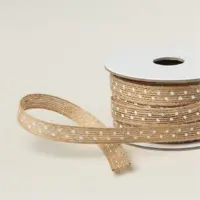
- Natural 3/8″ Polka Dot Trim – Estimated Restock Week of April 22
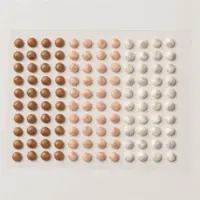
- Adhesive-Backed Swirl Dots – Estimated Restock Week of April 15
AVAILABLE NOW! See ALL the new on-line releases here.
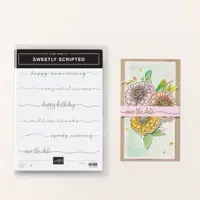
WHAT I LOVE. And there’s more . . . I’m also highlighting the Sweetly Scripted stamp set (another NEW on-line exclusive product) as a focal point on today’s card. The luscious layering of the long and lean sentiment with vellum, linen thread and a snippet of ribbon bring it to life but don’t distract from the gorgeous DSP pattern. The darling Natural Polka Dot Trim and Adhesive Backed Swirl Dots (offered in a combo of Pecan Pie shown, Petal Pink, White/Vanilla) are also NEW and the perfect coordinating “coffee-licious” touches.

Estimated Restock Week of April 8


NEED SKETCH INSPIRATION? The layout of today’s thank you card was inspired by the newest addition to my Stampin’ Pretty Sketchbook, Sketch #86 shown above!
Enjoy FREE sketch ideas with coordinating project tutorials in my Stampin’ Pretty Sketchbook here.
my simple card tutorial
CUT YOUR CARD STOCK – DIMENSIONS:
- Basic White Thick Card Stock:
- Card Base – 5 1/2 x 8 1/2, scored at 4 1/4 (top)
- Early Espresso Card Stock:
- Layer – 5 1/4 x 4
- Basic White Card Stock:
- Sentiment Strip – 5 1/2 x 1/2
- Vellum Card Stock:
- Layer – 4 1/2 x 1 1/2
- A Little Latte 12 x 12 Designer Series Paper
- Layer – 5 x 3 3/4
- Envelope Flap – 5 3/4 x 2 1/4

PROJECT TUTORIAL:
Begin by burnishing the fold of the Basic White Thick card base with a Bone Folder.
Adhere the A Little Latte Designer Series Paper and the Early Espresso layer together. The adhere to the card base with Multipurpose Liquid Glue.
Adhere the Vellum strip as shown with Stampin’ Seal (strategically placed where the sentiment strip will cover the adhesive).

Snip the ends of a 4 1/2″ long piece of Natural 3/8″ Polka Dot Trim as shown with Paper Snips.
Tie a bow of Linen Thread.
Adhere both as shown with a Mini Glue dots.
Use a Clear Block H to stamp the sentiment (Sweetly Scripted Stamp Set) in Early Espresso Classic Ink onto the Basic White layer.
Adhere the sentiment to the card as shown with strategically placed Stampin’ Dimensionals.

POP OF PERSONALITY! Embellish with Pecan Pie Adhesive-Backed Swirl Dots.
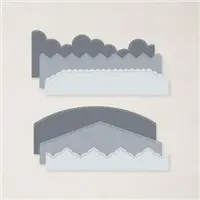
PERFECT POLISH! Adhere the 5 3/4 x 2 1/4 Designer Series Paper (DSP) to the Basic White Medium envelope flap with Multipurpose Liquid Glue. IMPORTANT: Add glue to the flap first, not the DSP. Center and line up the Basic Borders curved edge die, tape to secure (Post-It Tape) and crop with a Stampin’ Cut & Emboss Machine (Standard). Watch my Stampin’ Pretty WOW Video here.
stampin’ up! product spotlight!


promos, specials, & important updates
don’t forget your tulip rewards!

MY CUSTOMER EXCLUSIVE! Tulip Loyalty Rewards are my way of personally saying thank you to my frequent online shoppers. Earn a tulip for every $50 increment you spend on Stampin’ Up! products (purchased through me). Redeem tulips for a free stamp set (5 tulips) or bundle (10 tulips)!










“Creating a buzz” – I see what you did there! Love this card, Mary! The suite is amazing, and you’ve showcased it beautifully.