
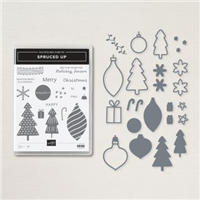
SPRUCED UP BUNDLE BREAKDOWN! On Monday I shared my first project using the Spruced Up! Bundle and promised to break down the different looks you can achieve with it . I have two more projects to share (tomorrow and Saturday), so stay tuned. Today’s card is a white-on-white beauty, perfect for those dreaming of a White Christmas.

BUNDLE AND SAVE 10%! Purchase the Spruced Up! Photopolymer Stamp Set and the coordinating Spruced Up Outlines Dies together as a bundle and SAVE 10%! See all the available Stampin’ Up! 10% off bundles in my online store here. The Spruced Up Bundle is also part of My Favorite Things.

CUT YOUR CARD STOCK – DIMENSIONS:
- Basic White Thick Card Stock:
- Card Base: 4 1/4 x 11, scored at 5 1/2
- Die-cut Layers (before cropping) – 8 1/2 x 11
- All die-cuts can be cropped from the same piece of card stock
PROJECT TUTORIAL:
Begin by burnishing the fold of the card base with a Bone Folder.
Crop the following with a Stampin’ Cut & Emboss Machine (Standard) and the following die-cuts:
- Scalloped Contours Die – Largest – 3 15/16″ x 5 1/4″
- Stitched Rectangles Die – 2nd Largest – 3 3/8″ x 4 3/4″
- Stylish Shapes Circle Die – Largest – 3″
- Stylish Shapes Flagged Sentiment Die – 2nd Largest – 2 3/4″ x 5/8″
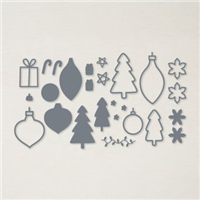
- Spruced Up Outlines Tree Dies – Both Sizes

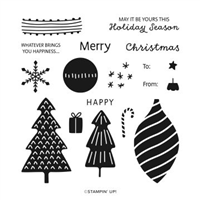
Use a Stamparatus to position and stamp the sentiment in Crumb Cake Classic Ink onto the Basic White Layer.
Adhere the scalloped die-cut layer to the card base with Stampin’ Dimensionals.
Adhere the rectangle die-cut with Stampin’ Seal.
Wrap the circle die-cut with Linen Thread, securing with a bow.
Adhere all remaining die-cuts to the card as shown with Stampin’ Dimensionals.

promos, specials, & important updates


don’t forget your tulip rewards!

MY CUSTOMER EXCLUSIVE! Tulip Loyalty Rewards are my way of personally saying thank you to my frequent online shoppers. Earn a tulip for every $50 increment you spend on Stampin’ Up! products (purchased through me). Redeem tulips for a free stamp set (5 tulips) or bundle (10 tulips)!


I love these beautiful layers of white. While the dies coordinate with a whimsical bundle, the card is sophisticated and beautiful!