
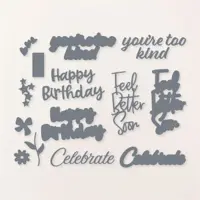
I can’t say enough about the adorable die cut and layered “happy birthday” sentiment (Stampin’ Up! Wanted to Say Dies) on today’s birthday card. It’s such a crisp, 3D message and there’s plenty of width on the bottom Basic White layer for Stampin’ Dimensionals.
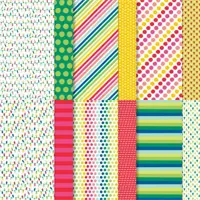
WHAT I LOVE! The splashy polka dot pattern is from the Stampin’ Up! Merry Bold & Bright Designer Series Paper Collection. Clearly, it’s not just for holidays! Enjoy my FREE Designer Series Paper Color Coordination chart here. It makes color matching with Stampin’ Up! colors a snap.
my simple card tutorial
CUT YOUR CARD STOCK – DIMENSIONS:
- Basic White Thick Card Stock:
- Card Base – 5 1/2 x 8 1/2, scored at 4 1/4
- Melon Mambo Card Stock:
- Layers – 5 1/4 x 4, 5 x 1 1/2
- Die-cut Sentiment – 3 1/4 x 2 (before die-cutting)
- Basic White Card Stock:
- Die-Cut Layer – 4 x 2 3/4 (before die-cutting)
- Die-cut Sentiment- 3 1/4 x 2 (before die-cutting)
- Merry Bold & Bright Designer Series Paper:
- Layer – 5 x 3 3/4
- Envelope Flap – 5 3/4 x 2 1/4

PROJECT TUTORIAL:
Begin by burnishing the fold of the Basic White Thick card base with a Bone Folder.
Adhere the Designer Series Paper to the large Melon Mambo layer with Multipurpose Liquid Glue.
Adhere the Melon Mambo card stock strip to the layer as shown with Multipurpose Liquid Glue.
Double wrap with white Baker’s Twine Essentials, securing with a bow on the left.
Adhere to the card base with Stampin’ Dimensionals.

Crop the 4 x 2 3/4 Basic White layer with a Stampin’ Cut & Emboss Machine (Standard or Mini) and the 3 3/4 x 2 1/4 Scalloped Contours Die.
Adhere as shown with Stampin’ Dimensionals.
Adhere the 3 1/4 x 2 Melon Mambo layer to an Adhesive Sheet.
Crop the Melon Mambo and Basic White layers with a Stampin’ Cut & Emboss Machine (Standard or Mini) and the “Happy Birthday” Wanted to Say dies.
Remove the Adhesive Sheet protective backing from the Melon Mambo die-cut and adhere to the Basic White die-cut.
Adhere to the card with Stampin’ Dimensionals.

POP OF PERSONALITY! Embellish with white Classic Matte Dots.
PERFECT POLISH! Use Multipurpose Liquid Glue to adhere the Designer Series Paper to the outside flap of a Basic White Medium Envelope flap.
stampin’ up! product spotlight!


oh, so pretty card idea!


OH, SO PRETTY! The card above showcases additional patterns available in the Merry Bold & Bright Designer Series Paper by Stampin’ Up! You can see the original blog post, with tips, tricks and project tutorial here.
promos, specials, & important updates
don’t forget your tulip rewards!

MY CUSTOMER EXCLUSIVE! Tulip Loyalty Rewards are my way of personally saying thank you to my frequent online shoppers. Earn a tulip for every $50 increment you spend on Stampin’ Up! products (purchased through me). Redeem tulips for a free stamp set (5 tulips) or bundle (10 tulips)!
my project supply list – click products to shop online!
Price: $12.50








I love the colors and simplicity of this card. Now for the hard part – parting with the DSP! Thanks for sharing.
So perfectly sweet! These dies are AMAZING (I use them all the time), and this paper makes a perfect accent for the sweet sentiment.
Mary, I love this bright and beautiful card. The recipient will be thrilled and uplifted to receive it. Enjoy your day!