
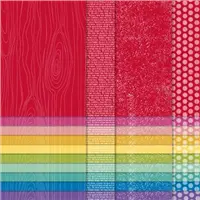
Today’s card says a good-bye to the lovely RETIRING Stitched Be Mine Dies and the splashy Brights 6×6 Designer Series Paper. Both items are available thru May 3, 2021 or WHILE SUPPLIES LAST.

STAMPIN’ PRETTY STEP-BY-STEP TUTORIAL:
Begin with a 5 1/2 x 4 1/4 card base of Basic White Thick card stock.
Use a Paper Trimmer to cut a piece of Basic White Thick card stock to 2 1/4 x 4 3/4.
Use a Stampin’ Cut & Emboss Machine to crop the top and bottom with the stitched scalloped edge die from the Stitched Be Mine Dies as shown. (final measurement: 2 1/8 x 4 3/4).

Cut 1/2 x 1 3/4 strips of each color from the Brights 6×6 Designer Series Paper Stack.
Adhere in the order as shown with Stampin’ Seal. (Gorgeous Grape, Pacific Point, Bermuda Bay, Coastal Cabana, Granny Apple Green, Daffodil Delight, Mango Melody, Flirty Flamingo, Melon Mambo, and Poppy Parade).
Adhere a piece of Basic White card stock to a Foam Adhesive Sheet.
Crop with the smallest Stitched Be Mine heart die and the Mini Stampin’ Cut & Emboss Machine.
Adhere to the card as shown.

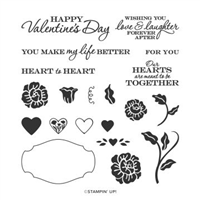
Use a Stamparatus to stamp the sentiment (Heart to Heart) in Versamark Ink onto a 1/4 x 2 3/4 piece of Basic Black card stock.
Cover with White Stampin’ Emboss Powder, tap to remove the excess, set with a Heat Tool.
Snip the end at an angle with Paper Snips.
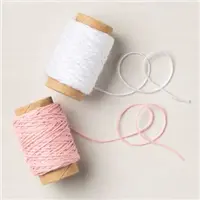
Adhere a bow of White Baker’s Twine to the left side with a Mini Glue Dot.
Adhere to the card with Mini Stampin’ Dimensionals and Stampin’ Seal.
POP OF PERSONALITY! Embellish with Matte Black Dots.

promos, specials, & important updates


don’t forget your tulip rewards!

MY CUSTOMER EXCLUSIVE! Tulip Loyalty Rewards are my way of personally saying thank you to my frequent online shoppers. Earn a tulip for every $50 increment you spend on Stampin’ Up! products (purchased through me). Redeem tulips for a free stamp set (5 tulips) or bundle (10 tulips)!


I love it , MsMary, pretty ♥️♥️♥️♥️
Tfs hugs
Frenchie ♥️
How do you come up with such cute, simple ideas!!! I love this card!
Beautiful cards, Mary. Enjoy your day!