
Today I am sharing a duo of note cards showcasing the Flowering Cactus Product Medley from the Stampin’ Up! 2021 January – June Mini Catalog. I hope it “prickles” your curiosity about these fun products!

FLOWERING CACTUS PRODUCT MEDLEY
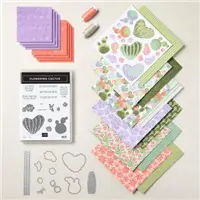
Creativity comes easy when you’ve got amazing coordinating products. Coordination is a Stampin’ Up! strong point and the Flowering Cactus Product Medley is a perfect example. Stamps, paper, dies, and accessories for creating whatever you want—let your creativity run free!
Flowering Cactus Product Medley includes these exclusive products:
- 15-piece Flowering Cactus Photopolymer Stamp Set
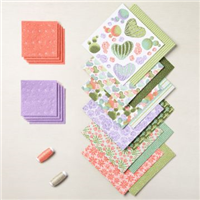
- 48 sheets of 6″ x 6″ (15.2 x 15.2 cm) Designer Series Paper: 8 each of 6 double-sided designs
- Die-cut felt sheets: 4 each of 2 colors
- Linen thread combo pack: 10 yards each in natural and Calypso Coral colors
- 10-piece Flowering Cactus Dies (use with Stampin’ Cut & Emboss Machine; compatible with the Mini Stampin’ Cut & Emboss Machine)
Add ink, card stock, and adhesive to complete your projects. Refill kit available (sold separately).

 STAMPIN’ PRETTY STEP-BY-STEP TUTORIAL:
Begin by burnishing the fold of a Basic White Note Card with a Bone Folder.
Use a Paper Trimmer to cut a piece of Flowering Cactus Designer Series paper to 4 3/4 x 3 1/4.
Adhere to the card base with Stampin’ Seal.
Wrap a piece of Calypso Coral Linen Thread around a 3 3/4 x 2 1/4 piece of Basic White card stock, securing with a bow.
Adhere to the card with Stampin’ Dimensionals.
Use a Stampin’ Cut & Emboss Machine to crop the images from a piece of Flowering Cactus Designer Series Paper with the coordinating Flowering Cactus Dies.
Adhere together with Stampin’ Seal and to the card with Stampin’ Dimensionals.
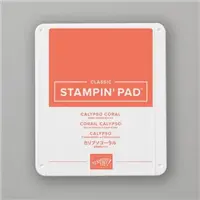
 Use a Stamparatus to stamp the sentiment in Calypso Coral Classic Ink onto the center of a 2 3/4 x 1/2 piece of Basic White card stock.
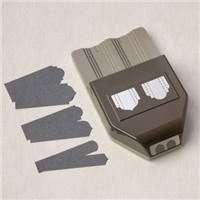
Crop the ends with the Treasured Tags Pick a Punch.
Adhere with Stampin’ Dimensionals and Stampin’ Seal.
POP OF PERSONALITY! Add two stitched Calypso Coral Felt Flowers to the card with Multipurpose Liquid Glue.
 STAMPIN’ PRETTY STEP-BY-STEP TUTORIAL:
Begin by burnishing the fold of a Basic White Note Card with a Bone Folder.
Use a Paper Trimmer to cut a piece of Flowering Cactus Designer Series paper to 4 3/4 x 3 1/4.
Adhere to the card base with Stampin’ Seal.
Wrap a piece of Calypso Coral Linen Thread around a 3 3/4 x 2 1/4 piece of Basic White card stock, securing with a bow.
Adhere to the card with Stampin’ Dimensionals.
Use a Stampin’ Cut & Emboss Machine to crop the images from a piece of Flowering Cactus Designer Series Paper with the coordinating Flowering Cactus Dies.
Crop a piece of Pear Pizzazz card stock with Flowering Cactus Die.
Adhere together with Stampin’ Seal and to the card with Stampin’ Dimensionals.

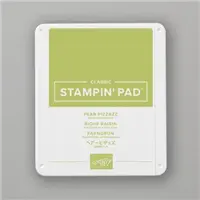
Use a Stamparatus to stamp the sentiment in Pear Pizzazz Classic Ink onto the center of a 3 1/4 x 1/2 piece of Basic White card stock.
Crop the ends with the Treasured Tags Pick a Punch.
Adhere with Stampin’ Dimensionals and Stampin’ Seal.
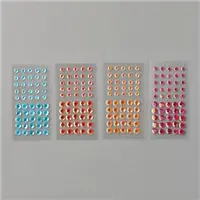
POP OF PERSONALITY! Embellish with Calypso Coral Artistry Blooms Adhesive-Backed Sequins. 
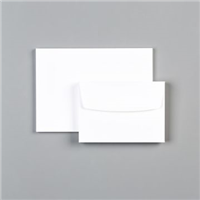
Oh, So Pretty! Stampin’ Up! Basic White Note Cards & Envelopes make it easy! The duo of note cards below were created with the Flowering Desert Stamp Set (now retired). You can easily recreate them by substituting images or die-cuts from the Flowering Cactus Product Medley.


MY MARCH HOST REWARDS CODE IS HERE! SAVE THIS CODE TO EARN TULIP REWARDS!
What are Tulip Rewards? Tulip Rewards are my way of personally saying thank you to my frequent shoppers. You earn a tulip for every $50 increment you spend on Stampin’ Up! products through me and can redeem for up to a $50 shopping spree when you reach 10 tulips. I cover shipping, handling, and tax on your spree, too!
You can see all the details on my EXCLUSIVE Tulip Rewards Program here.
Mary


My project supply list. Click products to shop on-line!








These cards are adorable, Mary, and I love the perfect sentiments for them. Enjoy your day!
LOVE LOVE LOVE Mary. I actually just opened this bundle up and played with it earlier this week. AWESOME bundle!!!!
Your cards are the best! I appreciate all that you share and look forward to your posts. One question I have is when you add layers to the note cards, do you find the envelopes a little too snug?
Thanks for all you do!
I do find that the envelopes are snugger on the notecards than on the medium envelopes, but they still do their job and protect the card. Since I do not mail notecards, it is ok that they are a tad more snug, if too much, I just add to the gift, etc, without the envelope. Mary