 Today’s card is a CASE (copy and share with everyone) of the Stampin’ Up! Mountain Air Bundle sample on Page 53 of the 2020 Mini Catalog.
  I immediately fell in love with this sample and just had give it a try.

One of the many benefits of being a Stampin’ Up!© Demonstrator is that you have access to the supply list of products used for catalog samples. This certainly helped me in re-creating this card.
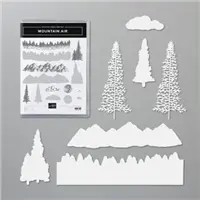
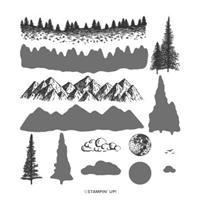
 Beautiful for masculine cards but equally cool for any occasion. Use the Stampin’ Up! Reversibles Mountain Air Stamp Set to create a striking outdoor scene. One side features a silhouette and the reverse side is a detailed image.
BUNDLE & SAVE 10%! Purchase the Mountain Air Reversibles Stamp Set and the Majestic Mountain Dies together as a bundle and save 10%! Discover more Stampin’ Up! 10% off bundles here.
WATCH A VIDEO: Mountain Air Bundle by Stampin’ Up!

STAMPIN’ PRETTY STEP-BY-STEP TUTORIAL:
Begin with a 4 1/4 x 5 1/2 card base of Smoky Slate card stock.
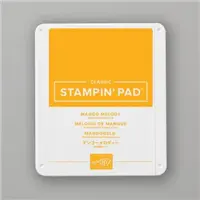
Add a watercolor wash of Mango Melody Classic Ink with an Aqua Painter to a 4 x 5 1/2 piece of Shimmery White card stock. TIP: When creating the watercolor wash background, add color in layers. Allow the 1st layer of color to dry completely before adding the 2nd layer of color. This adds depth and dimension to the color.
Use a Stamparatus to position and stamp the trio of birds (Mountain Air) in Tuxedo Black Memento Ink as shown.
Adhere to the card with Snail Adhesive.

Use a Stamparatus to stamp the detailed mountains (Mountain Air) in Tuxedo Black Memento Ink onto a piece of Basic Gray card stock.
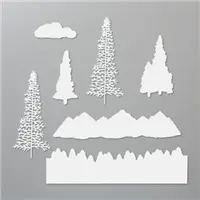
Crop with the coordinating die (Majestic Mountains) and a die-cutting and embossing machine.
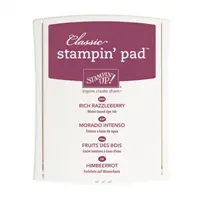
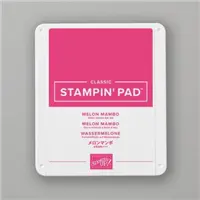
Use a Stamparatus to stamp the smooth mountains (Mountain Air) twice. Once “stamped off” in Rich Razzleberry and once “stamped off” in Melon Mambo onto Shimmer White card stock.
To crop the mountains using the coordinating die (Majestic Mountains), flip the card stock over, hold the image up to a light, line up the die and secure in place with washi tape.
TIP: To double-check the die is lined up properly, flip the card stock over, hold up to the light again to verify the edges are where they need to be.
Position the three mountains as shown, adhering together with Mini Glue Dots. Use a Paper Trimmer to cut to 4″ wide.
Adhere as shown with Stampin’ Dimensionals.

Crop two detailed trees (Majestic Mountain) of Basic Black card stock. Adhere together and to the card as shown with Mini Glue Dots.
Tie a bow of Whisper White Solid Bakers Twine and secure as shown with a Mini Glue Dot.
Use a Stamparatus to stamp the sentiment (Thanks for the Laughs) in Versamark Ink onto a piece of Basic Black card stock that has been rubbed with an Embossing Buddy. Cover with White Stampin’ Emboss Powder, flick to remove the excess, and set with a Heat Tool.
Trim to approximately 1/4 x 1 3/4.
Adhere as shown with Mini Stampin’ Dimensionals.
OH, SO PRETTY! Do you like stamping scenes? The card below was created using the Waterfront Stamp Set from page 125 of the Annual Catalog. You can see tips and a supply list on the original blog post here.


MARCH Host Code! SAVE IT! Don’t forget to add my March Host Code (ZHWPTNCE) to all orders placed through me between $50 and $149 to qualify for my Tulip Rewards program. Orders $150 and up (total before shipping and tax) automatically qualify and should not include the code. Get the scoop on Tulip Rewards and how you can earn a $50 shopping spree when you shop with me.

THREE FANTASTIC BONUS PRODUCTS! Check out the Sale-A-Bration extras below for the $99 Starter Kit! Purchasing the kit and joining Stampin’ Up! is PERFECT FOR HOBBY STAMPERS WHO LOVE A DISCOUNT (20 to 25%) and love oodles of ideas!

Click here to see all 10 reasons why you want the $99 starter kit NOW!
- Purchase the kit and join through me and become a member of my Stampin’ Pretty Pals community. Exclusive resources, fun & friendship in a pressure-free environment! Learn more.
- No risk and no penalty to drop!
- My Stampin’ Pretty Resume and my journey to being the #1 Stampin’ Up! demonstrator globally!
I love hearing from you! Please leave me your questions or comments about the project for today.

If you enjoyed this post, please be sure to . . .
- Receive a FREE PDF tutorial when you subscribe to my daily blog updates here.
- Click for my Monthly Host Code and how you can earn up to a $50 shopping spree with my Tulip Rewards Loyalty Program.
- Check out the clearance rack and save up to 70%.
- Save 10% on coordinating product bundles!
- The $99 Starter Kit is the best deal of ALL! Discounts & benefits here.
- Visit my gallery for 1000+ paper crafting ideas.
- View my FREE PDF Project Tutorials.
- Follow me on Pinterest.
- Subscribe to my YouTube paper crafting video tutorials.


My project supply list. Click products to shop on-line!











Ooooh , vary pretty scene , I love it ♥️
Hugs Frenchie
Beautiful scenery and gorgeous colors, Mary, those mountains look so inviting, wish I was there!!
XO
Beautifully done and great instructions (as always)! Thanks!!
WOW……Now that is one STUNNING looking card.
I love this scenic card, Mary, with your great watercolor wash background. Thanks for all your tips on making it. Enjoy your day!