
The Stampin’ Up! Snowflake Showcase Promotion is live and available to order. You can see details and a video showcasing the 5 limited-release products here.
I’ll share a WOW! video tomorrow with a close-up look at the Snowflake Showcase limited release products and tips for creating this card.

Stampin’ Pretty Step-by-Step Tutorial:
Create a 4 1/4 x 5 1/2 card base with Stampin’ Up! Whisper White Thick card stock and the Stampin’ Trimmer.
Adhere a 3 3/4 x 5 piece of Basic Gray card stock to a 4 x 5 1/4 piece of Lovely Lipstick using Snail Adhesive. Adhere this layer to the card base with Snail Adhesive.

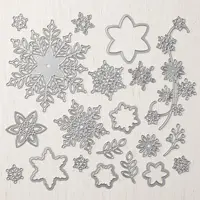
Crop three snowflakes (Snowfall Thinlits Dies) using the Big Shot Die-Cutting Machine, Precision Base Plate (much better results with detailed dies) and Whisper White card stock. Adhere to the card as shown with Mini Glue Dots or adhesive of your choice. Snip the bottom snowflake with a Paper Snips to align with the Basic Gray card stock.
Cut a piece of Vellum to 3 3/4 x 1 1/2 and adhere with Mini Stampin’ Dimensionals. TIP: The two large Glitter Dots cover two Mini Stampin’ Dimensionals that keep the vellum in place and lifted for a soft, 3-D effect.

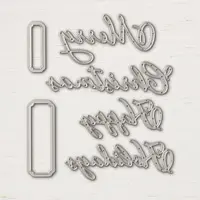
Use the Big Shot Die Cutting Machine and the “Merry” (Merry Christmas Thinlits Dies) to crop a piece of Lovely Lipstick card stock. Adhere with small bits of Snail Adhesive or adhesive of your choice.
Add one more small Glitter Enamel Dot as shown.
ONLY AVAILABLE NOV. 1 – 30 OR WHILE SUPPLIES LAST! These limited release Snowflake Showcase products are HOT! They will be exclusively available Nov. 1 – 30. See the Snowflake Showcase products, samples and learn more here.
I love hearing from you! Please leave me your questions or comments about the project for today.

If you enjoyed this post, please be sure to . . .
- Receive a FREE PDF tutorial when you subscribe to my daily blog updates here.
- Click for my Monthly Host Code and how you can earn up to a $50 shopping spree with my Tulip Rewards Loyalty Program.
- Check out the clearance rack and save up to 70%.
- Save 10% on coordinating product bundles!
- The $99 Starter Kit is the best deal of ALL! Discounts & benefits here.
- Visit my gallery for 1000+ paper crafting ideas.
- View my FREE PDF Project Tutorials.
- Follow me on Pinterest.
- Subscribe to my YouTube paper crafting video tutorials.


My project supply list. Click products to shop on-line!








These colors just go together!!! I love a bold color on a card. Thank you.
I thought they seemed pretty “merry” together, too, Jeannine!
Ohh!! Mary!!! I love how bright and elegant this card is, the beautiful snowflakes really pop against the gray card stock.
Love the way you placed that lovely sentiment on top of the vellum, it adds texture without taking anything from your card panel.
Thank you for sharing.
XO
Maria.
Vellum is becoming a “go to” for me. It gives such a soft, layered finish, Maria!
Simply gorgeous! I love the bright pink against the gray – and a brilliant idea to showcase the sentiment over a layer of vellum so the snowflakes peek through. Such a wonderful card, Mary! <3
Thanks, BK. I’m mad about vellum these days!
Love this pretty card using the Basic Gray and Lovely Lipstick. They go together so well and you have inspired me to try this combo. Enjoy your day!
Thanks, Hilda. Your comments add sunshine to my day. This could look beautiful and more traditional with Garden Green (instead of Basic Gray) and Real Red (instead of Lovely Lipstick)!
Festive looking holiday card my friend.
Thanks, Kadie. I love the modern mix of Basic Gray and Lovely Lipstick!
Question- why can’t I find the Joyous Noel paper to order? 147816 12×12
Let me know if it is or will be available as soon as you can. Thanks, Mary
Hi Michele. The Joyous Noel Paper was very popular and sold out. We will not be getting more in and it is now discontinued. Mary