
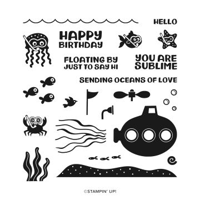
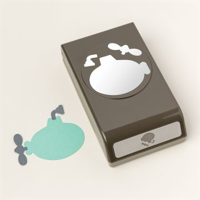
Why not a Pretty in Pink submarine in this ocean scene! I love how the coordinating elements of the Submarine Life stamp set and Submarine Builder Punch pull the look together.
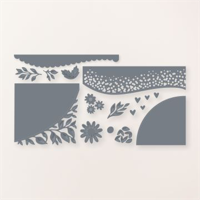
WHAT I LOVE! I used the back (smooth) side of the Around the Bend die with Crumb Cake card stock for the ocean floor. The “lacy” side of the same die cut was used for the texture.

GROOVY 3D GIFT IDEAS! Speaking of ocean scenes, Miss Octavia the Octopus has joined me as a pop of personality in my craft room. Learn more about my craft room organization here. Octavia is a lovely 3D “girl” created by my nephew, Jeremy, and his partner, Stacey. Octavia presides over my paper crafting kingdom 24/7!

If you are looking for a unique and customizable (oodles of colors) gift, check out Jeremy and Stacey’s Craftzilla on-line store. They started 3D printing in their home as a hobby during COVID and it has become a wonderful business for them. Some of my favorites (and you can customize colors) are the wine holder, octopus (now available in a larger size than mine), ever popular dragons, adorable gnome ornaments and decorative pots.
my simple card tutorial
CUT YOUR CARD STOCK – DIMENSIONS:
- Pretty in Pink Card Stock:
- Card Base – 5 1/2 x 8 1/2, scored at 4 1/4 (top)
- Basic White Card Stock:
- Layer – 5 1/2 x 3 1/2
- Sentiment Layer – 3 1/2 x 3/8
- Stamped Submarine & Pieces – 3 x 4 (before punching)
- Early Espresso Card Stock:
- Layer – 5 1/2 x 4
- Crumb Cake Card Stock:
- Die-Cut Curved Layer – 5 1/2 x 2 1/2 (before die-cutting)
- Pretty in Pink 2024-2026 In Color Designer Series Paper:
- Envelope Flap – 5 3/4 x 3

Burnish the fold of the Pretty in Pink card base with a Bone Folder.
Adhere the Basic White layer to the card base with Multipurpose Liquid Glue.
Adhere the Early Espresso card stock to the Basic White layer as shown with Multipurpose Liquid Glue.
Use a Clear Block C to position and stamp the “kelp” (Submarine Life Stamp Set) in Early Espresso Ink onto the Early Espresso layer as shown.
Use a Stampin’ Cut & Emboss Machine (Standard) to crop the Crumb Cake layer with the outside edge of the Around the Bend die, leaving 2 1/4 at it’s widest point.
Adhere (with Multipurpose Liquid Glue) the left over textured part of the die-cut to the straight edge to create an ocean bottom as shown (final size 4 1/4 x 1).

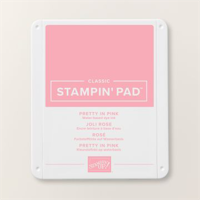
Use a Mini MISTIto stamp the submarine in Pretty in Pink Classic Ink and the prop and scope in Early Espresso Classic Ink (Submarine Life Stamp Set) onto the Basic White Layer.
Crop with the coordinating Submarine Life Builder Punch.
Adhere to the card with strategically placed Stampin’ Dimensionals.
Use a Mini MISTIto stamp the sentiment (Submarine Life Stamp Set)and a Sticky Mat (to hold the Basic White sentiment strip in place) in Early Espresso Classic Ink. Watch my 1 Minute to WOW video The Magic of the Mini MISTI for a quick demonstration here.
Adhere as shown with Mini Stampin’ Dimensionals.

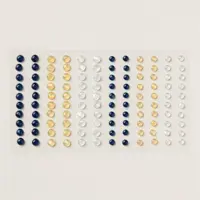
POP OF PERSONALITY! Embellish with 6 clear Opal Rounds (Assortment).
PERFECT POLISH! Adhere the 5 3/4 x 3 Designer Series Paper to the Basic White Medium envelope flap with Multipurpose Liquid Glue. IMPORTANT: Add glue to the flap first, not the Designer Series Paper. Center and line up the Around the Bend curved edge die, tape to secure (Post-It Tape) and crop with a Stampin’ Cut & Emboss Machine (Standard). Watch my Stampin’ Pretty WOW Video here.
stampin’ up! product spotlight!


oh, so pretty card idea!


OH, SO PRETTY! The card above also showcases the Submarine Life Stamp Set, Submarine Life Builder Punch and Around the Bend edge die (envelope).
promos, specials, & important updates
don’t forget your tulip rewards!

MY CUSTOMER EXCLUSIVE! Tulip Loyalty Rewards are my way of personally saying thank you to my frequent online shoppers. Earn a tulip for every $50 increment you spend on Stampin’ Up! products (purchased through me). Redeem tulips for a free stamp set (5 tulips) or bundle (10 tulips)!







As cute as can be! I love the colors combo and the sweet designs from these dies. Love Octavia, too! ♥
Mary, these submarine cards are awesome and adorable! The recipients will be thrilled to receive them. I love the novel idea of using the back of the Around the Bend die to get the curve of the sand. Perfect. Love your new Pal, Octavia! Enjoy your day1