
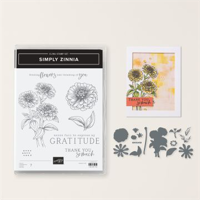
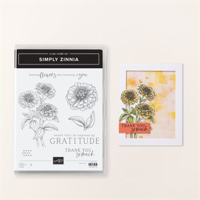
The Simply Zinnia dies (one of My Favorite Things) are at the heart of this card for the layered flower, stem and leaves. I layered the flower with an ombre of color (bottom to top) in Poppy Parade, Calypso Coral, Sweet Sorbet (retiring – get it NOW) and Petal Pink. Want to build this flower with me? Watch my latest 1 Minute to WOW! Video: Build a Beautiful Zinnia!
wow video: build a beautiful zinnia
WHAT I LOVE! Today’s zinnia card takes dimension to a new level, literally! I love how the deckled layers separated by Stampin’ Dimensionals give a really rich, sophisticated look in white on white. It looks très chic (reminds me of a wedding invitation) when you add a 4 x 5 1/4 piece of vellum on top to protect it in the mail.
my simple card tutorial: build a beautiful zinnia
CUT YOUR CARD STOCK – DIMENSIONS:
- Basic White Thick Card Stock:
- Card Base – 4 1/4 x 11, scored at 5 1/2 (top)
- Basic White Card Stock:
- Die-Cut Layers – 4 x 5 1/4 and 3 3/4 x 5 (before die-cutting)
- Sentiment – 3 1/2 x 7/8
- Poppy Parade, Calypso Coral, and Sweet Sorbet Card Stock:
- Poppy Flower Petal Die-Cuts – 2 1/4 x 2 1/4 (before die-cutting)
- Mossy Meadow Card Stock:
- Stem Die-Cut – 3 1/2 x 1/2 (before die-cutting)
- Leaves Die-Cuts – 2 x 2 1/4 (before die-cutting)
- Old Olive Card Stock:
- Stem Vein Die-Cuts – 2 x 2 (before die-cutting)
- Petal Pink Card Stock:
- Flower Center Die-Cut – 1 1/4 x 1 (before die-cutting)
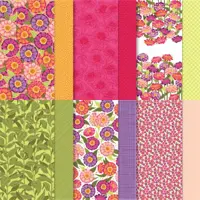
- Flowering Zinnias Designer Series Paper:
- Envelope Flap – 5 3/4 x 2 1/4 (before die-cutting)

PROJECT TUTORIAL:
Begin by burnishing the fold of the Basic White Thick card base with a Bone Folder.
Use a Stampin’ Cut & Emboss Machine (Standard) to crop the two pieces of Basic White card stock with the 3 3/4 x 5 and 3 3/8 x 4 5/8 Deckled Rectangle dies.
Adhere together and to the card with Multipurpose Liquid Glue.

Use a Stampin’ Cut & Emboss Machine (Standard or Mini) and the Simply Zinnia dies to crop the following:
- Mossy Meadow – Leaves (2) and Stem
- Old Olive – Leave Veins (2)
- Poppy Parade – Solid Zinnia Flower
- Calypso Coral and Sweet Sorbet – One Each of both Zinnia Petal Dies
- Petal Pink – Flower Center
Adhere all together and to the card as shown with Multipurpose Liquid Glue. Watch my latest 1 Minute to WOW! Video: Build a Beautiful Zinnia!
Use a Clear Block H to stamp the sentiment in Mossy Meadow Classic Ink onto the Basic White layer.
Adhere to the card as shown with Stampin’ Dimensionals.

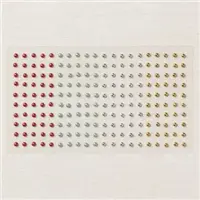
POP OF PERSONALITY! Embellish the sentiment and zinnia flower center with 3 (each) Gold Festive Pearls. TIP: I love using vellum to protect the fronts of my cards in the mail. Looks elegant, too!
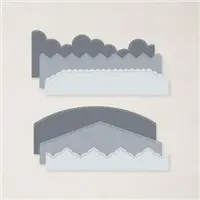
PERFECT POLISH! Adhere the 5 3/4 x 2 1/4 Flowering Zinnia Designer Series Paper to the Basic White Medium envelope flap with Multipurpose Liquid Glue. IMPORTANT: Add glue to the flap first, not the Textured Specialty Paper. Center and line up the Basic Borders curved edge die, tape to secure (Post-It Tape) and crop with a Stampin’ Cut & Emboss Machine (Standard). Watch my Stampin’ Pretty WOW Video here.
stampin’ up! product spotlight!


ESTIMATED RESTOCK DATE: The Flowering Zinnias Designer Series Paper is estimated to be back in stock the week of April 15, 2024!0
promos, specials, & important updates
don’t forget your tulip rewards!

MY CUSTOMER EXCLUSIVE! Tulip Loyalty Rewards are my way of personally saying thank you to my frequent online shoppers. Earn a tulip for every $50 increment you spend on Stampin’ Up! products (purchased through me). Redeem tulips for a free stamp set (5 tulips) or bundle (10 tulips)!












Very pretty card! I love the colors and the dimension. Thanks for sharing!