
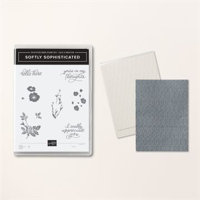
Honestly, the Softly Sophisticated 3D Embossing Folder was barely on my radar until I gave it a try on today’s Thank You card. WOW! The defined, chic texture was so “impressive” that I couldn’t wait to add it to my envelope flap for stunning coordination.


2 MINUTE TECHNIQUE TIP. I’m such a fan of dressing up envelope flaps and used the same embossing folder (Softly Sophisticated) for the card and envelope flap. I turned the embossing folder to “landscape” so that it would span the width of the envelope flap. This is how it should look before running it through the Stampin’ Up! Stampin’ Cut & Emboss Machine. For a really clean look, the crease of the envelope flap should go just a tad inside the embossing folder and line up with where the embossing starts.

NEED SKETCH INSPIRATION? The layout of today’s thank you card was inspired by the newest addition to my Stampin’ Pretty Sketchbook, Sketch #82 which I shared Tuesday.
my simple card tutorial
CUT YOUR CARD STOCK – DIMENSIONS:
- Crumb Cake Card Stock:
- Card Base – 4 1/4 x 11, scored at 5 1/2
- Petal Pink Card Stock:
- Layer – 3 3/4 x 5
- Very Vanilla Card Stock:
- Embossed Layer – 3 1/2 x 4 3/4
- Die-Cut Sentiment Layer – 3 1/4 x 1 3/4 (before die-cutting)
- Punched Boughs – 7 x 2 (before punching)
- Flirty Flamingo Card Stock:
- Die-Cut Layer – 2 3/4 x 4 1/4 (before die-cutting)


GET 100+ CARD SKETCH IDEAS FREE! Subscribe to my email updates & instantly receive a FREE digital gift of 100+ Card Sketch Ideas that you can save or print! Subscribers also receive my daily card ideas and tutorials, special offers, new product releases and exclusive “subscriber-only” resources.
PROJECT TUTORIAL:
Begin by burnishing the fold of the Crumb Cake card base with a Bone Folder.
Tuck the Very Vanilla card stock layer inside the Softly Sophisticated Embossing Folder and zip through a Stampin’ Cut & Emboss Machine (Standard).
Adhere to the Petal Pink card stock layer with Multipurpose Liquid Glue.
Wrap with black Baker’s Twine Essentials, securing with a bow.
Adhere to the card with Stampin’ Dimensionals.
Use a Clear Block D to stamp the sentiment and two boughs (Layering Leaves Stamp Set) in Tuxedo Black Memento Ink onto the coordinating Very Vanilla layers.
Crop the two boughs with the coordinating Bough Punch.

Use a Stampin’ Cut & Emboss Machine (Standard or Mini) to crop with the Flirty Flamingo layer with the 2 1/4 x 3 3/4 rectangle Everyday Detail die and the sentiment with the 2 3/4 x 1 1/4 rectangle Everyday Detail die. TIP: Use Post-It© Tape to keep the die in place over the sentiment when running it through the machine.
Adhere the Flirty Flamingo die-cut to the card with Stampin’ Dimensionals.
Adhere the boughs to the flirty flamingo piece with Mini Glue Dots.
Adhere the sentiment as shown with Stampin’ Dimensionals.
POP OF PERSONALITY! Embellish with one black Classic Matte Dot as shown.
PERFECT POLISH! Line the Softly Sophisticated folder up with the flap crease of a Very Vanilla Medium Envelope, slightly inside the folder where the pattern begins and zip thru the Stampin’ Cut & Emboss Machine.

stampin’ up! product spotlight!


oh, so pretty card idea!


OH, SO PRETTY! The card above also showcases the Layering Leaves Stamp Set and coordinating Bough Punch by Stampin’ Up! You can see the original blog post, with tips, tricks and project tutorial here.
promos, specials, & important updates


don’t forget your tulip rewards!

MY CUSTOMER EXCLUSIVE! Tulip Loyalty Rewards are my way of personally saying thank you to my frequent online shoppers. Earn a tulip for every $50 increment you spend on Stampin’ Up! products (purchased through me). Redeem tulips for a free stamp set (5 tulips) or bundle (10 tulips)!


Thanks for tip and reminder about embossing envelope flap! And thanks for inspiring me over the years with your exquisite card-making!
Very pretty card using a lovely sketch. Love it! Enjoy your day!
So beautiful, Mary! I love how you’ve positioned these two AMAZING dies! Such sweet colors and textures! Chef’s kiss!