
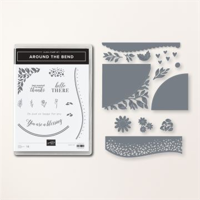
The Stampin’ Up! Around the Bend bundle hit the list of My Favorite Things the moment I “spied” it in the Spring mini. I cropped and layered the curves for a modern and colorful combination.
WHAT I LOVE ! Bold colors really speak to me for this Around the Bend spring thank you card, especially when balanced with a good dose of Whisper White. The Enjoy the Journey Designer Series Paper (FREE with a $50 order during Sale-A-Bration) was my “muse” for the splashy patterns and color choices.
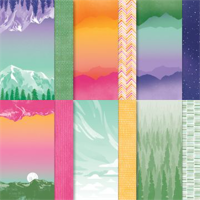
NEED COLOR INSPIRATION? The colors used on this card are based on the color combination shown below, one of five that I shared on Tuesday’s post.

my simple card tutorial
CUT YOUR CARD STOCK – DIMENSIONS:
- Melon Mambo Card Stock:
- Card Base – 4 1/4 x 11, scored at 5 1/2
- Die-cuts- 1 1/2 x 1 1/2
- Mango Melody Card Stock:
- Layer – 4 x 5 1/4
- Curved Die-cut – 6 x 2 (before die-cutting)
- Basic White Card Stock:
- Layer – 5 x 5
- Die-cut Sentiment Layer – 2 3/4 x 1 1/4 (before die-cutting)
- Die-cuts (flowers)- 2 1/2 x 2 (before die-cutting)
- Enjoy the Journey Designer Series Paper:
- Curved Die-cuts – 6 x 2 (Qty 3) (before die-cutting)

PROJECT TUTORIAL:
Begin by burnishing the fold of the card base with a Bone Folder.
Adhere the Mango Melody layer to the card base with Stampin’ Seal.
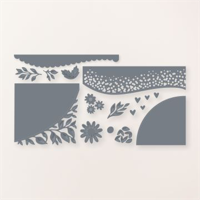
Crop one edge each of the three pieces of Designer Series paper with a Stampin’ Cut & Emboss Machine (Standard)and the curved edge of the “lacy” die. NOTE! Take time the time to play with the layers and curves until you get layout that feels right.
Layer and adhere to the Basic White layer as shown with Multipurpose Liquid Glue (allows you a second or two to adjust before it’s stuck).
Crop the Mango Melody layer with a Stampin’ Cut & Emboss Machine (Standard)and the curved edge of the lacy die (bottom) along with scalloped edge die (top). Both dies can be lined up and go on the same trip through the die-cut machine.
Layere and adhere to the card as shown with Multipurpose Liquid Glue.
Use a Paper Trimmer to cut the Basic White layer as well as the overhanging Designer Series Paper pieces down to 3 3/4 x 5.
Adhere to the card with Stampin’ Seal.

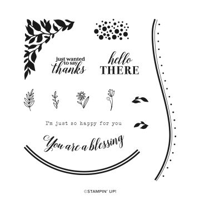
Use a Stamparatus to position and stamp the sentiment in Melon Mambo Classic Ink onto the Basic White layer.
Crop with a Stampin’ Cut & Emboss Machine (Standard or Mini) and the smallest Deckled Rectangle die, making sure the sentiment is offset to the right.
Use a Stampin’ Cut & Emboss Machine (Standard or Mini)to crop the flowers (Basic White), flower center and leaves (Melon Mambo).
Adhere the sentiment to the card with Stampin’ Dimensionals.
Adhere the flower leaves to the sentiment as shown with Multipurpose Liquid Glue.

Adhere the large flower and flower center together and to the card with Stampin’ Dimensionals.
Adhere the small white flowers as shown with Multipurpose Liquid Glue.
POP OF PERSONALITY! Embellish with Melon Mambo Opaque Adhesive-Backed Gems.
PERFECT POLISH! Use Multipurpose Liquid Glue to adhere the Designer Series Paper to the outside flap of a Basic White Medium Envelope. You can see my video demonstration with tips on adding designer paper to an envelope flap here.
OH, SO PRETTY!


OH, SO PRETTY! The colorful card above was created with the Curvy Dies (now retired) but can easily be CASE’d (Copy And Share with Everyone) using the NEW Around the Bend Dies (part of the Around the Bend Bundle shown below). You can see the original blog post and project tutorial here.
stampin’ up! product spotlight!


promos, specials, & important updates


don’t forget your tulip rewards!

MY CUSTOMER EXCLUSIVE! Tulip Loyalty Rewards are my way of personally saying thank you to my frequent online shoppers. Earn a tulip for every $50 increment you spend on Stampin’ Up! products (purchased through me). Redeem tulips for a free stamp set (5 tulips) or bundle (10 tulips)!


I love the bends, bright color combination, and sweet sentiment. Enjoy your day!