Welcome to the Stampin’ Pretty Pals’ Blog Hop!
This month, the theme is Home for the Holidays, so the design team created a project for the holiday of their choice. We really hope that you will be inspired by all the amazing creations the Pals are sharing with you! As you hop from blog to blog, we would love for you to leave a comment. You will find the lineup at the end of my post to help you “hop” along from Pal to Pal.

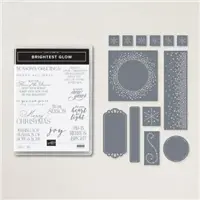
My holiday of choice is: Christmas! The Lights Aglow Suite Collection is absolutely beautiful! This has been an extremely popular collection so a few of the items are currently on backorder status, but all the products I used on my creation are currently in stock and ready to order.
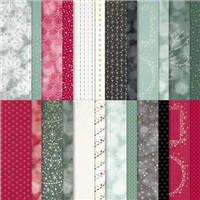
HERE’S WHAT I LOVE! Many of the patterns of the Lights Aglow Specialty Designer Series Paper can be substituted for the beautiful golden Christmas trees I used. That makes for great DSP “mileage” in mass producing this simple card.


CUT YOUR CARD STOCK – DIMENSIONS:
- Evening Evergreen Card Stock:
- Card Base – 4 1/4 X 11, scored at 5 1/2
- Very Vanilla Card Stock:
- Layers – 4 x 5 1/4 (Qty 2)
- Die-cut (cropped size) – 3 1/4 x 1 1/2
- Gold 6×6 Metallic Specialty Paper:
- Layer – 3 x 4
- Lights Aglow Specialty 6×6 Designer Series Paper:
- Layer – 3 x 5 1/4
- Envelope Layer – 5 3/4 x 2 1/4

PROJECT TUTORIAL:
Begin by burnishing the fold of the card base with a Bone Folder.
Adhere a Very Vanilla layer to the inside of the card base and one to the outside of the card base with Stampin’ Seal.
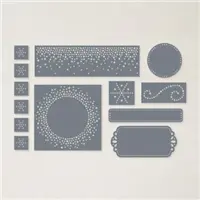
Use a Stampin’ Cut & Emboss Machine and the Labels Aglow die to crop the Very Vanilla sentiment layer.
Rub the die-cut layer and the inside of the card with an embossing buddy (Embossing Additions Tool Kit).
Use a Stamparatus to stamp the sentiments in Versamark Ink onto the die-cut sentiment layer and inside of the card.
Cover with Gold Metallics Embossing Powder, utilizing the Powder Pal (Embossing Additions Tool Kit) to catch the excess.
Set the powder covered sentiments with a Heat Tool.

Adhere the Lights Aglow Designer Series Paper layer to the brushed gold layer as shown with Stampin’ Seal.
Thread the gold trim through the die-cut sentiment label ends, starting thru the center hole on the right side, then along the back of the die-cut and out the center hole on the left side.
Adhere the sentiment die-cut as shown with Stampin’ Dimensionals.
Wrap the trim around the unglued layer, securing with a bow on the left side as shown.
Adhere the layer to the card with Stampin’ Seal.
THE PERFECT POLISH! Use Multipurpose Liquid Glue to adhere the Designer Series Paper to the outside flap of a Very Vanilla Medium Envelope. You can see my video demonstration with tips on adding designer paper to an envelope flap here.
More inspiration awaits, so use the lineup below to visit the rest of the Design Team. The Pals are excited to show you what they’ve created! Then, please mark your calendars for our next blog hop on December 14th. Our theme will be Last Minute Gift/Card Ideas.
Until then, have fun in your craft space.
Stampin’ Pretty Pals Blog Hop Line-Up:
- Mary Fish at Stampin’ Pretty
- Peggy Noe at Pretty Paper Cards
- Lisa Ann Bernard at Queen B Creations
- Stesha Bloodhart at Stampin’ Hoot!
- Jill Loveland at Simple Stamping
- Windy Ellard at Windy’s Wonderful Creations
- Debbie Mageed at Secrets to Stamping
- Rae Harper Burnet at Wild West Paper Arts
- Deb Walker at Deb Stamps Life
- Su Mohr at Aromas And Art
- Lori Webb at Clever Copies
- Jackie Beers at Blue Line Stamping
- Karen Hallam at Karen’s Stamping Habit
- Melissa Seplowitz at The Stamping Ninja
- Tricia Chuba at ButterDish Designs
Mary


My project supply list. Click products to shop on-line!


Price: $15.00


So elegant and pretty!
Such a pretty card, Mary! Love the heat embossing!
Your card shines with creativity! Thank you for sharing, Mary!
One of my favorites as well, Mary. Your card is beautiful!
Beautiful card Mary! I couldn’t agree with you more, it is the best Christmas sentiment set ever!
You card is beautiful with this DSP!
Absolutely gorgeous, Mary! I have stayed away from this page of paper (unsure how to use it), but I love how you’ve showcased it front and center. Such a beauty!
I love this beautiful card, Mary. I agree the stamp set has the best Christmas sentiments. Thanks, as always, for the tutorial. Enjoy your day!
This card is so pretty! The paper and that sentiment die cut are perfect.