
LOVE SKETCHES? Yesterday, I shared the newest addition to my Stampin’ Pretty Sketchbook, Sketch #39! Today’s card uses that sketch, incorporating Stampin’ Up! products from the Flowering Fields Suite Collection, part of the 2022 January – June Mini Catalog release.

Enjoy more sketch ideas in my Stampin’ Pretty Sketchbook here.
Click here or the button below to print or save my complete sketchbook!


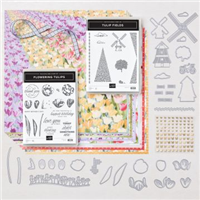
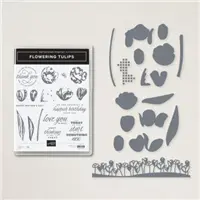
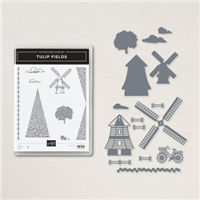
BUNDLE & SAVE 10%! Purchase the Flowering Fields Suite Collection using product number 157685 and SAVE 10% OFF the following coordinating items: Flowering Tulips Stamp Set, Tulips Dies, Tulip Fields Stamp Set, Windmill Fields Dies. See all the available Stampin’ Up! 10% off bundles in my online store here.
 STAMPIN’ PRETTY STEP-BY-STEP TUTORIAL:
Begin with a 5 1/2 x 4 1/4 card base of Basic White Thick card stock.
Adhere a 5 1/4 x 4 piece of Flowering Fields Designer Series Paper to the card base with Stampin’ Seal.
Adhere a 5 x 1 1/2 piece of Basic White card stock to a 5 x 3 1/4 piece of Flowering Fields Designer Series Paper with Stampin’ Seal.
Use a Stamparatus to position and stamp the sentiment in Evening Evergreen Classic Ink onto the piece of Basic White card stock as shown.

Wrap the seam with Evening Evergreen 3/8″ Windowpane Check Ribbon, securing with a bow.
Adhere the panel to the card with Stampin’ Seal.
Use a Stampin’ Cut & Emboss Machine (Standard or Mini) to crop two pieces of Pumpkin Pie card stock with the tulip border from the Windmill Fields dies.
Adhere to the bottom of the Basic White card stock strip with Multipurpose Liquid Glue.
Use a Stampin’ Cut & Emboss Machine (Standard or Mini) along with the 2 1/8 Layering Circle die to crop a piece of Basic White card stock and the 2 3/8 Layering Circle die to crop a piece of Mango Melody card stock.

Adhere together with Stampin’ Seal and to the card with Stampin’ Dimensionals.
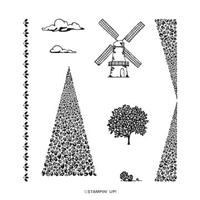
Use a Stamparatus to stamp the two clouds in Smoky Slate Classic Ink and the windmill and bushes in Evening Evergreen Classic Ink onto a piece of Basic White card stock. (Tulip Fields Stamp Set).
Color the windmill with Crumb Cake Stampin’ Blends Combo Pack.
Crop with a Stampin’ Cut & Emboss Machine (Standard or Mini) and the coordinating Windmill Fields Dies.
Adhere as shown with Mini Stampin’ Dimensionals and Multipurpose Liquid Glue.
POP OF PERSONALITY! Embellish with Brushed Brass Butterflies.
PERFECT POLISH! Use Multipurpose Liquid Glue to adhere a 2 1/4 x 5 3/4 piece of Flowering Fields Designer Series Paper to the outside flap of a Basic White Medium Envelope. You can see my video demonstration with tips on adding designer paper to an envelope flap here.


FREE DSP COLOR CHART! You can find my updated color charts and meet all the new Designer Series Paper on my blog post here.
Mary


My project supply list. Click products to shop on-line!


Beautiful card from your pretty sketch. I love all the elements. Enjoy your day!
Im so glad you shared this card…..I am having trouble finding how to use some of the busy paper. This card is one that I really love. Thank you again!!!
The tulip border trim just puts this card OVER-THE-TOP. TFS!
Every once in awhile I come across a card that stands out in color as well as technique which makes it a winner and this is one of those cards. Your colors are awesome which makes the card so lovely. What a super job you did on this card. Thanks for sharing.