
I created a pair of simple thank you cards today that show the WOW! of Stampin’ Up! designer series paper.
I love hearing from you! Please leave me your questions or comments about the project for today.

Both the Whole Lot of Lovely and Coffee Break Designer Series Paper patterns used are part of the BUY 3 GET 1 FREE SALE. Details and selections here.

It’s a perfect time to stock up on select designer series paper collections! Sale ends Oct. 31.
STAMPIN’ PRETTY TIPS:
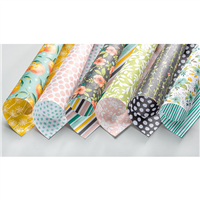
- My first thank you card and envelope flap use a stunning floral pattern from Whole Lot of Lovely Designer Series Paper (on the list of My Favorite Things from the annual catalog) and part of the sale! The result is decidedly feminine.

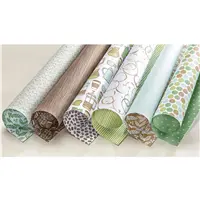
- The second thank you card and envelope get a modern, unisex style from Coffee Break Designer Series Paper (also on the list of My Favorite Things from the annual catalog and part of the sale).

- Both cards use sentiments from Stampin’ Up! Dragonfly Dreams Photopolymer Stamp Set. I love how the interior comes to life with a coordinating sentiment.

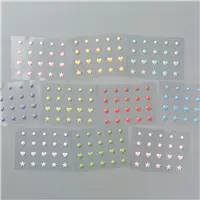
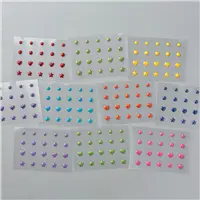
- Each sentiment gets a pop of color from Subtles (Calypso Coral) and Regals (Garden Green) Enamel Shapes.

- An additional piece of designer series paper is added to the Whisper White Medium Envelope Flaps and snipped with Paper Snips to fit.
- Measurements are the same for both cards. From bottom to top. Card base is 4 1/4″ x 5 1/2″. Whisper White 4″ x 5 1/4″. Layer below the pattern is 3 1/4″ x 4 1/2″. Patterned paper measures 3″ x 4 1/4″. Sentiment is approx. 1″ x 3 1/2″.

Hover over photos and click on the Pin button to save to Pinterest. If you are reading this within an email, you’ll need to click here to reach my blog and pin.
Click here to follow me on Pinterest.
FREE DESIGNER SERIES PAPER COORDINATING COLOR CHART! Click and print the following charts to easily see which colors coordinate with Stampin’ Up! Designer Series Paper.
- Current designer series paper (2017-2018 Annual Catalog & 2017 Holiday Catalog).
- Retired designer series paper. Dates back to 2008. Most retired Stampin’ Up! paper.

DON’T MISS my Merry Patterns Blog Candy Giveaway on yesterday’s post here!

My Host Code Exclusive! Spend $75 or more through me and earn the NEW Foil Snowflakes FREE. Simply add this month’s host code to your order. Orders over $150 should not use the code and will automatically qualify. Qualifying total excludes shipping and tax.
I love hearing from you! Please leave me your questions or comments about the project for today.
If you enjoyed this post, please be sure to . . .
- Receive a FREE PDF tutorial when you subscribe to my daily blog updates here.
- Click for my Monthly Host Code and how you can earn up to a $50 shopping spree with my Tulip Rewards Loyalty Program.
- Check out the clearance rack and save up to 70%.
- Save 10% on coordinating product bundles!
- The $99 Starter Kit is the best deal of ALL! Discounts & benefits here.
- Visit my gallery for 1000+ paper crafting ideas.
- View my FREE PDF Project Tutorials.
- Follow me on Pinterest.
- Subscribe to my YouTube paper crafting video tutorials.


My project supply list. Click products to shop on-line!


Here’s a link to Mary’s YouTube tutorial on how to make the envelope flaps with the DSP.
https://www.pinterest.com/pin/574068283742659520/
What a great way to take your card up a notch! Thank you, Mary.
Thanks for the assist, Deb S. You are fast!
These cards are such a great idea. One could use absolutely any DSP …even retired designs one may have around the house…for the front pattern. Also, i just want to add….I love your blog…and your videos. I have my own demonstrator but so look forward to going to your site. Bless you Mary.
Thanks, Pat! The goal today was to show how easy it is to change this look with a simple change in pattern. I love pretty paper!
Lovely cards Mary! I too love the way you decorate your envelopes – takes the card to the next level!
Thanks, Bonnie. It builds a excitement for what’s inside to have a “sneak peek” of pretty paper on the flap!
I love how you always add the same designer paper in the card to the envelope. I bought the dies for the envelope flap and they don’t look like yours. how do you measure and cover the envelope flap?? Thank you so much. I love your sight Kate
Here’s video where I share how to cover the flap and trim the excess with Paper Snips: https://www.pinterest.com/pin/574068283742659520/
Oooh , vary pretty dsp, my fav, I find my self not wanting to use it
Houring, lol
And lovely card and envelope ,
Hugs Frenchie ♥️
Use it, Frenchie . . . It’s much prettier on a card than on a shelf 🙂
I love these, Mary! That extra border of white is divine – and really helps the DSP to pop. <3
Good point, BK. Whisper White against the black pattern is striking!
Loved the mixed metals card yesterday. Wow, a zillion and one comments! I have both packs of these papers you feature today. I love the cards and will be CASEing away.
Beautiful. Duplicating something I make means the world. I have added the dimensions above, Chris.
loooooove this card and i am needing some more t’you cards so . . . with your permission :))) i will be CASEing very soon!
It’s an honor to have you CASE these. Quick and pretty!
I love that designer series paper, but I haven’t had a chance to use it yet. I like how you did this. With such a complex pattern, you minimized it just enough to simplify the design. Good job, Mary – like always!
Keeping the sentiment simple allows you to play with some of the stronger patterns! I appreciate your feedback!
Wonderful cards! I agree with the previous comment…just a little dsp change makes the card completely different. The first dsp you used is gorgeous! I would like the dimensions, too, please. Have a great weekend!
Love hearing that, Amy. Measurements are the same for both cards. From bottom to top. Card base is 4 1/4″ x 5 1/2″. Whisper White 4″ x 5 1/4″, Layer below the pattern is 3 1/4″ x 4 1/2″. Patterned paper measures 3″ x 4 1/4″. Sentiment is approx. 1″ x 3 1/2″.
Love these pretty cards, Mary. The DSP really gives them a lift and shows how just the change of paper can make one feminine and one masculine. Have a great Saturday!
I couldn’t agree more, HJ. Thanks for commenting!
Two BEAUTIFUL cards that spot-light our FABULOUS Designer Series Paper. Nicely Done My Friend!!!!!
Thanks, Kadie. Always a delight to hear from you!
Would you please share the dimensions of the layers for your thank you cards. They are great!
Would love the dimensions!
Happy to share the dimensions. They are the same for both cards. From bottom to top. Card base is 4 1/4″ x 5 1/2″. Whisper White 4″ x 5 1/4″, Layer below the pattern is 3 1/4″ x 4 1/2″. Patterned paper measures 3″ x 4 1/4″. Sentiment is approx. 1″ x 3 1/2″. I don’t have the cards to measure and be exact (sent to friends). However, this should be close 🙂
From bottom to top. Card base is 4 1/4″ x 5 1/2″. Whisper White 4″ x 5 1/4″, Layer below the pattern is 3 1/4″ x 4 1/2″. Patterned paper measures 3″ x 4 1/4″. Sentiment is approx. 1″ x 3 1/2″.