
Yesterday, I shared “Take 5 Stampin’ Pretty Color Combinations” with you featuring Stampin’ Up! Bermuda Bay! Today I’m sharing a card using one of the 5 color combinations – Melon Mambo, Bermuda Bay, and Granny Apple Green!

MISSED IT? You can see the additional Bermuda Bay color combinations on my blog post here and all of my previous color combinations on my blog page here.

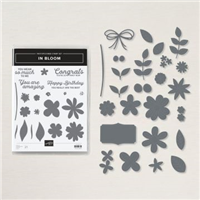
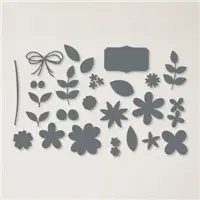
MY FAVORITE THINGS! The Pierced Blooms Dies have the most adorable die cut “stitching.” I fell in love as soon as I saw them! Want to see the rest of My Favorite Things from the 2021 Mini & Sale-a-Bration Catalogs? Take a look by clicking here.
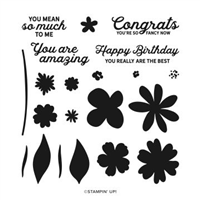
BUNDLE & SAVE 10%! Purchase the In Bloom Photopolymer Stamp Set and the coordinating Pierced Blooms Dies together as a bundle and SAVE 10%! See all the current Stampin’ Up! 10% off bundles in my online store here.

STAMPIN’ PRETTY STEP-BY-STEP TUTORIAL:
Begin with a 5 1/2 x 4 1/4 card base of Basic White card stock.
Adhere a 5 1/4 x 4 piece of Bermuda Bay card stock to the card base with Stampin’ Seal.
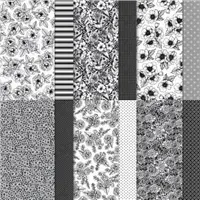
Adhere a 5 x 1 piece of striped True Love Designer Series Paper and a 5 x 3 1/4 piece of Basic Black card stock to the Bermuda Bay piece as shown with Stampin’ Seal.

Use a Stamparatus to position and stamp the sentiment (In Bloom) in Tuxedo Black Memento Ink onto a piece of Basic White card stock.
Crop it with a Stampin’ Cut & Emboss Machine and the coordinating Pierced Blooms die.
Adhere to the card with Stampin’ Dimensionals.
Crop the following colors with a Stampin’ Cut & Emboss Machine and the Pierced Blooms dies:
- Granny Apple Green
- Bermuda Bay
- Melon Mambo
- Basic Black
Slightly curl the petals and leaves with a Bone Folder.

Adhere together and to the card with Mini Glue Dots & Stampin’ Dimensionals.
POP OF PERSONALITY! Embellish the sentiment with Matte Black Dots.
PERFECT POLISH! Use Multipurpose Liquid Glue to adhere a 2 1/4 x 5 3/4 piece of coordinating Designer Series Paper to the outside flap of a Basic White Medium Envelope. Trim to size with Paper Snips. You can see my video demonstration with tips on adding designer paper to an envelope flap here.
 OH, SO PRETTY! The card below was also created using the In Bloom Bundle and the coordinating Paper Blooms Designer Series Paper that can be earned for FREE during Sale-a-Bration!


NEW FEBRUARY HOST REWARDS CODE! SAVE THIS CODE TO EARN TULIP REWARDS!
What are Tulip Rewards? Tulip Rewards are my way of personally saying thank you to my frequent shoppers. You earn a tulip for every $50 increment you spend on Stampin’ Up! products through me and can redeem for up to a $50 shopping spree when you reach 10 tulips. I cover shipping, handling, and tax on your spree, too!
You can see all the details on my EXCLUSIVE Tulip Rewards Program here.
Mary


My project supply list. Click products to shop on-line!
<









I love the bright colors in the first card with the black and the second card is pretty also. THANKS for the inspiration!
Such a bold and beautiful card! I love the bright colors on the black backdrop. I just started playing with this bundle yesterday and made my first corner fold card using the dies. I’m lovin’ it! Thanks for the great tutorial.
This is striking! Love this color combo against the black!!
Genius ideas. I love both cards and the colors are awesome combinations ?
Now that is a WOW kind of card my friend. LOVE the color combination.
I love this pretty card, Mary. The In Bloom dies make the flowers really pop with the stitching. Enjoy your day!