
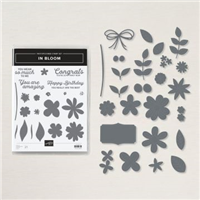
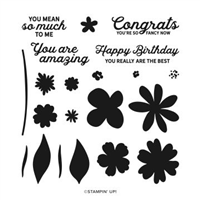
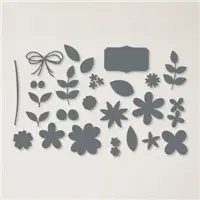
On Monday, I shared Sketch #20, the most recent addition to my Stampin’ Pretty Sketchbook. I promised to share a creation today using the sketch and reached for the Stampin’ Up! In Bloom Bundle (one of My Favorite Things)! I’m tickled by the sweet, “stitched” flowers!

MY FAVORITE THINGS! Want to see the rest of My Favorite Things from the 2021 Mini & Sale-a-Bration Catalogs? Take a look by clicking here.

COORDINATION CHEMISTRY! Did you know, the Paper Blooms Designer Series Paper coordinates perfectly with the In Bloom Bundle shown above? Their chemistry together makes this card delightful! Earn the Paper Blooms Designer Series Paper FREE with a $50 Purchase during Sale-a-Bration.
FREE DSP COORDINATION CHART! My FREE Stampin’ Up! Designer Series Paper Coordinating Color Chart has been updated with the NEW 2021 January – June Mini and 2021 Sale-a-Bration Catalogs! You can download it here.


LOVE SKETCHES? Check out my Stampin’ Pretty Sketchbook here or download my FREE PDF of all sketches here.
STAMPIN’ PRETTY STEP-BY-STEP TUTORIAL:
Begin with a 5 1/2 x 4 1/4 card base of Basic White card stock.
Adhere a 1 3/4 x 5 1/4 and a 2 1/4 x 5 1/4 piece of Paper Blooms Designer Series Paper to a 5 1/4 x 4 piece of Basic White card stock with Stampin’ Seal.
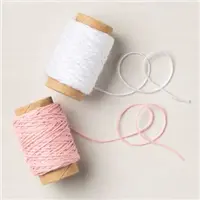
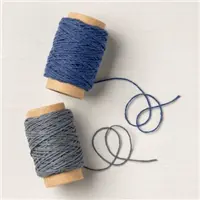
 Double wrap with Whisper White and Night of Navy Baker’s Twine, securing with a bow.
Adhere to the card with Stampin’ Dimensionals.
Use a Mini Stampin’ Cut & Emboss Machine and the 1 11/16 x 3 11/16 Stitched Rectangle Die to crop a piece of Basic White card stock.
Adhere to the card with Stampin’ Dimensionals.
Use a Mini Stampin’ Cut & Emboss Machine and the Pierced Blooms Dies to crop the following pieces of card stock:
- Old Olive – Leaves
- Night of Navy – Large Flower & Flower Centers
- Seaside Spray – Flower Center
- Rococo Rose – Large Flower
- Soft Sea Foam – Large Flower
Adhere as shown with Mini Glue Dots and Stampin’ Dimensionals.

Use the Stamparatus to stamp the sentiment in Versamark Ink onto a 3/4 x 3 1/8 piece of Night of Navy card stock. Cover with White Stampin’ Emboss Powder and set with a Heat Tool.
Crop each end with the Lovely Labels Pick a Punch.
Adhere with Stampin’ Dimensionals.
POP OF PERSONALITY! Embellish the center of the flowers with Opal Rounds.
PERFECT POLISH! Use Multipurpose Liquid Glue to adhere a 2 1/4 x 5 3/4 piece of Designer Series Paper to the outside flap of a Basic White Medium Envelope. Trim to size with Paper Snips. You can see my video demonstration with tips on adding designer paper to an envelope flap here.
 OH, SO PRETTY! The card below was also created using the Paper Blooms Designer Series Paper!


Sale-A-Bration $99 Starter Kit Promotion & Designer Series Paper Bonus. Kick off the Spring Mini catalog with the BEST SAVINGS of all! Get $125 in your choice of products for $99 and the kit ships FREE. BONUS DESIGNER SERIES PAPER INCLUDED IN THE KIT FREE! Be first to enjoy 200 sheets of 6 x 6 designer series paper (above) featuring new designs from the unreleased 2021-2022 Annual Catalog!
Order the $99 starter kit with Sale-A-Bration bonus and join Stampin’ Up! through me here.


SALE-A-BRATION! Don’t miss our biggest promotion of the year! Earn FREE products for every $50 you spend (total before shipping and tax). You can see all the Sale-a-Bration freebies in my online store here.

MY JANUARY HOST CODE! SAVE THIS CODE TO EARN TULIP REWARDS!
What are Tulip Rewards? Tulip Rewards are my way of personally saying thank you to my frequent shoppers. You earn a tulip for every $50 increment you spend on Stampin’ Up! products through me and can redeem for up to a $50 shopping spree when you reach 10 tulips. I cover shipping, handling, and tax on your spree, too!
You can see all the details on my EXCLUSIVE Tulip Rewards Program here.
Mary


My project supply list. Click products to shop on-line!


Absolutely perfect!
I so love this! Love the papers, love the dies and love the colors!
I really like the new stamps and dies cant wait to try them
Oh my Mary…….this card is simply STUNNING.
Mary, this card really captured my attention with those pretty colours and dies. It’s funny how seeing such a beautiful card can make me want the products I said no to. These are definitely on my next order. Thanks for the inspiration.
Mary, I love this pretty card with the two DSP layers and the stitched flowers. So pretty. Enjoy your day!