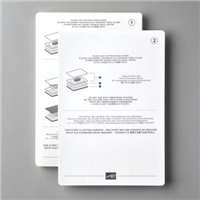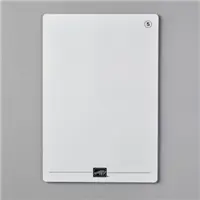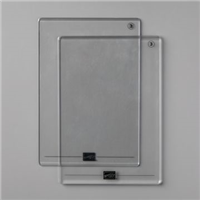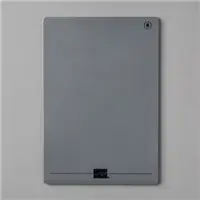
I have gotten a number of questions from customers who have struggled with getting their embossing folder sandwich to roll through the Stampin’ Up! Stampin’ Cut & Emboss Machine. In most cases, the problem was resolved by understanding that there are three different embossing folder types (one retired) of different thicknesses and each has their own sandwich. The tips below (including two printable “cheat sheets”) should help you get the results you are hoping for!
IDENTIFY YOUR EMBOSSING FOLDER TYPE! There are three types of folders that have been offered by Stampin’ Up! Their thicknesses vary by design so it is ESSENTIAL to know what type of folder you have so you know what type of sandwich you will need.
- TYPE 1: Standard Embossing Folders (Current)
Approximately 1/16″ Total Thickness - TYPE 2: 3D Embossing Folders (Current)
Approximately 1/8″ Total Thickness - TYPE 3: Dynamic Embossing Folders (Retired, June 2019)
Approximately 3/16″ Total Thickness
HOW TO IDENTIFY IT: It will have both a SIZZIX & Stampin’ Up! Logo

HOT TIP: Label or mark your folders so you know which type of embossing folder you are working with!

BUILDING THE PERFECT SANDWICH: Each type of embossing folder requires a different sandwich when passing through a die-cutting and embossing machine, including both the NEW Stampin’ Cut & Emboss Machine and the RETIRED Big Shot.
- TYPE 1: STANDARD EMBOSSING FOLDERS
- NEW Stampin’ Cut & Emboss Machine Sandwich
- Top – 3 Cutting Plate
- Middle – Standard Embossing Folder 1/16″ Thick
- Middle – 3 Cutting Plate
- Bottom – 1 Platform
- RETIRED Big Shot Machine Sandwich
- Top – Standard Cutting Plate
- Middle – Standard Embossing Folder 1/16″ Thick
- Middle – Standard Cutting Plate
- Bottom – Standard Platform
- NEW Stampin’ Cut & Emboss Machine Sandwich
- TYPE 2: 3D EMBOSSING FOLDERS
- NEW Stampin’ Cut & Emboss Machine Sandwich
- Top – 4 Specialty Plate
- Middle – 3D Embossing Folder 1/8″ Thick
- Bottom -1 Platform
- RETIRED Big Shot Machine Sandwich
- Top – 3D Embossing Folder Plate (Blue) or 4 Specialty Plate*
- Middle – 3D Embossing Folder 1/8″ Thick
- Bottom – Standard Platform
- NEW Stampin’ Cut & Emboss Machine Sandwich
–OR–
- Top – Standard Cutting Plate
- Middle – Shim of card stock or similar approx 1/16″ thick
- Middle – 3D Embossing Folder 1/8″ Thick
- Bottom – Standard Platform
- TYPE 3: DYNAMIC (SIZZIX) EMBOSSING FOLDERS
- NEW Stampin’ Cut & Emboss Machine Sandwich
- Top – 3 Cutting Plate
- Middle – Dynamic Embossing Folder 3/16″ Thick
- Bottom – 1 Platform
- RETIRED Big Shot Machine Sandwich
- Top – Standard Cutting Plate
- Middle – Dynamic Embossing Folder 3/16″ Thick
- Bottom – Standard Platform
- NEW Stampin’ Cut & Emboss Machine Sandwich

SPECIALTY PLATE 4 MAKES IT EASY!
The new Specialty Plate* (Item 154711) makes your sandwich for 3D folders a cinch! All you need is the Base Plate and Specialty Plate to get the proper sandwich every time.


CHECK THE LIST! Is it a 3D or Dynamic Embossing Folder?
NOTE: The embossing folders listed below were released as both a Dynamic Folder & a 3D Folder. You can measure the thickness or check for the logos to determine which embossing folder type you have.
3D: Stampin’ Up! Logo ONLY
DYNAMIC: BOTH Sizzix and Stampin’ Up! Logos
I love hearing from you! Please leave me your questions or comments about the project for today.

If you enjoyed this post, please be sure to . . .
- Receive a FREE PDF tutorial when you subscribe to my daily blog updates here.
- Click for my Monthly Host Code and how you can earn up to a $50 shopping spree with my Tulip Rewards Loyalty Program.
- Check out the clearance rack and save up to 70%.
- Save 10% on coordinating product bundles!
- The $99 Starter Kit is the best deal of ALL! Discounts & benefits here.
- Visit my gallery for 1000+ paper crafting ideas.
- View my FREE PDF Project Tutorials.
- Follow me on Pinterest.
- Subscribe to my YouTube paper crafting video tutorials.


My project supply list. Click products to shop on-line!


Hi, thanks for useful info. However, I, like many out there, still have a Bigshot and we won’t be ditching our lovely folders or getting a new machine just yet. I have read about a blue mat, never had one, the Dynamic folders went through the BS no problem with adjustment of regular plates, but now I am having difficulties trying to work out a sandwich for the new type in the BS. Can you suggest something? Thanks.
Silly me – I missed the explanation re the BS! Will pay more attention to instructions next time! Though I never needed the blue specialty plate before…..
Thank you!!!!!!! VERY helpful.
Thank you from those of us who still have the big shot?
mary – your tutorials are the BEST!!! i loved this one in particular as i spend way too much time otherwise looking up which sandwich to use w my embossing folders. these two printouts simplify the process greatly and are MUCH appreciated. what an organized mind you have !!!!
Thank you so much, Mary, for the helpful hints on the different types of embossing folders. So nice to be able to print out the sheet on the sandwich, too. As always, you are a “peach” of a demonstrator.
Mary, thank you for your wonderful tutorial on embossing! Just what I needed. I printed out your tutorial for reference.
Mary, Thank you so much for the awesome tutorial.
This is going to help me so much. I have all my EF labeled with their names. All I will need to do is add what type of EF they are.
I battle most every time trying to get the right fit for embossing.
I do have a question I am still using my big shot. Will these instructions also be the same for the Big Shot?
Very, very helpful! I have all my embossing folders from the beginning and was concerned about telling the new 3-D folders from the original 3-D folders. Now I won’t be nervous about breaking my new machine.
You never disappoint! Thank you so much for collating and publishing such valuable info. A time saver for us all. You are THE BEST!
Today’s information was very helpful to me. I enjoyed your newsletter very much and look forward every morning to see what’s new!
I am a demonstrator who loves your layouts and saves many of your card design ideas because I like the simple but elegant style. I just want to say that your tutorial on embossing sandwiches is going to save me SO much frustration. Thanks for all your helpful tips – just can’t say it enough!
This is SO HELPFUL, Mary!!! Thank you!
U R 4-ever helpful Mary
thank you
Thank you so much for this post! I had figured out a bit of this but not without some frustration.
You are the best!!
This is a great explaination and perfect viusal. Can I share it?
This is awesome information in a simple and clear way
Thank you!
Oh So HELPFUL my friend. This is one valuable tool to have on hand for my cut & embossing machine.
Thanks for this information. It’s helpful. Do you know if you can use the Gemini junior for embossing the 3 d folders and if so what the sandwich would be. I tried it but it got stuck and I’m afraid to try again. Thanks.
Very helpful! Thank you!
Thanks for sharing. Is the specialty plate (#4) the same as our old blue plate?
Yes, it is the same outside of the material it is made out of. Mary
Thank you, Thank you, Thank you! I struggle with this every time I use embossing folders. I also appreciated your tutorial on the envelope liners. I have that die but have yet to do one that worked.
Finally, a guide to embossing all in one place. This is such a help with all the different folders. Thanks so much.
Thank you so much for sharing this information. It is a great tutorial for “old” demos and especially for our newest purchasers of the new Cut & Emboss Machine. A great resource!
Omg, thank you for the info…it is extremely helpful
Thank you so much for taking the time to collate this valuable information. I have 2 Big shot machines and just can’t warrant purchasing another whilst these two are functioning and working well.
With your table I should be able to continue using these for a while longer, and when they give up the ghost I can purchase a SU one without feeling guilty.
Thanks once again
Kind regards
This list is very helpful. A customer asked me about this recently as she was having trouble getting her sandwich just right. I’ll definitely share this with her. Enjoy your day!
Tried my new machine for the first time using dies. I found the machine was much harder to guide them through than my Big Shot machine. I hope it is just because it is new. Otherwise I like it.