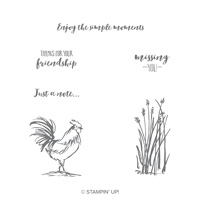
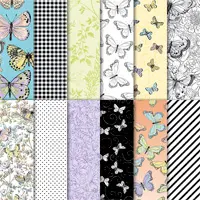
 Today’s friend card highlights the Home to Roost stamp set and Botanical Butterfly Designer Series Paper (black gingham). Both are level 1 Sale-A-Bration gifts and can be earned FREE with a qualifying order (see below). With just a few strokes of color from my Calypso Coral Stampin’ Blends, the rooster from Home to Roost stamp set comes to life. No wonder this stamp set has become “the darling” of the Sale-A-Bration promotion.
GET THEM NOW before Sale-A-Bration ends! These links include all available Sale-A-Bration products in “real time!” Products are available through March 31 or while supplies last.
- 1st Level Sale-A-Bration. FREE products for every $50 you spend.
- 2nd Level Sale-A-Bration. FREE products for every $100 you spend.
- View limited release coordinating Sale-A-Bration products for purchase.

STAMPIN’ PRETTY STEP-BY-STEP TUTORIAL:
Start with a 5 1/2 x 4 1/4 card base of Crumb Cake card stock.
Layer and adhere a 5 1/4 x 4 piece of Whisper White card stock with Snail Adhesive.

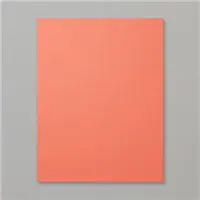
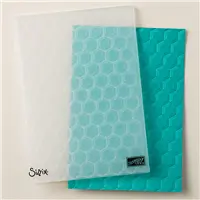
Zip a 3 1/2 x 3 3/4 piece of Calypso Coral card stock through the Big Shot with the Hexagon Dynamic Textured Impressions Embossing Folder. The hexagons mimic “chicken wire.” Adhere as shown with Snail Adhesive.
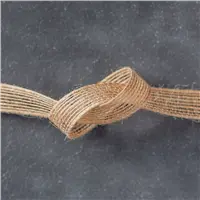
Cut a piece of 5/8″ Burlap Ribbon to 3″ long, adhere with Snail Adhesive.
Use the Stamparatus to stamp the sentiment in Versamark Ink onto a piece of Basic Black card stock that has been rubbed with an Embossing Buddy. Cover with White Stampin’ Emboss Powder, flick to remove the excess and set with a Heat Tool.
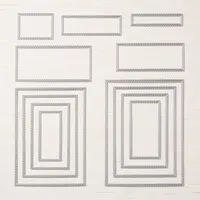
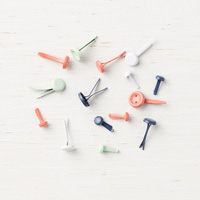
Crop sentiment with the Big Shot, Magnetic Platform and the 2 3/4 x 7/8 Rectangle Stitched Framelits Die. Add a Calypso Coral Basic Brad in the upper left corner. Adhere with Snail Adhesive.

Use the Stamparatus to stamp the rooster in Tuxedo Black Memento Ink onto a 2 3/8″ square of Whisper White card stock.
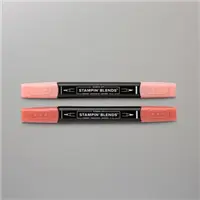
Color with Light and Dark Calypso Coral Stampin’ Blends. Adhere to a 2 5/8 square of Crumb Cake card stock that has been cropped with the Big Shot and a Stitched Shape Square Framelits Die. Adhere with Stampin’ Dimensionals.
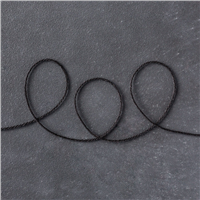
Tie a piece of Basic Black Solid Baker’s Twine through a Tropical Flower Button, securing with a bow. Adhere with a Mini Glue Dot.
 Adhere a 2 1/4 x 5 3/4 piece of Botanical Butterfly Designer Series Paper to the outside flap of a Medium Whisper White Envelope. Trim to size with Paper Snips. You can see my video demonstration with tips on adding designer paper to an envelope flap here.
OH, SO PRETTY! Here’s another card (and FREE tutorial) I created using the Home to Roost stamp set. You can view the original blog post with the tutorial and supplies list here.

I love hearing from you! Please leave me your questions or comments about the project for today.

If you enjoyed this post, please be sure to . . .
- Receive a FREE PDF tutorial when you subscribe to my daily blog updates here.
- Click for my Monthly Host Code and how you can earn up to a $50 shopping spree with my Tulip Rewards Loyalty Program.
- Check out the clearance rack and save up to 70%.
- Save 10% on coordinating product bundles!
- The $99 Starter Kit is the best deal of ALL! Discounts & benefits here.
- Visit my gallery for 1000+ paper crafting ideas.
- View my FREE PDF Project Tutorials.
- Follow me on Pinterest.
- Subscribe to my YouTube paper crafting video tutorials.


My project supply list. Click products to shop on-line!














I love the selective coloring – and the beautiful texture from this embossing folder. Great pairing! ♥
I love the hexagon folder embossing for creating a cover over the bumps and embellishments of handcrafted cards. Reminds me of bubble wrap but in coordinating colors!
Ooooh, simplicity, means beautiful, love it MsMary ♥️
Hugs Frenchie ♥️
Great point, Frenchie. Thanks for stopping by!
The WOW factor is turned up quite a bit. I LOVE the colors, especially the Calypso Coral layer. I couldn’t see the embossing in the first photo and I thought my eyes were playing tricks on me. Thank goodness you did a close up because the hexagon is awesome! TFS.
and that is the second photo I took of the first one. texture can be tricky. glad you could see it in the close-up, Juanita.
I love everything about both of your rooster cards! The hexagon background is my favorite! I feel a case coming on!!
A CASE is an honor, Michelle. Thanks!
Love, Love both of your cards. The layers and textures are wonderful. Can’t wait to give them a try.
Thanks, Roberta. This little stamp set has surprised me with it’s versatility.
The texture on this card is amazing my friend. Thanks for sharing.
Thanks, Kadie. It was a bit of a challenge photographing the hexagon texture! Glad you noticed.
I’m not able to click on the tutorial
I’m hoping to get that updated shortly, Dawn. Thanks for letting me know!
Oh WOW!! this handsome Rooster can look awesome in any color, love both of these cards, your layout really shows off the beautiful image perfectly.
Thank you for sharing, Mary.
XO