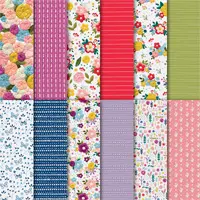
 Today’s friend card duo highlights the power of pretty designer series paper and offers a sneak peek of the Needlepoint Nook suite of products (Occasions Catalog) and the Part of My Story Cling Stamp (Sale-A-Bration). Here’s my Occasions & Sale-A-Bration sneak peek video reveal for a closer look at these and other new products. Both begin Jan. 3.

I put the two Needlepoint Nook patterns on the card above together and did a private Facebook Live with my Stampin’ Pretty Pals Community to select the pattern possibilities for the second butterfly card. Thanks, Pals, for your creative input.

- Needlepoint Nook Designer Series Paper #148807 $11.00 (Occasions 2019)
- Old Olive Linen Thread #148811 $5 (Occasions 2019)
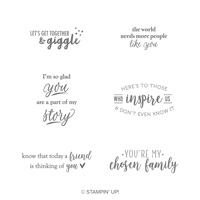
- Party of My Story Cling Stamp Set #149719 FREE with $50 purchase during Sale-a-Bration (2019)
- Watch a Stampin’ Up! video demonstration for the Needlepoint Nook product suite here.
STAMPIN’ PRETTY STEP-BY-STEP PDF TUTORIAL:
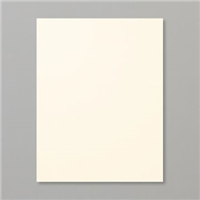
Start with a 4 1/4 x 5 1/2 Very Vanilla Thick card base.
Adhere a 4 x 5 1/4 piece of Needlepoint Nook Designer Series Paper with Snail Adhesive.
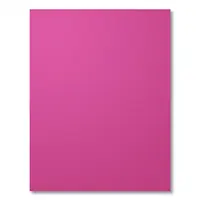
Layer and adhere a 2 3/4 x 4 piece of Needlepoint Nook Designer Series Paper to a 3 x 4 1/4 piece of Berry Burst card stock. Adhere to the card base with Stampin’ Dimensionals.

Stamp sentiment (Part of My Story SAB stamp set) on Very Vanilla card stock using Berry Burst ink and the Stamparatus. Trim to 3 3/4 x 1. Adhere as shown with Stampin’ Dimensionals.
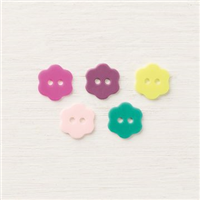
Thread a piece of Old Olive Linen Thread through a Berry Burst Flower Button, securing with a bow. Adhere with a Mini Glue Dot.

Adhere a piece of Needlepoint Nook Designer Series Paper to the outside flap of a Stampin’ Up! Very Vanilla Medium Envelope using Multi-Purpose Glue (or adhesive or your choice). Follow the line of the flap with paper snips to remove excess designer series paper. Here’s my video demonstration with tips.

Start with a 4 1/4 x 5 1/2 Whisper White Thick card base.
Adhere a 4 x 5 1/4 piece of Needlepoint Nook Designer Series Paper with Snail Adhesive.
Layer and adhere as shown, a 2 5/8 x 3 7/8 piece of Needlepoint Nook Designer Series Paper, 2 3/4 x 4 piece of Night of Navy card stock, and a 3 x 4 1/4 piece of Balmy Blue card stock. Adhere to the card base with Stampin’ Dimensionals.
 Stamp sentiment (Part of My Story SAB stamp set) on Whisper White card stock using Night of Navy ink and the Stamparatus. Trim to 3 3/8 x 1. Adhere as shown with Stampin’ Dimensionals.
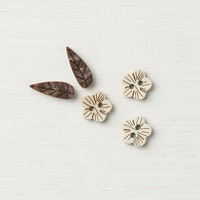
Thread a piece of Linen Thread through a Tropical Elements Button, securing on the back side with a bow. Adhere with a Mini Glue Dot.
 Adhere a piece of Needlepoint Nook Designer Series Paper to the outside flap of a Stampin’ Up! Whisper White Medium Envelope using Multi-Purpose Glue (or adhesive or your choice). Follow the line of the flap with paper snips to remove excess designer series paper.
I love hearing from you! Please leave me your questions or comments about the project for today.

If you enjoyed this post, please be sure to . . .
- Receive a FREE PDF tutorial when you subscribe to my daily blog updates here.
- Click for my Monthly Host Code and how you can earn up to a $50 shopping spree with my Tulip Rewards Loyalty Program.
- Check out the clearance rack and save up to 70%.
- Save 10% on coordinating product bundles!
- The $99 Starter Kit is the best deal of ALL! Discounts & benefits here.
- Visit my gallery for 1000+ paper crafting ideas.
- View my FREE PDF Project Tutorials.
- Follow me on Pinterest.
- Subscribe to my YouTube paper crafting video tutorials.


My project supply list. Click products to shop on-line!







Beautiful. I was not going to purchase the needlework paper any time soon. Now I have changed my mind.
I love the paper patterns . . . it was my top choice out of the Needlepoint Nook suite of products! Lots of bang for the buck!
Beautiful. Iwas not going to purchase the needlework paper any time soon. Now I have changed my mind
This is such a wonderful way to showcase the versatility of a beautiful sketch with a beautiful paper. These cards are uniquely different despite their similarities.
2 VARY BEAUTIFUL CARDS , love them , my sister Claudie is having a birthday next month and her card is with that DSP, ?it’s so beautiful,
It was my FIST PICK , I go crazy with flowers MsMary,
Thanks for sharing ♥️
Hugs Frenchie ♥️
I just love (and admire) the way you combine patterns, textures and shapes!
OMG!! Mary, these cards are breathtaking. I can only imagine opening an envelope to see either of these cards inside. That needlepoint nook DSP is absolutely beautiful and I know now that I have to have it!
Two beautiful card creations my friend. That DSP is SO BEAUTIFUL!!!!