
Today’s card is my CASE (Copy And Share with Everyone) of a Stampin’ Up! sample that I loved in the photo below.

Twinkle Twinkle Designer Series Paper (on my card and envelope) is part of the Stampin’ Up! Buy 3 Get 1 FREE Designer Series Paper Sale! Mix, match & SAVE! Details here. Ends July 31.

STAMPIN’ PRETTY STEP BY STEP TUTORIAL:
Create a 4 1/4 x 5 1/2 card base using the Stampin’ Trimmer and Night of Navy card stock.
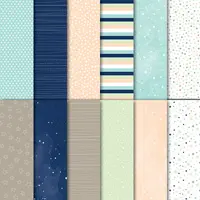
Cut and adhere (left to right) the following sized strips from Twinkle Twinkle Designer Series Paper. 1 1/4 x 4 3/4, 3/4 x 4 3/4, 1 x 4 3/4, 3/4 x 4 3/4.

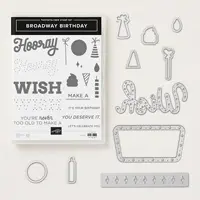
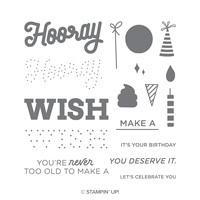
Using the Stamparatus stamp positioning tool (watch my video with Stamparatus tips here), stamp “wish” in Pool Party ink on Whisper White card stock and stamp again (layer over “wish”) with the coordinating dotted “wish” in Basic Gray ink. Both stamp images are from Stampin’ Up! Broadway Birthday Photopolymer stamp set.
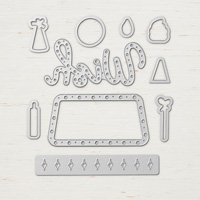
Crop “wish” using the marquee die from Broadway Lights Framelits Dies, the Big Shot Die-Cutting Machine and Magnetic Platform to keep the die in place. Purchase the Broadway Birthday Photopolymer stamp set and Broadway Lights Framelits Dies together as a bundle and save 10%!

Stamp “make a” and “it’s your birthday” (Broadway Birthday Photopolymer stamp set) in Basic Gray Ink on Smoky Slate card stock. Trim “make a” to approximately 1 1/4 x 3/8 and “it’s your birthday” to approximately 2 x 1/4. Adhere both to the sentiment layer with Mini Stampin’ Dimensionals.
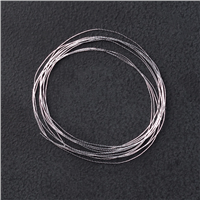
Add Silver Metallic Thread to the back of the “wish” sentiment. TIP: Add four or five Glue Dots to the back of the “wish” layer. Wrap thread around three or four fingers four or five times. Cut and press into glue dots.

Adhere “wish” sentiment to a 2 3/4 x 2 piece of Vellum card stock with Snail Adhesive and adhere ALL to the card base using Stampin’ Dimensionals.
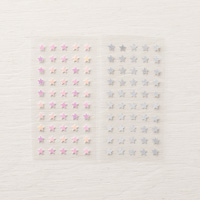
For a little “stellar” bling, add silver sequin stars from Twinkle Adhesive Backed Sequins to sentiment and designer series paper.

Start with a 5 1/8 wide coordinating pattern from Twinkle Twinkle Designer Series Paper. Crop with the envelope liner die from Beautiful Layers Framelits Dies. My liner is approximately 3 1/2 high. Adhere the liner with Snail Adhesive (or adhesive or your choice) to the interior of a Stampin’ Up! Medium Whisper White Envelope.
Enjoy my FREE PDF Step-By-Step Tutorial (and supply list) for the Make A Wish Birthday Card here.

THE MORE STAMPIN’ BLENDS THE MERRIER! Ramp up your coloring “confidence” with these eleven NEW colors of Stampin’ Up! Stampin’ Blends Markers. Learn more about how to use Stampin’ Blends and shop here.

THREE JULY PROMOTIONS YOU WON’T WANT TO MISS!
- Buy 3 Designer Series Paper Get 1 FREE
- 10 Ink Pads FREE with $99Starter Kit
- My July Host Code Offer: Tufted Embossing Folder!
I love hearing from you! Please leave me your questions or comments about the project for today.

If you enjoyed this post, please be sure to . . .
- Receive a FREE PDF tutorial when you subscribe to my daily blog updates here.
- Click for my Monthly Host Code and how you can earn up to a $50 shopping spree with my Tulip Rewards Loyalty Program.
- Check out the clearance rack and save up to 70%.
- Save 10% on coordinating product bundles!
- The $99 Starter Kit is the best deal of ALL! Discounts & benefits here.
- Visit my gallery for 1000+ paper crafting ideas.
- View my FREE PDF Project Tutorials.
- Follow me on Pinterest.
- Subscribe to my YouTube paper crafting video tutorials.


My project supply list. Click products to shop on-line!











Oh – this card is a beautiful combination of products. Thank you for highlighting it!
Thanks, Stacy. I love the Navy on Navy . . . rich and feels like night sky!
Oh Mary, a STELLAR card indeed!!! Beautifully done, love the randomly placed panels and your touch of bling with those little stars.
Awesome masculine card, thank you for sharing.
Pinning it immediately.
XO
Maria.
Glad you enjoyed this card as well, Maria! I love the twinkle of the sequin stars!
Oh MsMary, you did vary well , I love it ? it’s fun casing ha? ,that’s one of my fav things to do, besides getting inspired,
Tfs
Hugs Frenchie ♥️
Sometimes I’m drawn to a card and excited to make it! This was one of those occasions and now I can share how to make it (since I had to figure it out)!
Great masculine card, Mary. Love the “nest” of thread to add interest. Thanks for the measurements. Have a wonderful day!
It’s so much easier to create “the nest” by wrapping the linen thread around three (or four) fingers. Thanks for stopping, HJ.
LOVE how you put the ‘Mary’ spin on this card my friend. SO AMAZING!!!
Thanks . . . it’s pretty close to the original but I do take credit for figuring out the measurements and sharing!
This card was a standout in the samples provided by Stampin’ Up! I LOVE that you recreated it and added your own spin. Love this card, Mary! <3
Thanks, Brian. Once I saw it, I couldn’t resist. It think it’s a marvelous masculine card or even a card for my grand nephews!