
Yesterday, I shared the video below with tips on how to create a background using 1/2″ strips of designer series paper. Today, I have all the details on the card I used for the demonstration. Enjoy and have a lovely, paperfilled weekend (and for some of you, very snowy–stay safe)!
If you have a moment, I would love your feedback or questions on this project HERE.
Please click on the image above to play my video.
STAMPIN’ PRETTY TIPS:
- I started the pattern near the middle with the long Delightful Dijon star pattern (the one that runs below the “j”) and began spacing pieces about 1/8″ apart from my starting point. This is a good spot to observe how they intersect.

- I adhered the interior portion of the strips, cropped the layer to size and then added a wee bit of adhesive (Fine-Tip Glue Pen) to the pieces along the new, clean edges as needed to secure them.

- Hover and Pin it! Here’s a photo showing key products for today’s card that you can save or pin to Pinterest. See ALL my product photos in one spot on my How to Make Simple Cards board on Pinterest.

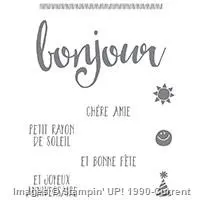
- Bonjour! Here is the French version of the Sale-A-Bration “Hello” stamp set called “Salut.” It’s also available as free gift choice (use item #141270 to redeem) but ONLY through Feb. 15. Earn a free Sale-A-Bration gift for every $50 you spend before shipping and tax. Read more about Sale-A-Bration . . .

- Using my Stampin’ Trimmer, I cut to the “b” from the left and to the “r” from the right. The balance was carefully paper snipped. I love the way it looks propped up on Stampin’ Dimensionals.

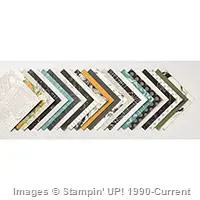
- I used handsome patterns from Going Places Designer Series Paper Stack for the 1/2″ strips as well as the envelope liner. See more close-up views of designer series paper from the Occasions Catalog and Sale-A-Bration here.

- Pin my Stampin’ Pretty Color Mix! Visit my Stampin’ Pretty Color Mix Board on Pinterest for more ideas.


Receive a FREE PDF tutorial when you subscribe to my daily blog updates here.
I love hearing from you! Please leave me your questions or comments about the project for today.

If you enjoyed this post, please be sure to . . .
- Receive a FREE PDF tutorial when you subscribe to my daily blog updates here.
- Click for my Monthly Host Code and how you can earn up to a $50 shopping spree with my Tulip Rewards Loyalty Program.
- Check out the clearance rack and save up to 70%.
- Save 10% on coordinating product bundles!
- The $99 Starter Kit is the best deal of ALL! Discounts & benefits here.
- Visit my gallery for 1000+ paper crafting ideas.
- View my FREE PDF Project Tutorials.
- Follow me on Pinterest.
- Subscribe to my YouTube paper crafting video tutorials.


My project supply list. Click products to shop on-line!
Built for Free Using: My Stampin Blog







Mary, your creations are so very beautiful. Thank you so much for sharing how you create the works of art. I made this one today but put my own spin on it 🙂
I am a new demonstrator and have been making cards for less than a year. I appreciate all your ideas and instructions.
What a kind comment, Karen, and beautiful way to start my day!
Mary,
This is a beautiful card and the instructions are clear. It is helpful to know you chose five different papers. What a wonderful way to use those skinny scraps we all have!
I agree, Janet. So many possibilities for scraps.
Hello Mary,
You are great. Your vidéo is very explicit, even for a person who does not speak correctly your language. Best of all, you used a set of stamps with words in French. A little more about this technique is cutting the word in the middle of the card. A detail very pleasant to the eye.
Thank you so much for sharing.
Best regards
Catherine
Merci, Catherine.
Too bad we can’t still buy that guillotine cutter. I’ve tried others but they don’t do a very good job.
MsMary, l love it so much, I made one , did you see it ? I for got and I put them to close forgot the 1/8 ?, my next one , and I think mine looks to busy , oh well,
Tfs, it was lots of fun !!!
Hugs Frenchie
Hi Mary, This is one of my favorite card layouts. I have made a few, well maybe more than a few. I always butt the 1/2″ strips next to each other. I like how you leave that 1/8″ in-between. I’ll have to try it!
🙂
I really like this! I’m going to try it for a birthday card with the birthday DSP for my granddaughter’s birthday. I can hardly wait to see how it comes out.I
Thanks so much for the video.
Linda
Hi Mary,
Beautiful graphic card with lovely choice of colours. I just realized that you got the SAB set in French! Very cool! 🙂 I hesitated between getting the English one myself because I liked the “hello” (and could have gotten wood mount) or the French version, but ultimately decided to go for the French because I’ll get more use out of it.
TFS!
Cindy
So true, Cindy. There’s something so beautiful about “bonjour!”
Thank you for always sharing your knowledge and talent with us. I love the Bojour card!
Oh Mary, this card is gorgeous, I love the fact you are giving all of those scraps of beautiful paper a chance to shine beautifully.
Love the video, makes me want to give this a try.
Thank you for sharing.
Love the way you cherish paper, Maria . . . giving “beautiful paper a chance to shine!”
A work of art Mary!!
Here’s a quick list by the English name but the French product number. I used Hello (Salut) for my “bonjour!” They are only available in clear-mount (red rubber to be used on your own clear blocks).
Botanicals for You – #141252
What I love – #141278
Perfect Pairings -#141264
Honeycomb Happiness -#141294
Sky is the Limit -#141284
Hello -#141270
Your comments are music to my ears, especially if you plan to give this style of card a try!
Thank you so much Mary for giving more specific details about this card. It helps me put it “all in place.” I will definitely give this style of card a try.
GREAT VIDEO my friend. I totally GET IT now. Thanks for sharing yet another portion of all the talent going on in your ‘pretty’ little head.
ABSOLUTELY fabulous!! love this “quilted” look ! i really enjoy your videos. thank you!!!