
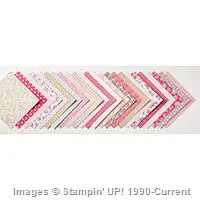
Stampin’ Up! Love Blossoms Designer Series Paper Stack is center stage today. I cut half inch strips of several of my favorite patterns to create the graphic background for this valentine card.

You can see close-up views like the Love Blossoms Stack above of all the new designer series paper (Occasions Catalog and Sale-A-Bration) here or the 2015-2016 Annual Catalog designer series paper here. You can pin your favorites!
STAMPIN’ PRETTY TIPS:
- This is not an alien from outer space. This is what the design of my strips looked like adhered to a piece of Whisper White Cardstock (go a little larger than you need on the cardstock, too). You don’t need to have such long pieces but I thought it would be better for demonstration.

- Clean edges! I cropped the whole thing to 3 3/4″ x 5″ using my paper cutter, a guillotine style Stampin’ Up! used to sell that I think does a good job cutting through the layers.

- This card makes an even stronger statement with a pretty envelope and liner that picks up one of the dominant patterns in the Love Blossoms Designer Series Paper Stack.

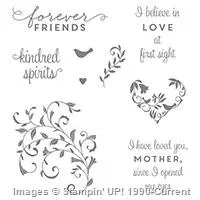
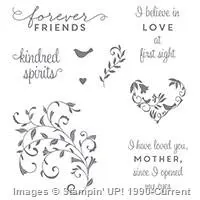
- The “forever friends” sentiment is from First Sight stamp set, new in the Occasions Catalog.

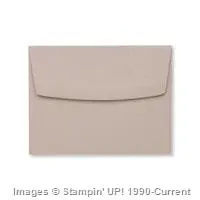
- What makes Stampin’ Up! Medium Crumb Cake Envelopes so special?

- Not only do they coordinate with Crumb Cake Cardstock, you can use less designer series paper since it doesn’t show through. I won’t tell if you won’t.

- If you like this technique and card or have questions, please leave me a comment HERE.
- My Stampin’ Pretty Color Mix to save or pin to Pinterest.

- Hover and Pin it! Here’s a photo showing key products for today’s card that you can save or pin to Pinterest. See ALL my product photos in one spot on my How to Make Simple Cards board on Pinterest.


Receive a FREE PDF tutorial when you subscribe to my daily blog updates here.
I love hearing from you! Please leave me your questions or comments about the project for today.

If you enjoyed this post, please be sure to . . .
- Receive a FREE PDF tutorial when you subscribe to my daily blog updates here.
- Click for my Monthly Host Code and how you can earn up to a $50 shopping spree with my Tulip Rewards Loyalty Program.
- Check out the clearance rack and save up to 70%.
- Save 10% on coordinating product bundles!
- The $99 Starter Kit is the best deal of ALL! Discounts & benefits here.
- Visit my gallery for 1000+ paper crafting ideas.
- View my FREE PDF Project Tutorials.
- Follow me on Pinterest.
- Subscribe to my YouTube paper crafting video tutorials.


My project supply list. Click products to shop on-line!
Built for Free Using: My Stampin Blog








Hi Mary, I like your Strips of Love card very much. Where do I find your video on it please? Cheers and Thankyou, Marilyn in the UK.
Hi Marilyn in the UK!
You can find my video here: STRIPS CARD VIDEO
Enjoy! Mary
How wide are the strips ?
came across this on Pinterest tonight and I love this design for using our scraps, thanks for sharing!
Beautiful – Love you’re style! I need to spend more time reading this in detail…. just beautiful.
Love the colors and design! Also love this font…
Thanks, Maryjane! That means the world!
Hi Stephanie: I did a video that I think you will find helpful! https://stampinpretty.com/2016/01/you-asked-for-this-video.html M
Are the white spaces 1/4″ also? How did you keep them so precise! Thank you for the graphic layout…I doubt that a video is necessary, with measurements and your photo of the layout. Thanks!
You can always restart your experience with paper, stamps and ink and block off time. Great therapy and a much needed artistic outlet!
Wow, a friend sent me your link, Mary. Thank you so very much for spelling out your directions.
I am a hobbyist demonstrator so miss a lot of the great techniques that those of you who are more involved in our craft excel at. Guess I need to devote more time. Hope to spend some over spring break and I’m going to try a card with the strips you outlined above.
Thanks again for sharing…
Thank you so much, Marilyn. Your feedback keeps me inspired!
I just came across your awesome card and I believe I will have to give it a try! Thanks so much for sharing. You do beautiful work,
Hi Mary!
I copied this technique on my first card and realized how easy it was and just started going crazy with it. It really is super simple! I started with the first strip and just built from there, so simple and when I showed my husband, he loved it! I made so many cards, and still have more to make, but this idea really helped! Thank you so much for sharing and the best part is, I can use this technique for other cards, not just Valentine’s Day. I have scraps of paper I couldn’t part with and now will come to some great use for St. Patrick’s Day and Easter as well! Awesome! I had such a productive weekend! Now I am just hoping my Paper Pumpkin comes in today! I just want to call in sick so I can stay home and craft, I just love your site! Thanks for your daily inspiration.
I love your thoughtful response, Crazy Patty! Fun!
thank you very much for your answer and yours informations
I started with the strips in the middle and built around that. It’s my first time of trying this technique so there may be other options.
The strips are 1/2″ wide. The length is determined by how I crop. I would make them at least 4″. Thank you for your kind words, Catherine.
Hello Mary,
Hello Mary,
I am French and I love your site. I watch it regularly. Your cards are beautiful.
I love this card. Can you, please, give me the dimensions of the strips. This technique is superb, and the white edges highlight the colors.
If you can answer me, I would be very happy.
Best regards
Catherine CHEMIN
Very nice and I would think could be made with scraps too.!!!
I cannot stop looking at this Gorgeous Card you created…..
Absolutely Breathtaking, Mary!
Great showcase for the new DP. Thank you for helping us remember a tried and true technique that we may have forgotten about. Thank you!
Congratulations! This project is one of my most popular pins this week and is being highlighted on my blog today. Thanks for sharing. Kylie xx
Thanks you, Kylie. That means so much!
Love this idea, Mary. I keep saving all these little DSP pieces thinking I’ll use them and this is a great way to do it! You can make a stack of these so they’re ready whenever you need a quick card!
What a beautiful card!
Great card and tutorial! I will be using up several bags of scrap DSP to make cards using this technique!
Is their a teaching video on this Wonderful card?
I may make another one in the future with different DSP. If so, I’ll do a video.
Love this technique, please do a video.
OH, so beautiful, Mary! The colors, the theme, the clever placement–you always WOW us with your artistry!
it says you cut the patterned part 3 3/4 x 5. is that correct? isn’t the card 4 1/2 x5? and what size is the pink it sits on?
Hi Sherie: The card base if 4 1/4 x 5 1/2″. The Blushing Bride layer is 4″ x 5 1/4″. The layer with the strips is 3 3/4″ x 5″. Each layer is 1/4″ different than the other.
Such a beautiful card. Thanks for the step by step instructions. I will have to try this soon.
This is a beautiful card Mary! TFS the step by step process. I am going to try and recreate this one!
Where do you start with the strips?
Such a pretty card Mary!! Love all that DSP doing it’s magic.
Wow! I have been looking for the perfect Valentine’s Day card to make for my friends and everything just seemed so romantic, but not this! I LOVE IT! The best part is that I can even use my box of scraps of paper that I couldn’t throw away. Thank you for sharing, I love going to your site everyday and seeing what you are doing. I actually am picking up my Stampin Up! order tonight and I got lots of paper heading my way. My weekend is now booked in my Diva Den! Thank you!
Enjoy your Diva Den, Patty
I LOVE this paper! I can’t wait to make this card! Thanks for sharing.
What a beautiful card!…and a great idea to showcase many of the designer papers. Thanks for the inspiration.
Such talent! Love this idea and your card and matching envelope! Thanks for sharing. Someone lucky will receive this beauty! Happy Valentine’s Day
What a great eye for design and a good use of DSP. Think I’ll perfect my technique with scraps first before I cut into my good stash!
Did you back each strip with white card stock?
They are layered on Whisper White card stock. Then I crop the entire thing to size, Genie!
Wowsah! This is really striking Mary. Thank you so much for the photo layout showing the placement of the strips. I will definitely be CASEing this.
I love this, Mary. So clever to keep space between the panels – such a great showcase of this gorgeous paper.
Very cool. Video please?
Hi d: I’m not too sure there’s much more I could show on a video than the explanation and photo above. It’s easy but a little futzy (time consuming) and you might fall asleep! m
Thanks for such wonderful comments! I really appreciate it. I left about 1/8″ between the strips–pretty much eyeballed it. Start by laying out a few pieces without adhesive to get an idea how you want the pattern to look. Then adhere and be mindful of keeping 1/8″ all the way around as you go. Easier than it looks.
A heartfelt master piece my friend. Thanks for the demo shot.
I fell in love with your card at first glance!! LOVE IT!! 🙂
Mary, I love it and the designer series paper. Nice use of it. Did you leave spaces in between the dsp, it looks like it? Great job!
Love your card Mary! I need to get this paper its gorgeous.
Love the card Mary!! I just got that paper and I love it! Happy Friday!
This is gorgeous Mary! Love the paper, the design and the sentiment you have used. Wonderful. TFS