
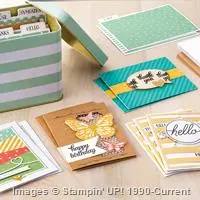
I need a lot of birthday and congrats cards this month and found a quick solution in the Stampin’ Up! Tin of Cards Project Kit. I easily whipped up (in about an hour and a half) sixteen simple cards that are ready to go for many occasions. There are four each of four designs.

GOTTA HAVE IT! Perhaps my favorite part of the kit is this adorable striped Mint Macaron Tin and dividers that help me stay organized by occasion.

The kit includes:
- 16 4 1/4″ x 5 1/2″ card bases and envelopes
- 10 sheets of 4 1/4″ x 6 1/4″ Designer Series Paper (to adhere to the tin dividers)
- 4 die-cut Designer Series Paper strips
- Gold Glimmer Paper hearts
- Die-cut accents
- Printed acetate sheet
- Gold foil strips
- Gold metallic thread
- 1 sheet clear star expoxy stickers
- Gold epoxy hearts
- 4 wood cutouts
- 1 tin box with lid
- 9 file tab dividers (unstamped)

I stuck with the original design for simplicity’s sake and speed but you can certainly apply your own creative touches.

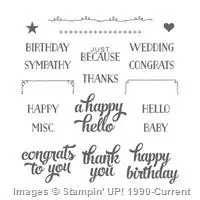
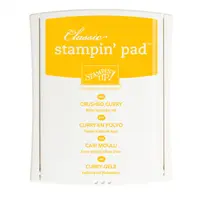
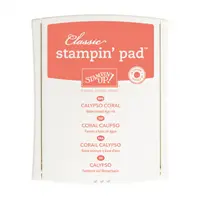
The Tin of Cards photopolymer stamp set is sold separately. You’ll need your own ink and adhesive, too (not included in the kit). I used Tuxedo Black Memento Ink, Jet Black Stazon (for stamping on the wood cutouts), Calypso Coral Classic Stampin’ Pad, Crushed Curry Classic Stampin Pad, Mint Macaron Classic Stampin’ Pad, Glue Dots and Snail Adhesive.

Images © Stampin’ Up!
The stamp set is such a great set of sentiment essentials and is on the list of My Favorite Things from the Stampin’ Up! Annual Catalog found here. I loved adding the “doodles” and categories to the tabbed dividers–so easy with photopolymer (clear) stamps.

IDEA! The kit and stamp set together would make a fabulous holiday gift! Which of the four cards is your favorite? How do you like the tin?
If you click the image above, you can watch a Stampin’ Up! video showing a close-up look and step-by-step instructions for the Tin of Cards Project Kit.

LOOKING FOR INSPIRATION? Check out 100’s of past card ideas in My Gallery.
I love hearing from you! Please leave me your questions or comments about the project for today.

If you enjoyed this post, please be sure to . . .
- Receive a FREE PDF tutorial when you subscribe to my daily blog updates here.
- Click for my Monthly Host Code and how you can earn up to a $50 shopping spree with my Tulip Rewards Loyalty Program.
- Check out the clearance rack and save up to 70%.
- Save 10% on coordinating product bundles!
- The $99 Starter Kit is the best deal of ALL! Discounts & benefits here.
- Visit my gallery for 1000+ paper crafting ideas.
- View my FREE PDF Project Tutorials.
- Follow me on Pinterest.
- Subscribe to my YouTube paper crafting video tutorials.


My project supply list. Click products to shop on-line!
Built for Free Using: My Stampin Blog




Great, Mary, thanks for sharing. I have 5 of the boxes and the stamp set. 4 for gifts and i for me. Wilt get started soon, I hope, fall and cracked ribs etc have held me up! : (
But soon : ) Always enjoy your cards and post F L! Hugs!
Oh, Diana! I’m so sorry to hear about your fall. Glad you are on the mend. Paper crafting can be great medicine.
Awwwww, MsMary, there all beautiful, I bought the stamps set but didn’t buy the bundel, now I can kick my self , Tfs
Hugs frenchie,
No need to kick yourself, Frenchie. There isn’t a 15% off bundle with the tin/kit. You can always get the kit later! The tin is adorbs!
I totally agree that this kit is a MUST HAVE. The cards are GORGOUS……and come together in a SUPER SNAP. Thanks for sharing!
Thanks, Kadie, for the reinforcement! I now have 16 cards ready to go, especially when I’m in a time pinch. I even switched up the sentiments and made a few sympathy cards because I often need them quickly.
I love the tin! In fact, I’m going to a weekend crop in a few minutes and you’ve inspired me to take my own unstarted tin of cards kit with me! Thanks.
Fabulous idea, Liz!
Good Morning Mary,
The BD card is my favorite. I love the stamped border around it. I’m going to watch the video now, to see if they show that particular technique . . . so evenly perfect. If not . . . any hints on that?
🙂
I have good news for you, Nancy. The birthday card with the heart die cut is pre-stamped. You won’t need to worry about precision. However, I used the stamps to add the border to the blue congrats and butterfly cards!
A tip for stamping the borders is my same tip for stamping sentiments. The photopolymer (clear) stamps make it easier to line things up (“eyeballing it”). I like to mount them on the block on a diagonal. I find it’s easier to see the edges of the stamp (and you don’t get the prism effect of the edges of the block) and allows for more precision in getting things straight.