
Wild Wheat, a 2023-2025 Stampin’ Up! In Color, is nothing short of luscious paired with Night of Navy and gold. Think of Wild Wheat as a trendy, rich neutral (brass) and the color possibilities will flow. In addition to Night of Navy, I love it paired with rich colors like Stampin’ Up! Cherry Cobbler, Real Red, Lost Lagoon, Basic Gray, Early Espresso, Mossy Meadow, Blackberry Bliss, Early Espresso, Berry Burst and Pretty Peacock. Try it with Pebbled Path, Moody Mauve or Boho Blue for a hip, retro style.
my simple card tutorial
CUT YOUR CARD STOCK – DIMENSIONS:
- Basic White Thick Card Stock:
- Card Base – 4 1/4 x 11, scored at 5 1/2 (top)
- Night of Navy Card Stock:
- Layer – 4 x 5 1/4
- Cropped Layer – 4 x 5 1/4 (before die-cutting)
- Cropped Sentiment Layer – 3 3/4 x 1 1/4 (before die-cutting)
- Wild Wheat Card Stock:
- Layer – 4 1/4 x 5 1/2 (before trimming)
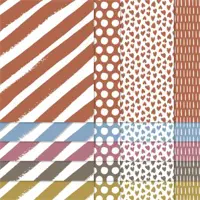
- 2023-2025 6 x 6 Designer Series Paper:
- Envelope Flap – 5 3/4 x 2 1/4 (before die-cutting)

PROJECT TUTORIAL:
Begin by burnishing the fold of the Basic White Thick card base with a Bone Folder.
Adhere the Night of Navy card stock to the card base with Multipurpose Liquid Glue.
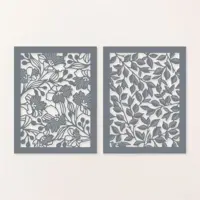
Use a Stampin’ Cut & Emboss Machine (Standard) to crop the Night of Navy layer with the Gorgeous Garden die.
Adhere to the Wild Wheat layer with Multipurpose Liquid Glue.
Use a Paper Trimmer to trim to 3 3/4 x 5.
Secure any loose ends with Multipurpose Liquid Glue.
Adhere to the card with Stampin’ Dimensionals.

Layer and secure Navy Ribbon as shown with Mini Glue Dots. NOTE: Ribbon is not tied because the knot would add too much bulk.
Adhere a bow of gold Simply Elegant Trim to the ribbon as shown with a Mini Glue Dot.
Rub the Night of Navy sentiment layer with an Embossing Buddy (Embossing Additions Tool Kit).
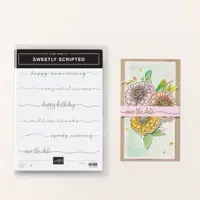
Stamp the sentiment (Sweetly Scripted Stamp Set) in Versamark Ink onto the Night of Navy layer.
Cover with gold Metallics Embossing Powder. Tap to remove the excess. Set with a Heat Tool.
Crop with a Stampin’ Cut & Emboss Machine (Standard or Mini)and the Stylish Shapes 3 1/2 x 1 flagged die.
Adhere to the card with double-stacked Stampin’ Dimensionals.

POP OF PERSONALITY! Embellish with one large gold adhesive-backed Blooming Pearl.
PERFECT POLISH! Adhere the 5 3/4 x 2 1/4 Wild Wheat 2023-2025 6 x 6 Designer Series Paper to the Basic White Medium envelope flap with Multipurpose Liquid Glue. IMPORTANT: Add glue to the flap first, not the Designer Series Paper. Center and line up the Basic Borders angle edge die, tape to secure (Post-It Tape) and crop with a Stampin’ Cut & Emboss Machine (Standard). Watch my Stampin’ Pretty WOW Video here.
stampin’ up! product spotlight!


oh, so pretty card idea!


OH, SO PRETTY! The card above also uses the Gorgeous Garden Dies, as well as other retiring products. You can see the original blog post, tutorial and product list here.
promos, specials, & important updates


don’t forget your tulip rewards!

MY CUSTOMER EXCLUSIVE! Tulip Loyalty Rewards are my way of personally saying thank you to my frequent online shoppers. Earn a tulip for every $50 increment you spend on Stampin’ Up! products (purchased through me). Redeem tulips for a free stamp set (5 tulips) or bundle (10 tulips)!


Absolutely GORGEOUS! I’ve loved all of the cards you’ve made with these dies. Such classic beauties!
Mary, Your card is stunning. The colors you used were so unexpected, the end result speaks for itself. Thank you so much for the inspiration,