
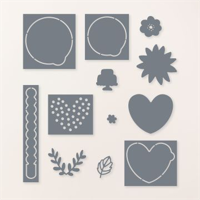
The Stampin’ Up! Hooray for Surprises stamp set and dies (save 10% on the bundle until May 1) offers a wonderful way to deliver an interactive message. Just pull the tab built right into the dies and reveal the message below! I couldn’t resist the tulips (luscious stamped in Night of Navy) since they remind me of my Stampin’ Pretty tulip logo!
PURCHASE NOW & SAVE! See all Stampin’ Up! bundles here that will carry over to the new annual catalog but will no longer be 10% off as of May 1, 2024. See what’s retiring and on sale (April 9) all in one place here.

WOW! TECHNIQUE TIP: Get perfect hidden message placement by creating a template! It’s as easy as 1, 2, 3! See how to create the template and assemble the layers in my tutorial below.
my simple card tutorial

CUT YOUR CARD STOCK:
- Basic White Card Stock
- Layers & Template – 5 x 3 1/2 (Qty 3)
- Long Sentiment – 4 x 1
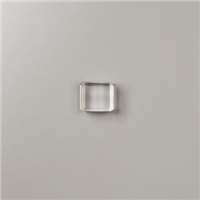
- “Pull” – scrap
- Neutrals 6×6 Designer Series Paper
- Envelope Flap – 5 1/8 x 2 1/8
PROJECT TUTORIAL:
Begin by burnishing the fold of the Basic White Note Card card base with a Bone Folder.
Crop all three 5 x 3 1/2 pieces (separately)of Basic White card stock with a Stampin’ Cut & Emboss Machine (Standard), Post-It Tape (to secure the die in place), and the 4 1/4 x 2 7/8 Deckled Rectangle die.


Use a Clear Block D to stamp the heart (Hooray for Surprises)in Night of Navy Classic Ink onto one of the Basic White die-cut rectangles (1) (approx. 1/4 from the top).
Stack the stamped die-cut rectangle (1)and a blank die-cut rectangle (2) on top of each other. Use a Stampin’ Cut & Emboss Machine (Standard), Post-It Tape (to secure the die & layers in place), and the coordinating Hooray for Surprises heart die to crop both pieces (stamped and blank) at the same time.
Remove the perforated heart from the blank die-cut rectangle (2). This is now your template. (2)
Line up your template (2) over the top of the 3rd blank die-cut rectangle (3).
Use a Clear Block D to stamp the hidden message (Hooray for Surprises)in Night of Navy Classic Ink onto the center of the die-cut heart opening (2 & 3).
Adhere the outer edges (avoiding the perforated heart) of the two stamped layers (1 & 3) together with Multipurpose Liquid Glue.
Adhere to the card with Stampin’ Dimensionals.

Use a Clear Block H to stamp the sentiments (Hooray for Surprises Stamp Set) in Night of Navy Classic Ink onto the coordinating pieces of Basic White card stock.
Use a Paper Trimmer to cut the long sentiment to 3 1/2 x 1/4. Angle cut the right end with Paper Snips.
Trim the “Pull” to size with Paper Snips.

Adhere both to the card with Foam Adhesive Strips (perfectly sized to fit under the skinny sentiments).
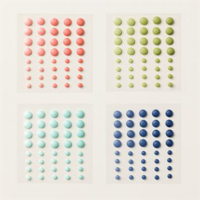
POP OF PERSONALITY! Embellish the sentiment with three small Night of Navy Ombre Matte Decorative Dots.
PERFECT POLISH! Adhere the 5 1/8 x 2 1/8 Designer Series Paper (DSP) to the Basic White Note Card envelope flap with Multipurpose Liquid Glue. IMPORTANT: Add glue to the flap first, not the DSP. Center and line up the Basic Borders scalloped edge die, tape to secure (Post-It Tape) and crop with a Stampin’ Cut & Emboss Machine (Standard). Watch my Pretty Envelope Flap WOW! video for a quick demonstration here.

stampin’ up! product spotlight!


promos, specials, & important updates


don’t forget your tulip rewards!

MY CUSTOMER EXCLUSIVE! Tulip Loyalty Rewards are my way of personally saying thank you to my frequent online shoppers. Earn a tulip for every $50 increment you spend on Stampin’ Up! products (purchased through me). Redeem tulips for a free stamp set (5 tulips) or bundle (10 tulips)!


Such a sweet card and great walkthrough of how these dies work. Very clear, very fun!
I have this set but have not inked it. Thanks so much for the tutorial on how to add the “Pull tab”. Can’t wait to make it. Enjoy your day, Mary!