This wonderful 3-D tree was stamped and die cut using the Stampin’ Up! Merriest Trees Bundle. Don’t you adore all the fun layers? Add a few baubles and a striped pattern from A Walk in the Forest Designer Series Paper and enjoy the WOW! effect.
WHAT I LOVE! Did you know that for every purchase of A Walk in the Forest Designer Series Paper, Stampin’ Up! donates $3 to support organizations dedicated to spreading cheer and providing support to those in need. BONUS! The Designer Series Paper has images that coordinate with the Merriest Tree Bundle (Item 162068, estimated to be back in stock NEXT WEEK)!
my simple card tutorial
CUT YOUR CARD STOCK – DIMENSIONS:
- Pecan Pie Card Stock:
- Card Base – 4 1/4 x 11, scored at 5 1/2
- Basic White Card Stock:
- Layer & Die-Cuts – 3 31/2 x 5 1/4 (Qty 3)
- Sentiment – 2 3/4 x 3/4
- A Walk in the Forest Designer Series Paper
- Layer – 4 x 5 1/4
- Envelope Flap – 5 3/4 x 2 1/4

PROJECT TUTORIAL:
Begin by burnishing the fold of the Pecan Pie card base with a Bone Folder.
Layer and adhere a Basic White layer to the Designer Series Paper together and to the card base with Multipurpose Liquid Glue.
Use a Stampin’ Cut & Emboss Machine (Standard or Mini) and the Merriest Tree dies to crop a full tree from a Basic White layer. This will be your “canvas” to build the layered tree.
Use a Clear Block E to stamp the full tree image in Granny Apple Green Classic Ink and the tree accents in Old Olive Classic Ink onto a Basic White layer.
Crop the tree sections with the coordinating Merriest Tree dies, starting with the top of the tree (smallest die) first, working your way down to the bottom.
NOTE: Your dies will go beyond the image you are cutting. This saves on ink and card stock.
Starting with the bottom die-cut, adhere the tree canvas (created in step 3) with Stampin’ Dimensionals on the bottom half and Multipurpose Liquid Glue on the top edge. Continue this process until the top piece, which is adhered with a Stampin’ Dimensional.

Use a Clear Block A to stamp the tree trunk in Pecan Pie Classic Ink and the star in Daffodil Delight Classic Ink onto scraps of Basic White card stock.
Crop with a Stampin’ Cut & Emboss Machine (Standard or Mini) and the coordinating Merriest Tree dies.
Adhere the tree trunk with snipped-to-size Stampin’ Dimensionals and star with Multipurpose Liquid Glue.
Use a Clear Block G to stamp the sentiment (Merriest Trees Stamp Set) in Balmy Blue Classic Ink onto the Basic White Sentiment piece.
Adhere as shown with Stampin’ Dimensionals.
Tie a bow of white Baker’s Twine Essentials and adhere tucked under the sentiment as shown with a Mini Glue Dot.
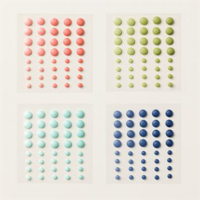
POP OF PERSONALITY! Embellish the tree with Old Olive Ombre Matte Decorative Dots.


The Merriest Trees Dies (part of the Merriest Trees Bundle) are estimated to be back in stock NEXT WEEK (November 6). You can check inventory status here: INVENTORY STATUS REPORT

GET 100+ CARD SKETCH IDEAS FREE! Subscribe to my email updates & instantly receive a FREE digital gift of 100+ Card Sketch Ideas that you can save or print! Subscribers also receive my daily card ideas and tutorials, special offers, new product releases and exclusive “subscriber-only” resources.
Mary


My project supply list. Click products to shop on-line!


Price: $12.50