
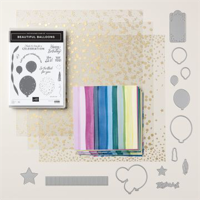
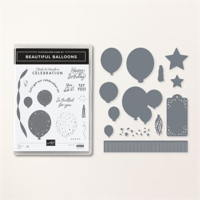
I adore this fun and flirty fringe created using the die from the Beautiful Balloons Bundle, part of the Stampin’ Up! Bright & Beautiful Suite. And there’s so much more birthday “magic” to be made with the dies and stamps. The entire collection is available for purchase now as part of the new Stampin’ Up! 2023-2024 Annual Catalog.
WHAT I LOVE ! Texture can make such a statement. These fringed layers remind me of a piñata. How perfect for a birthday card!
my simple card tutorial
CUT YOUR CARD STOCK – DIMENSIONS:
- Basic White Thick Card Stock:
- Card Base – 4 1/4 x 11, scored at 5 1/2
- Layer (below fringe) – 4 x 5 1/4 (before trimming down)
- Basic White Card Stock:
- Stamped/Die-cut Balloon – 2 1/2 x 2 3/4 (before die-cutting)
- Misty Moonlight Card Stock
- Layer – 4 x 5 1/4
- Bright & Beautiful 6×6 Designer Series Paper:
- Layer – 3 3/4 x 2 1/2
- Die-cut Balloons – 3 1/2 x 2 1/4 (before die-cutting – crop both from same piece)
- Die-cut Fringe – 6 x 6 (use full sheet)

PROJECT TUTORIAL:
Begin by burnishing the fold of the Basic White Thick card base with a Bone Folder.
Adhere the Misty Moonlight layer to the card base with Stampin’ Dimensionals.
Use the fringe die to crop SIX strips from the full sheet of Bright and Beautiful DSP.
Adhere to the Basic White layer, starting at the bottom and layering until all 6 strips are adhered as shown with Multipurpose Liquid Glue.
Adhere the Bright & Beautiful DSP layer to the top of the Basic White layer (above the fringe) with Multipurpose Liquid Glue.
Use a Paper Trimmer to cut down to 3 3/4 x 5.

Double wrap the seam with Orchid Oasis 2022-2024 In Color Baker’s Twine, securing with a bow as shown.
Adhere to the card with Multipurpose Liquid Glue.
Use a Clear Block D to stamp the balloon confetti (Beautiful Balloons Stamp Set) in Bubble Bath and the sentiment in Misty Moonlight.
Crop the stamped image and the two other balloons from the DSP with a Stampin’ Cut & Emboss Machine (Standard or Mini) and the coordinating Beautiful Balloon dies.
Adhere all three balloons as shown with Stampin’ Dimensionals.
PERFECT POLISH! Use Multipurpose Liquid Glue to adhere the Designer Series Paper to the outside flap of a Basic White Medium Envelope. You can see my video demonstration with tips on adding designer paper to an envelope flap here.
stampin’ up! product spotlight!


NEW PRODUCTS! This card has several new products from the Stampin’ Up! 2023-2024 Annual Catalog that are available NOW! Add them to your order via the shopping links below!
oh, so pretty card idea!


OH, SO PRETTY! The card above also uses the NEW Bright & Beautiful Designer Series Paper! It also offers a look at the NEW Timeless Arrangements Bundle, part of My Favorite Things from the 2023-2024 Annual Catalog!
promos, specials, & important updates


don’t forget your tulip rewards!

MY CUSTOMER EXCLUSIVE! Tulip Loyalty Rewards are my way of personally saying thank you to my frequent online shoppers. Earn a tulip for every $50 increment you spend on Stampin’ Up! products (purchased through me). Redeem tulips for a free stamp set (5 tulips) or bundle (10 tulips)!


I have the fringe scissors that I am going to use. I bought them a long time ago but never had an occasion to use them.
Me, too! I need to use those fringe scissors! Hope I can make it look as even and neat! 🙂
Mary, you are so clever to use the DSP to make the ombre fringe. It is an adorable card. Enjoy your day!