
LOVE SKETCHES? On Tuesday I shared the newest addition to my Stampin’ Pretty Sketchbook, Sketch #38, a fun fold! Today’s card uses that sketch, incorporating Stampin’ Up! products from the Flowering Fields Suite Collection, part of the 2022 January – June Mini Catalog release.

Enjoy more sketch ideas in my Stampin’ Pretty Sketchbook here.
Click here or the button below to print or save my complete sketchbook!

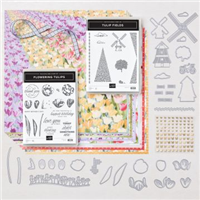
BUNDLE & SAVE 10%! Purchase the Flowering Fields Suite Collection using product number 157685 and you SAVE 10% OFF the following coordinating items: Flowering Tulips Stamp Set, Tulips Dies, Tulip Fields Stamp Set, Windmill Fields Dies. See all the available Stampin’ Up! 10% off bundles in my online store here.
Stampin’ Up! shared the video above to demonstrate how to assemble the Tulip Dies! A time-saver for sure!

STAMPIN’ PRETTY STEP-BY-STEP TUTORIAL:
Begin with a 4 1/4 x 9 1/4 piece of Basic White Thick card stock.
COOL TIP! If you start with a full 8 1/2 x 11 piece of card stock, save the 1 3/4 x 4 1/4 piece you just cut off to create the card base. You will use it as the piece that holds the tulips!
Score and fold at 1 7/8 and 7 3/8.
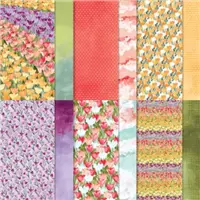
Use a Paper Trimmer to cut the following pieces of Flowering Fields Designer Series Paper:
- Grid Design: 4 x 5 1/4, 4 x 1 5/8 (qty 2), 4 x 1 1/2
- Tulip Design: 3 3/4 x 1 3/8 (qty 2)
 Layer and adhere a 3 3/4 x 5 piece of Basic White card stock to the 4 x 5 1/4 piece of Designer Series Paper together and to the inside of the card with Stampin’ Seal.
Layer and adhere the tulip Designer Series Paper to the grid Designer Series Paper and then to the outside folds of the card with Stampin’ Seal.
Adhere the final piece of grid Designer Series Paper to the 1 3/4 x 4 3/4 piece of Basic White card stock (the piece remaining from cutting the card base) with Stampin’ Seal.
Adhere only to the top flap of the card front as shown with Stampin’ Dimensionals.

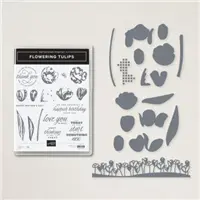
Use a Stampin’ Cut & Emboss Machine (Standard or Mini) along with the Tulips dies to crop the following pieces of card stock:
- Mossy Meadow: 3 stems, 2 leaves
- Real Red: 7 tulip petals (see video here for assembly instructions)
Assemble and adhere as shown with Mini Glue Dots and Stampin’ Dimensionals.
Triple wrap with white Baker’s Twine Essentials, securing with a bow.
POP OF PERSONALITY! Embellish with Brushed Brass Butterflies.

FREE DSP COLOR CHART! You can find my updated color charts and meet all the new Designer Series Paper on my blog post here.
Mary


My project supply list. Click products to shop on-line!





Those tulips, DSP and layout are stunning! Thanks Mary for another beautiful card!
What a beautiful card, I’m just waiting for that stamp set to arrive, will have to follow your great instructions to make a card. Thanks
Mary, Your tulip cards are beautiful! Thanks for continuing to send me the newsletters.
This is a very pretty card Mary. I do believe I will be CASING this.
Thanks for your inspiration.
An absolute beauty! Love how these tulips are layered – and this is a great showcase of the gorgeous patterns in this paper. ♥
:Lovely colorful card and neat how you put it all together. Instructions are so helpful. Thanks for sharing.
Gorgeous my friend!