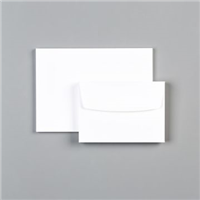
This Valentine Greetings Note Card takes another look at the Love & Happiness Hybrid Bundle and the Sweet Talk Designer Series Paper.

STAMPIN’ PRETTY STEP-BY-STEP TUTORIAL:
Begin by burnishing the fold of a Basic White Note Card with a Bone Folder.
Use a Paper Trimmer to cut a piece of Sweet Talk Designer Series Paper to 3 1/4 x 3.
Adhere to the note card as shown with Stampin’ Seal.

Cut a piece of Basic White card stock to 3 x 2 5/8.
Adhere to a Foam Adhesive Sheet.
Run through the Stampin’ Cut & Emboss Machine (Standard or Mini) along with the Bouquet of Love Hybrid Embossing Folder Heart Die.
Remove the protective backing and adhere to the card.
Crop a piece of Sweet Talk Designer Series Paper with a Stampin’ Cut & Emboss Machine (Standard or Mini) and the smaller Bouquet of Love Hybrid Embossing Folder Heart Die.

Adhere to the card as shown with a Stampin’ Dimensional.
Use the Stamparatus to stamp the sentiment in Real Red Classic Ink onto a piece of Basic White card stock.
Use a Stampin’ Cut & Emboss Machine to crop with the coordinating Bouquet of Love Hybrid Embossing Folder Die.
Tie a bow of White Baker’s Twine Essentials, adhering with a Mini Glue Dot.
Adhere the sentiment to the card with snipped-to-size Foam Adhesive Sheet.
POP OF PERSONALITY! Embellish with Clear Polished Dots.
PERFECT POLISH! Use Multipurpose Liquid Glue to adhere a piece of Sweet Talk Designer Series Paper to the outside flap of a Basic White Note Card Envelope. Trim to size with Paper Snips. You can see my video demonstration with tips on adding designer paper to an envelope flap here.
promos, specials, & important updates
don’t forget your tulip rewards!

MY CUSTOMER EXCLUSIVE! Tulip Loyalty Rewards are my way of personally saying thank you to my frequent online shoppers. Earn a tulip for every $50 increment you spend on Stampin’ Up! products (purchased through me). Redeem tulips for a free stamp set (5 tulips) or bundle (10 tulips)!


Hi Mary, look your cards and posts, I learn and get ideas from all your layouts.
Also, looking for some Beauty of Tomorrow DSP, happen to have any to spare or know how I can find some, even a few sheets.
Thanks
I love this DSP pack and can’t wait to get it. Your card is great for Valentine’s and easy to get several out the door in a little more than a month!
What a FUN little card. I’m crazy about that sentiment label.