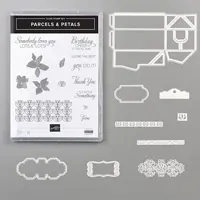
 The Parcels & Petals Bundle pairs up with Bird Ballad Designer Series Paper to create quick and cute gift boxes that are perfectly sized to hold gift cards & more. Yesterday I shared a post announcing Blog Candy, which just happens to be the Parcels & Petals Bundle I used to create the gift boxes above. It’s not too late to participate! Click here to see my blog post and comment for your chance to win! Contest ends, Friday, July 19 at Noon MT. Winner will be announced on my blog, Saturday, July 20th.

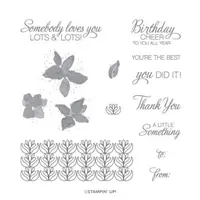
BUNDLE & SAVE 10%! Purchase the Parcels & Petals Cling Stamp Set and the coordinating Perfect Parcel Dies together as a bundle and SAVE 10%! See all the current Stampin’ Up! 10% off bundles in my online store here.

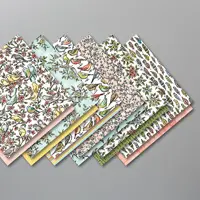
The gorgeous Bird Ballad Designer Series Paper is packed with beautiful images that have been colored with Stampin’ Blends (high-quality, alcohol-based, dual-tip markers) for easy coordination. You can see all available Stampin’ Blends in my online store here.
STAMPIN’ PRETTY STEP-BY-STEP TUTORIAL:
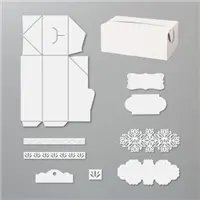
Use a die-cutting machine and the parcel die (Perfect Parcel) to crop two pieces of Bird Ballad Designer Series Paper. TIP: If you are using paper that contains lines or images that have a specific direction, be sure to cut both pieces, side-by-side, so that it lines up properly when assembling the box.

Assemble the box as follows:
- Fold and burnish each scoreline with a Bone Folder!
- Add Tear & Tape Adhesive to the tabs (see photo).

- Adhere the first set of tabs together, making sure to lineup the score lines.

- Fold the box (see photo) adhering the 2nd set of tabs, again, making sure to lineup the score lines.

- Assemble the bottom of the box by adhering the flaps with adhesive to the adjacent flap (see photo). After adhering, gently push down on the center until the pieces somewhat “snap” into place and form the box bottom.

- Fold the top side flaps in (see photo):

- Tuck the flaps into the side tabs (see photo):

- The box is fully assembled and should look like the photo:

DECORATING TUTORIAL Box #1:
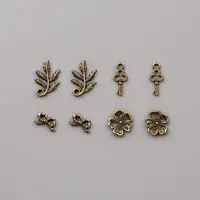
Double wrap the parcel box with Whisper White Solid Baker’s Twine, securing with a bow on the righthand side. Tie a Bird Ballad Trinket to the bow with another piece of Whisper White Solid Baker’s Twine.

Add a 2 x 7 1/2 belly band of Bird Ballad Designer Series Paper to the center of the box, adhere the ends together with Snail Adhesive or Tear & Tape.
Use the Stamparatus to stamp the sentiment in Tuxedo Black Memento Ink onto Whisper White card stock. Crop with a die-cutting machine and the label die (Perfect Parcel). Adhere as shown with Stampin’ Dimensionals.

DECORATING TUTORIAL Box #2:
Double wrap the parcel box with Whisper White Solid Baker’s Twine, as shown, securing with a bow.
Use the Stamparatus to stamp the sentiment in Tuxedo Black Memento Ink onto Whisper White card stock. Crop with a die-cutting machine and the label die (Perfect Parcel). Adhere to ONE side of the parcel box top with Snail Adhesive.

Snip a bird from the Bird Ballad Designer Series Paper using Paper Snips. Adhere as shown with a Stampin’ Dimensionals (to the same side as the sentiment).
Add a Bird Ballad Trinket, tucked under the bow, adhering with a Mini Glue Dot.
Add a Gift Card (a perfect fit) or small gift as desired.

 WHERE IN THE WORLD IS STAMPIN’ PRETTY?
Yesterday was the LAST DAY of our trip of a lifetime. We took a golf cart tour of Florence, did some shopping and a bit of relaxing. Today we are headed on a train to Bologna, there will be hop on a plane back home!
You can see several photos from our trip by taking a peek at my personal Facebook page here.


Click on the images below to see details of each special!
I love hearing from you! Please leave me your questions or comments about the project for today.

If you enjoyed this post, please be sure to . . .
- Receive a FREE PDF tutorial when you subscribe to my daily blog updates here.
- Click for my Monthly Host Code and how you can earn up to a $50 shopping spree with my Tulip Rewards Loyalty Program.
- Check out the clearance rack and save up to 70%.
- Save 10% on coordinating product bundles!
- The $99 Starter Kit is the best deal of ALL! Discounts & benefits here.
- Visit my gallery for 1000+ paper crafting ideas.
- View my FREE PDF Project Tutorials.
- Follow me on Pinterest.
- Subscribe to my YouTube paper crafting video tutorials.


My project supply list. Click products to shop on-line!






what wonderful boxes & as always, the pic. were over the top lovely. Mary, you’re so pretty, so you should remove your sunglasses before having your pic. taken. Looks like a trip of a life time & so you deserved it.
You are a master that works amazingly well with ink, paper and glue, etc. It is always a pleasure to see your awesome and encouraging creations.
That picture of the bridge is so beautiful!
My husband and I visited Italy in 2016! It was fabulous!!
Mary, what a sweet little box! thank you for sharing this idea, I love this bird stamp set and the dsp too.
Beautiful boxes, so glad you enjoyed your trip!
Thank you for the photo tutorial of assembling this box; so very helpful. The completed examples are both so adorable. Can’t thank you enough for creating and sharing.
Hope you are “recovering” from the long journey home. So glad you had such a spectacular trip.
You know me……..I LOVE 3-D projects and this one is on my TO DO list. What a darling little box…….And you decorated it perfectly. Thanks for the step-by-step instructions. LOVE IT my friend!!! Welcome back to Tucson.
Cute project today, Mary. Glad you enjoyed your wonderful trip. The extra days on each end of the cruise made it even more memorable. Enjoy your day!