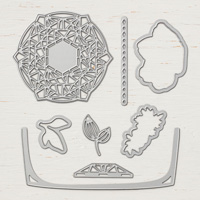
Today’s love and sympathy card showcases the Lasting Lily Stamp Set (a Level 2 Sale-A-Bration free with a qualifying $100 purchase) as well as the Limited Release Sale-A-Bration Coordination Lily Framelits Dies.
These links include all Sale-A-Bration releases and available products in “real time!”
- 1st Level Sale-A-Bration. FREE products for every $50 you spend.
- 2nd Level Sale-A-Bration. FREE products for every $100 you spend. Watch my video reveal here.
- View limited release coordinating Sale-A-Bration products for purchase (available NOW thru March 31 or while supplies last).
PLEASE GET THE DIES NOW! Stampin’ Up! announced that inventory is running low on the Lily Framelits Dies. If you love the look and ease of cropping coordinating images with dies, you can purchase them here.
STAMPIN’ PRETTY STEP-BY-STEP TUTORIAL:
Create a 4 1/8 x 5 1/2 card base using Crumb Cake card stock and the Stampin’ Up! Stampin’ Trimmer. It cuts and scores.
Use the Big Shot and the largest & 2nd largest Rectangle Stitched Framelits Dies to crop two pieces of Whisper White card stock. Adhere the larger rectangle to the card base with Snail Adhesive.
Use the Stamparatus to position and stamp the sentiment in Crumb Cake Ink onto the bottom right corner of the smaller rectangle. Adhere with Stampin’ Dimensionals.

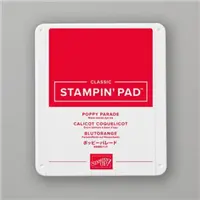
Stamp the stems and leaves in Granny Apple Green, and the lilies in Poppy Parade ink onto Whisper White card stock.
TIPS for a better image using the Lasting Lily Photopolymer stamp set.
- Use the Stamparatus.
- Apply ink in circles with a sponge dauber directly to the stamp.
- Apply enough pressure to fill the fine details of the Distinktive stamp. You should be able to see the image and lines on the stamp. If not, you may need to “dauber” to remove some of the ink.
- If the stamped image is too light, you can reink and restamp in the exact same spot using the Stamparatus.
- I did the same technique (circles of ink with daubers) with the stems and leaf. However, I did a little swipe of the Granny Apple Green pad across the side of the stamp for the deeper accent on the edge.
Use the Big Shot, Magnetic Platform, and coordinating Lily Framelits Dies to crop the Lasting Lily stamped images (lilies, stems and leaf). VIDEO TIP: At about the 3 1/2 minute mark, this Stampin’ Up! video shows you how to line up photopolymer stamps with the dies before stamping. This method is an incredible help in aligning the images with the dies.

Adhere the stems and smaller lily as shown with Snail Adhesive. Adhere the larger lily with Stampin’ Dimensionals.
Tie a bow of Linen Thread and adhere with a Mini Glue Dot (rolled so that it doesn’t show).
For the perfect polish – Use a Big Shot, Magnetic Platform, envelope liner die (Beautiful Layers Thinlits Dies) and the Floral Romance Specialty Designer Series Paper to create an envelope liner. Adhere to the inside of a Stampin’ Up! Whisper White Medium Envelope.
I love hearing from you! Please leave me your questions or comments about the project for today.

If you enjoyed this post, please be sure to . . .
- Receive a FREE PDF tutorial when you subscribe to my daily blog updates here.
- Click for my Monthly Host Code and how you can earn up to a $50 shopping spree with my Tulip Rewards Loyalty Program.
- Check out the clearance rack and save up to 70%.
- Save 10% on coordinating product bundles!
- The $99 Starter Kit is the best deal of ALL! Discounts & benefits here.
- Visit my gallery for 1000+ paper crafting ideas.
- View my FREE PDF Project Tutorials.
- Follow me on Pinterest.
- Subscribe to my YouTube paper crafting video tutorials.


My project supply list. Click products to shop on-line!


I cannot get this tutorial for printing when I click on the printing area.
Pat Janssen
Love this card Mary. I have this stamp and will be CASING this. It does make a beautiful sympathy card.
Thanks so much, Beth. I love that you can make the lilies pretty much any color or change the sentiment to match occasions!
Love this one Mary! I am still enjoying Mexico. I totally missed the huge snow storm that hit Colorado Springs and Monument where I live! We have had 70’s for two awesome weeks!
Glad you missed the storm and are enjoying sunny Mexico. I head to Mexico in about 3 weeks. Can’t wait!
Oh how BEAUITFUL, MsMary, Love Love it , so neat and perfect ♥️
Tfs hugs Frenchie ♥️
I think the flowers send a powerful and artistic message. Clean and classic!
Mary
What a stunning card!! I just love ? the colors!! You’re an amazing stamper love all the inspiration you share. Inky hugs,
Terry ~~
I couldn’t find the tutorial
Just gorgeous Mary. So glad I got the framelits early. I will hold on to this bundle long after it is retired.
Hi Mary,
This is the prettiest and most natural looking Lasting Lily card I have seen, and it is wonderful! Thank you so much for the inking tips, and for the link to the video showing how to line up the stamp with the die before stamping. (RE: the previous comment about the link going to the wrong bundle–not so. It’s just that the tip is more at the 2-1/2 minute mark than the 3-1/2 minute mark.)
Can’t wait to get into my stamp room and CASE this great creation of yours. Thanks for sharing!
Love the Video! Great Tip! I never watched before, because I didn’t get the Rainbow Stamp Set. Thanks for pointing the tip out! I watched and now it will be easy to line up the dies with the stamp…Brilliant! TFS…Oh! your card is just beautiful! I may have to case this one too!
Drop-dead gorgeous, Mary! Your card is perfection – and that perfection is made even more perfect by the envelope liner. Such a classy card!
Love your beautiful card. Great job on coloring the lilies. I tried to watch the video but it is linked to another bundle. Have a great Saturday!
Hilda, Go back and watch that same video again, but go to the 2-1/2 minute mark, You’ll see how to line up your stamp with the die.
This is beautiful! Would love the tutorial, but there is something wrong with the link. I love your work and the simple style of your cards. Thank you so much for sharing with us!
Your card is beautiful my friend. Sympathy cards are difficult to make and this Lily set makes that task a tad bit easier. Thanks for sharing.