
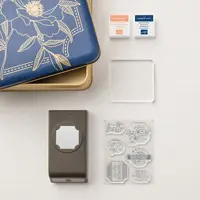
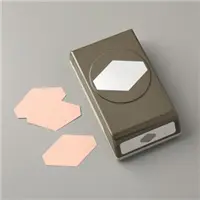
Simple and eclectic describes today’s hello card. I created it with the help of the punch and stamp set from the Darling Label Punch Box (p.44, Annual Catalog).

The punch box and is on the list of My Favorite Things from the Stampin’ Up! Annual Catalog. It includes the Darling Label Punch, Darling Label Photopolymer Stamp Set, Night of Navy and Grapefruit Grove Classic Stampin’ Spots and a clear stamp block. The included tin (8 x 8 x 3) is to die for! Makes a charming creative gift, too!

My simple hello card was inspired by my Stampin’ Pretty color combination above. For 100’s of Stampin’ Up! color ideas, please be sure to follow my Inspired by Color board on Pinterest here
STAMPIN’ PRETTY STEP-BY-STEP TUTORIAL:
Create a 4 1/4 x 5 1/2 card base using the Stampin’ Trimmer and Crumb Cake card stock. Using Snail, adhere a 3 3/4 x 5 piece of Whisper White card stock to the card base.

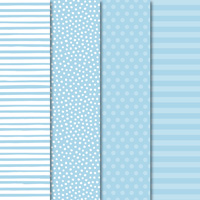
Adhere a 3 x 1 Soft Sea Foam stripe pattern (Subtles 6 x 6 Designer Series Paper) to a 2 1/2 x 3 3/4 piece of Basic Black card stock. Adhere as shown to the card base.
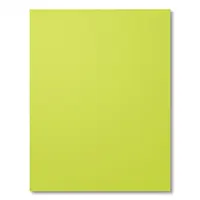
Create a flagged end on a 3 x 3/4 piece of Lemon Lime Twist card stock using the Tailored Tag Punch. With Snail Adhesive, adhere a 3 1/4 piece of Whisper White 5/8 Polka Dot Tulle Ribbon. Wrap with Linen Thread and tie in a bow. Adhere with Stampin’ Dimensionals to card base.

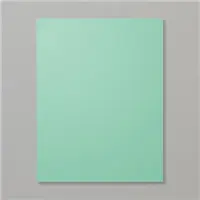
Stamp “hello” from the Darling Label Photopolymer Stamp Set in Tuxedo Black Memento Ink on Coastal Cabana card stock. Crop “hello” with the Darling Label Punch. Adhere with Stampin’ Dimensionals as shown. The Darling Label Punch and Darling Label Photopolymer Stamp Set are exclusively available as part of the Darling Label Punch Box.
For the perfect pop of bling and coordinating personality, add Coastal Cabana Glitter Enamel Dots.
Enjoy my FREE PDF Step-By-Step Tutorial (and supply list) for the Darling Label Punch Box Hello Card here.

I love this alternate card idea from Stampin’ Up! using the punch and stamp set from the Darling Label Punch Box. Don’t miss the punch background!
I love hearing from you! Please leave me your questions or comments about the project for today.

If you enjoyed this post, please be sure to . . .
- Receive a FREE PDF tutorial when you subscribe to my daily blog updates here.
- Click for my Monthly Host Code and how you can earn up to a $50 shopping spree with my Tulip Rewards Loyalty Program.
- Check out the clearance rack and save up to 70%.
- Save 10% on coordinating product bundles!
- The $99 Starter Kit is the best deal of ALL! Discounts & benefits here.
- Visit my gallery for 1000+ paper crafting ideas.
- View my FREE PDF Project Tutorials.
- Follow me on Pinterest.
- Subscribe to my YouTube paper crafting video tutorials.


My project supply list. Click products to shop on-line!







I bought this set. There are some great ideas here for using it. Thank you Mary.
That is one bold and dare I say BEAUTIFUL looking card my friend. LOVE the touch of Polka Dot Tulle Ribbon on this card.
Thanks, Kadie. I often shy away from wider ribbon but this Tulle is dreamy to layer and tie!
WOW!! such a wonderful package. You always show such an easy way to use S.U products, Can’t wait to get mine
This is definitely simple and could easily transition to something entirely new with a color change!
Ref: the pretty pink ‘ Thanks’ card:
Did you hand draw the ‘stitching’ on the punched thanks label?
Cute cards!
Thanks, Kimberly. Stampin’ Up! created the pink card (on the cover of the annual catalog). The “stitching” is part of the stamp image. Easy as can be!
Love this cute card with the soft palette, the great punch and the ribbon. Your inspiration picture is lovely. Have a great day!
A very simple mix of soft greens and blues, right! Black really makes it all pop!
Oh Mary!!! That color combination is absolutely dreamy! I’d love to decorate my home with these colors, and why not? They are just so calm. Celia
I agree, Celia. Very “spa” like!
Love this color combo and the use of the darling label punch. Just striking!
Thanks, Linda. That little punch is a work horse!
Such a great card, Mary! I love the color inspiration and the super-fun layout you’ve created. <3
Great to hear, Brian. This one went together quickly. Hooray!