
Stampin’ Up! Red Foil Sheets are simply sumptuous for the holidays and the perfect WOW! for today’s Pals Paper Arts Sketch Challenge (PPA268).

Be inspired by what the Pals Paper Arts Resident Artists have designed using this sketch and play along here.
STAMPIN’ PRETTY TIPS:
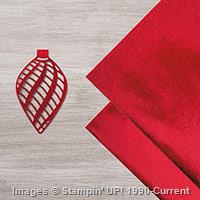
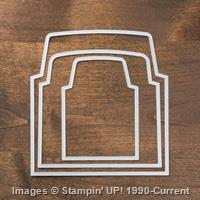
- Check out the intricate details of this die cut ornament. I layered it over Red Foil Sheets and popped up my white layer on Stampin’ Dimensionals, taking advantage of the “negative space.”

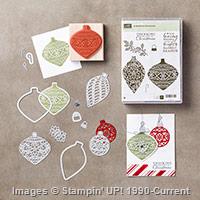
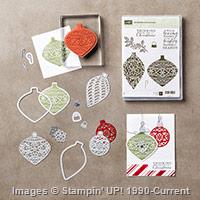
- Save 15% when you purchase the Delicate Ornament Thinlits Dies and Embellished Ornaments stamp set as a bundle. They landed on the list of My Favorite Things from the holiday catalog.

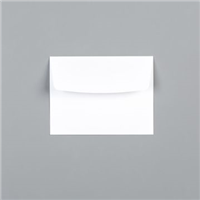
- I cropped more of the Red Foil Sheets for the envelope liner, a really rich, elegant touch.

- Be sure to use fairly clean cutting plates for the liner or your old cuts on the plate will leave an impression. You’ll also want to score the fold for the envelope flap since the Red Foil is thick. Alternate idea – Try Real Red Envelope Paper (139604). It’s not shiny but better suited for mass producing!
WHY SHOP WITH STAMPIN’ PRETTY? Earn FREE stamps with my Tulip Rewards Loyalty Program. Read more . . .
I love hearing from you! Please leave me your questions or comments about the project for today.

If you enjoyed this post, please be sure to . . .
- Receive a FREE PDF tutorial when you subscribe to my daily blog updates here.
- Click for my Monthly Host Code and how you can earn up to a $50 shopping spree with my Tulip Rewards Loyalty Program.
- Check out the clearance rack and save up to 70%.
- Save 10% on coordinating product bundles!
- The $99 Starter Kit is the best deal of ALL! Discounts & benefits here.
- Visit my gallery for 1000+ paper crafting ideas.
- View my FREE PDF Project Tutorials.
- Follow me on Pinterest.
- Subscribe to my YouTube paper crafting video tutorials.


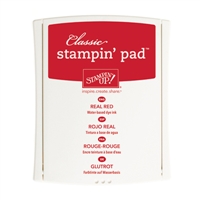
My project supply list. Click products to shop on-line!
Built for Free Using: My Stampin Blog






Thanks, Katy, for your sweet words!
This is a very special “Mary classic”… so beautiful!!
Hi Jenny: I used the Fine Tip Glue Pen to attach the detailed ornament die cut to the red foil. Pretty straight forward. Thanks for your wonderful comment! M
I love this card! whats the best way to adhere the die cut to the paper? Maybe a 1 minute to wow here – this is great –
Love your work Mary!
Hi Mery, can you make a video for this beautiful card and envelope.
Thanks for your attention.Aurora Guerra
Hi Aurora! I’ll keep it in mind but may not have time for a few weeks. Stampin’ Up! has done a video on the Precision Based Plate to offer a few tips on the dies. https://youtu.be/4CQlMQ_6cOM
Thank you so much for your comments. I can’t wait to try more projects with these dies and stamp set!
Elegant as always. Just lovely.
This card is just plain gorgeous! I love the elegant simplicity. Thanks for the inspiration.
Simply stunning card, Mary! I love the red foil on the white, really says “Christmas” to me.
I thought I could live without this set. I was so wrong! Stunning!
You won’t be disappointed, Annie. It’s a beautiful group of dies and stamps.
I love how you took advantage of the negative space. This is stunning and simple at the same time!
All these comments make me smile! Thanks.
So elegant!
SOOOO in love with the new Red Foil paper….and sure makes a spectacular card!!!
These comments make me so proud to know you and share your passion for paper crafting.
Outstanding……just beautiful with such class
Mary, this is just beautiful. I just love the clean and simple look that you have mastered!
Thank you so much!
Mary this looks like a fancy store- bought card!! Gorgeous!!
Thanks, Susan!
wow! your card is beautiful! wish I was on your Christmas list!
Such sweet comments. Thank you. You’re right. The shine is truly amazing in person, Frenchie!
Omg , breathe taking , I can just imagine in person!! Wow
Tfs, hugs Frenchie,
My, oh my what a lovely card! It is un- describable (ly) beautiful. Suck a beautiful card. Thanks so much for sharing with us!
Mary, your card today is STUNNING! Quick question, did you put the popped up white layer on first and then line up the intricate white ornament inside onto the red foil? Also did you use the new fine tip glue pen to attach the intricate one? Thank you for sharing with us! It is beautiful!
Definitely on the Fine Tip Glue Pen, Shari. I added the popped up white layer first over the red foil and attached the white, intricate ornament carefully, through the window. A little tricky but doable. Keep the fine tip adhesive to a minimum so it doesn’t slide.
Mary, your card is so pretty! And, I love the title of your blogpost today!
That’s straight from Snidely Whiplash (Bullwinkle). I’m a cartoon junkie!
Mary, this is just beautiful….you continue to amaze….love the red shine on white. Thank you for sharing!
Thank you, Rene’. I sure appreciate everyone’s comments!
I sure appreciate your comments. A quicker way to create this look would be to use the solid ornament die and crop in red foil and layer the detailed ornament over it in Whisper White Pop them both UP on Stampin’ Dimensionals vs. using the negative of the solid ornament, like I did.
SERIOUS WOW kind of card my friend. Love everything about this card.
What Maria said. LOL! This card is beautiful.
Ok Mary, I had to pick myself from the floor and sit down again after I saw this card!!!!! in one word…..GORGEOUS, AMAZING, ELEGANT, PERFECT, INCREDIBLE!!!!! Ok, 5 words!! The red foil paper gives this pristine card such a rich look, thank you so much for sharing.