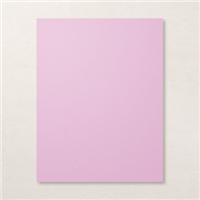
Today’s spring birthday card includes a sneak peek of the Stampin’ Up! Lighter Than Air Designer Series Paper (DSP). It comes in a chic palette of pastels including Petal Pink, Lemon Lolly, Pool Party, Balmy Blue, Bubble Bath and Fresh Freesia. The Lighter than Air Designer Series Paper is part of the Stampin’ Up! Lighter Than Air Suite Collection and will be available for purchase starting Jan. 4, 2024.
WHAT I LOVE! You also are getting sneak peeks of the coordinating Rainbow Adhesive Backed Dots and Baker’s Twine Three Color Pack (Lemon Lolly, Balmy Blue and Flirty Flamingo). I tied the Lemon Lolly and Balmy Blue Baker’s twine in bows, adhered them together (bow to bow) with a Mini Glue dot and then wrapped and tied Whisper White Baker’s twine around them in a bow. Splashy and simple!


NEED SKETCH INSPIRATION? The layout of today’s birthday card was inspired by the newest addition to my Stampin’ Pretty Sketchbook, Sketch #80 which I shared Tuesday!
my simple card tutorial
CUT YOUR CARD STOCK – DIMENSIONS:
- Basic White Thick Card Stock:
- Card Base – 5 1/2 x 8 1/2, scored at 4 1/4
- Layer – 3 1/8 x 2
- Die-Cut Sentiment – 3 1/2 x 2 1/4 (before die-cutting)
- Fresh Freesia Card Stock:
- Layer – 4 3/4 x 3 1/2
- Balmy Blue Card Stock:
- Die-Cut Sentiment – 3 1/2 x 5 (before die-cutting)
- Lighter Than Air Designer Series Paper:
- Layer – 4 1/2 x 3 1/4

PROJECT TUTORIAL:
Begin by burnishing the fold of the Basic White Thick card base with a Bone Folder.
Adhere the Designer Series Paper and Fresh Freesia layers together with Multipurpose Liquid Glue and to the card as shown with Stampin’ Dimensionals.
Adhere the Basic White Thick layer to the center of the card with Stampin’ Dimensionals.
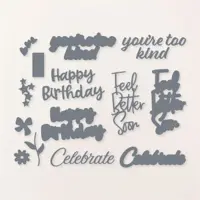
Use a Stampin’ Cut & Emboss Machine (Standard or Mini) to crop the the Basic White and Balmy Blue layers with the Wanted to Say “Happy Birthday” dies.
Adhere the die-cuts together with Multipurpose Liquid Glue and to the card with Stampin’ Dimensionals.

Tie bows of Lemon Lolly and Balmy Blue Baker’s Twine (Three Color Pack). Adhere them together with a Mini Glue Dot.
Wrap with white Baker’s Twine Essentials and secure with a bow.
Adhere to the card as shown with a Mini Glue Dot.
POP OF PERSONALITY! Embellish with five Rainbow Adhesive-Backed Dots as shown.
PERFECT POLISH! Use Multipurpose Liquid Glue to adhere the Designer Series Paper to the outside flap of a Basic White Medium Envelope flap.
stampin’ up! product spotlight!


oh, so pretty card idea!


OH, SO PRETTY! The card above also showcases the Wanted to Say Dies by Stampin’ Up! You can see the original blog post, with tips, tricks and project tutorial here.
promos, specials, & important updates
don’t forget your tulip rewards!

MY CUSTOMER EXCLUSIVE! Tulip Loyalty Rewards are my way of personally saying thank you to my frequent online shoppers. Earn a tulip for every $50 increment you spend on Stampin’ Up! products (purchased through me). Redeem tulips for a free stamp set (5 tulips) or bundle (10 tulips)!


Your cards are always the best. They have great color, style, and ease to make!
What a great take on your sketch! I love how bright and fun this card is with minimal effort. Enjoy your day!