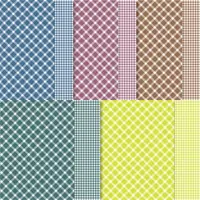
What could be sweeter than these charming 1.5″ squares of color cropped from Stampin’ Up! Glorious Gingham Designer Series Paper (new). They work beautifully either as the focus or background on a card and the colors are so playful!
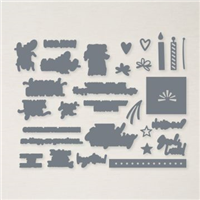
WHAT I LOVE ! Stampin’ Up! Charming Sentiments stamp set is a powerhouse of greetings for a variety of occasions. You definitely want to order the coordinating Sentiment Silhouette dies for the perfect “crop” of your message. For a WOW! look, pop the sentiment up with Stampin’ Dimensionals on a white background (I used a banner die from Stylish Shapes Dies below) for fantastic 3-D!
my simple card tutorial
CUT YOUR CARD STOCK – DIMENSIONS:
- Basic White Card Stock
- Layer – 4 1/2 x 3
- Die-Cut Banner – 3 x 1 (before die-cutting)
- Sentiment Die-cut – 2 1/4 x 1 (before die-cutting)
- Berry Burst Card Stock:
- Layer – 4 3/4 x 3 1/4
- Piece for Die-Cut Hearts – 1 1/4 x 1 1/4 (before die-cutting)
- Glorious Gingham Designer Series Paper
- Squares – 1 1/2 x 1 1/2
- Envelope Flap – 5 1/8 x 2


GET 100+ CARD SKETCH IDEAS FREE! Subscribe to my email updates & instantly receive a FREE digital gift of 100+ Card Sketch Ideas that you can save or print! Subscribers also receive my daily card ideas and tutorials, special offers, new product releases and exclusive “subscriber-only” resources.
PROJECT TUTORIAL:
Begin by burnishing the fold of the Basic White Note Card base with a Bone Folder.
Layer and adhere the Basic White layer and Berry Burst Layer together with Multipurpose Liquid Glue and to the card base with Stampin’ Dimensionals.
Adhere the Blueberry Bushel and Lemon Lime Twist squares to the card with Multipurpose Liquid Glue.
Adhere the Berry Burst square to the card with Stampin’ Dimensionals.
Crop the Basic White layer with a Stampin’ Cut & Emboss Machine (Standard or Mini) and the Stylish Shapes 2 3/4 wide flagged banner die.
Adhere to the card as shown with Stampin’ Dimensionals.
Use a Clear Block G to stamp the sentiment (Charming Sentiments) in Blueberry Bushel Classic Ink onto the Basic White layer.
Crop with a Stampin’ Cut & Emboss Machine (Standard or Mini) and the coordinating Sentiment Silhouette die.
Adhere the sentiment as shown with Mini Stampin’ Dimensionals.

Crop the Berry Burst piece with a Stampin’ Cut & Emboss Machine (Standard or Mini) and the two Sentiment Silhouette heart dies (run the outline heart through twice).
Adhere the cropped heart outline to the solid heart as shown with Multipurpose Liquid Glue and to the Lemon Lime Twist square with a Mini Stampin’ Dimensional.
Adhere the two heart centers to the Blueberry Bushel square as shown with snipped-to-size Mini Stampin’ Dimensionals.
PERFECT POLISH! Use Multipurpose Liquid Glue to adhere the Designer Series Paper to the outside flap of a Basic White Note Card Envelope. You can see my video demonstration with tips on adding designer paper to an envelope flap here.
stampin’ up! product spotlight!


promos, specials, & important updates


don’t forget your tulip rewards!

MY CUSTOMER EXCLUSIVE! Tulip Loyalty Rewards are my way of personally saying thank you to my frequent online shoppers. Earn a tulip for every $50 increment you spend on Stampin’ Up! products (purchased through me). Redeem tulips for a free stamp set (5 tulips) or bundle (10 tulips)!