
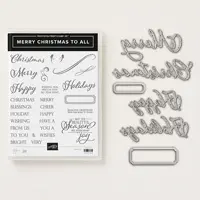
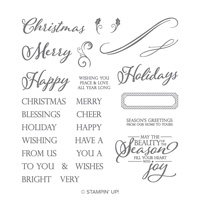
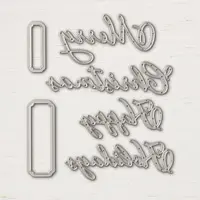
Today’s snowflake card has Merry Christmas singing the “blues!” Included on the card are the following new products from the Stampin’ Up! Holiday Catalog, available starting Sept. 5: Frosted & Clear Epoxy Droplets, Merry Christmas to All Photopolymer Stamp Set, Merry Christmas Thinlits Die (the stamp set and coordinating die will be available as a 10% off bundle) and the Blizzard Thinlits Die.

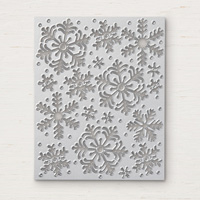
Check out all the snowflakes the Blizzard Thinlits Die makes. I can’t wait to use the remaining “negative” space – see top of photo).
STAMPIN’ PRETTY STEP-BY-STEP TUTORIAL:
Create a 4 1/4 x 5 1/2 card base with Balmy Blue card stock and the Stampin’ Trimmer. Layer a 4 x 5 1/4 piece of Night of Navy card stock on top and adhere with Snail Adhesive.
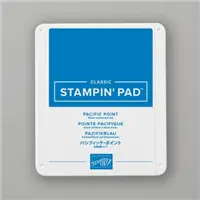
Use a Sponge Dauber to add “stripes” of Balmy Blue (top), Pacific Point (middle) and Night of Navy (bottom) ink to an approximately 5 x 2 piece of Whisper White card stock. Crop “Merry” centered on the three blues using the die from Stampin’ Up! Merry Christmas Thinlits Dies. Adhere with an adhesive of your choice to a 3 3/4 x 5 piece of Whisper White card stock. I used little dabs of Snail Adhesive.
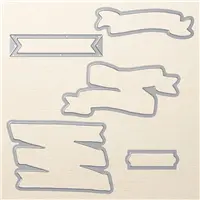
Stamp “Christmas” (Merry Christmas to All Photopolymer Stamp Set) with VersaMark Ink on Night of Navy card stock. Heat emboss with the Heat Tool and White Stampin’ Emboss Powder. Trim to approximately 2 x 1/2. TIP: I used the Big Shot, Magnetic Platform and the straight die with two flagged ends from Bunch of Banners Framelits Dies to crop “Christmas” evenly. I snipped off the flagged ends. Adhere as shown using Mini Stampin’ Dimensionals.
Crop snowflakes using Whisper White card stock, the Stampin’ Up! Blizzard Thinlits Die, the Big Shot Die-Cutting Machine and the Precision Base Plate. TIP: The Precision Base Plate will improve cutting results dramatically when using the Blizzard Thinlits die. Adhere snowflakes to the Whisper White layer as shown using Snail Adhesive in the center.

TURN ON THE LIGHTS! Add large and small frosted (self-adhesive) droplets from Frosted & Clear Epoxy Droplets to the snowflake centers. They catch the light and look like mini Christmas lights! Adhere Whisper White Layer to card base with Snail Adhesive.
Stamp interior sentiment (Merry Christmas to All) using the Stamparatus in Night of Navy ink on a 3 3/4 x 5 piece of Whisper White card stock. Add 2 more die cut snowflakes. Adhere with Snail Adhesive to a 4 x 5 1/4 piece of Night of Navy card stock and then adhere to the interior of the card.

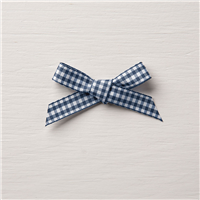
For a pretty presentation, use a Stampin’ Up! Clear Envelope and tie a piece of Night of Navy 1/2 Gingham Ribbon in a bow.
Enjoy my FREE PDF Step-By-Step Tutorial (and supply list) for the Merry Christmas Snowflake Card here.
promos, specials, & important updates
don’t forget your tulip rewards!

MY CUSTOMER EXCLUSIVE! Tulip Loyalty Rewards are my way of personally saying thank you to my frequent online shoppers. Earn a tulip for every $50 increment you spend on Stampin’ Up! products (purchased through me). Redeem tulips for a free stamp set (5 tulips) or bundle (10 tulips)!











Beautiful card Mary. The ombré effect on the word Merry brings to mind, for me at least, ice forming.
Maybe that’s why I adore blue with snowflake and snowfall cards . . . feels like ice!
Mary, This is a beautiful card! Now I know I have to order this bundle! Thanks for sharing the PDF!
My pleasure to share the PDF and your comment is a gift in return!
SO GORGEOUS, Mary! I love these blues – that “Merry” couldn’t be more perfect. Love how you resolved it with the block of “Christmas.” <3
Thanks, BK. I adore blues for snowflake cards (or any card with lots of white!)
The Christmas catalog is jammed packed with so many fantastic things that I can’t wait to get my hands of. I LOVE the colors you chose and using three different colors for the Merry adds a lot of interest. The snowflakes are divine and, I am happy that they are different types. TFS and encouraging the excitement with your beautiful creations,
Thanks so much, Juanita. Your feedback means so much!
I ADORE your card my friend. I can’t wait to try that Blizzard Thinlit die with our new embossing pad……..Think it’s going to make a GREAT embossed background for one of my upcoming winter cards. THANKS for sharing!
Thanks, Kadie. It’s a little snowflake making machine!
I love this stunning card, Mary. The ombre sentiment really adds a nice touch to the beautiful snowflakes. I can’t wait to see what you do with the negative. Have a great day!
You sure know how to make a girl smile on a Monday morning, Hilda!
This card is so soft and pretty inside and out. Thanks for sharing how you colored your ombre strip, Mary. As one who is brayer challenged, I am excited to learn that you used your daubers. Yay!
Sure thing . . . I’ll do a video this morning and share tomorrow. It really couldn’t be easier. Definitely a 1 Minute to WOW! Thanks, Linda.
What a gorgeous and elegant Holiday Card Mary, the snowflakes are so beautiful and this die is spectacular as a background too.
Love the color on the sentiment, thank you for sharing how you created it.
Sending love and hugs.
Thanks, Maria. I love traditional colors for Christmas (red and green). However, blue has a little magic when it comes to snow!