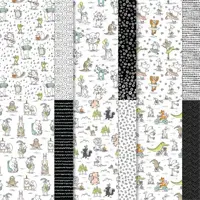
Stampin’ Up! Is a master of coordination and that is true of the three coordinating patterns from Zoo Crew Designer Series Paper used on today’s card. The koala was ready to be cropped with a 2-3/8″ Circle Punch and become the focal point. The black and white dots are the background “stage.” A wee bit of the black pattern peeks out top and bottom from behind the “stage.”
WHAT I LOVE ! There’s something so striking about a white embossed sentiment on black card stock. Perfect for a clean and simple style.

NEED SKETCH INSPIRATION? The layout of today’s thank you card was inspired by the newest addition to my Stampin’ Pretty Sketchbook, Sketch #69, which I shared on Tuesday!

Enjoy FREE sketch ideas with coordinating project tutorials in my Stampin’ Pretty Sketchbook here.
my simple card tutorial
CUT YOUR CARD STOCK – DIMENSIONS:
- Basic White Thick Card Stock:
- Card Base – 5 1/2 x 8 1/2, scored at 4 1/4
- Lemon Lime Twist Card Stock
- Layer – 5 1/4 x 4
- Petal Pink Card Stock:
- Strip -4 3/4 x 1 3/4
- Pool Party Card Stock:
- Flagged Strip – 5 1/2 x 1 (before flagging)
- Basic Black Card Stock:
- Layer – 4 x 3 1/2
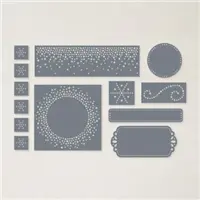
- Die-cut Circle – 2 3/4 x 2 3/4 (before die-cutting)
- Die-cut Sentiment – 4 x 1 (before die-cutting)
- Zoo Crew Designer Series Paper:
- Layers – 4 1/2 x 3 (zigzag) 3 3/4 x 3 1/4 (dots)
- Envelope Flap – 5 3/4 x 2 1/4
- Cropped Koala

PROJECT TUTORIAL:
Begin by burnishing the fold of the Basic White Thick card base with a Bone Folder.
Adhere the zigzag Designer Series Paper and Lemon Lime Twist layer together as shown with Multipurpose Liquid Glue and to the card with Stampin’ Dimensionals.
Adhere the Petal Pink strip to the card as shown with Stampin’ Dimensionals.
Use the Banners Pick a Punch to crop both ends of the Pool Party strip.
Adhere as shown with Multipurpose Liquid Glue.
Adhere the dots Designer Series Paper and Basic Black layer together as shown with Multipurpose Liquid Glue and to the card with Stampin’ Dimensionals.
Crop the koala from the Zoo Crew Designer Series Paper with the 2-3/8″ Circle Punch.
Adhere to a piece of Basic Black card stock that has been cropped with a Stampin’ Cut & Emboss Machine (Standard or Mini) and the Stylish Shapes 2-5/8″ circle die.

Use a Clear Block I to stamp the sentiment in Versamark Ink onto the Basic Black Sentiment Layer that has been rubbed with an Embossing Buddy (Embossing Additions Tool Kit).
Cover with white Basics Embossing Powder. Set with a Heat Tool.
Crop with a Stampin’ Cut & Emboss Machine (Standard or Mini) and the Labels Aglow die.
Thread white Baker’s Twine Essentials through the holes on both ends of the sentiment die-cut, securing on the left-side with a bow.
Adhere to the card with a snipped-strip edge of Stampin’ Dimensionals.
POP OF PERSONALITY! Embellish with two small black Classic Matte Dots.
PERFECT POLISH! Use Multipurpose Liquid Glue to adhere the Designer Series Paper to the outside flap of a Basic White Medium Envelope. You can see my video demonstration with tips on adding designer paper to an envelope flap here.
stampin’ up! product spotlight!


be a part of something special!
I have the privilege of leading a welcoming, nationwide community of over 700 paper crafting enthusiasts. I support them with daily communication, kindness and a whole lotta paper crafting inspiration, prizes and fun! Your card making confidence will bloom and you’ll fit right in to this artistic, friendly and positive environment.
You’ll never be pressured to sell or build a business! THIS IS ABOUT YOU!
promos, specials, & important updates


don’t forget your tulip rewards!

MY CUSTOMER EXCLUSIVE! Tulip Loyalty Rewards are my way of personally saying thank you to my frequent online shoppers. Earn a tulip for every $50 increment you spend on Stampin’ Up! products (purchased through me). Redeem tulips for a free stamp set (5 tulips) or bundle (10 tulips)!
my project supply list – click products to shop online!

Sale: $10.62
Price: $12.50