
Since the release of the Stampin’ Up! 2019 Holiday Catalog, many customers have asked “How do you make that gorgeous background behind the So Many Stars Bundle Sample on pg. 3?” What better way to answer than figuring it out for you! Please share what you think of the end result HERE.
So, today’s card is a CASE (copy and share with everyone) of the Stampin’ Up! sample on Page 3 of the Holiday Catalog. Want to see the new catalog now? Click to view the new catalog on-line! Here’s a FREE Wish List to print and help you keep track of your favorites!
Get a copy of the 2019 Holiday Catalog! If you are not a current Stampin’ Pretty customer and you plan to shop through me, you can request a copy of the holiday catalog free by visiting my page here. 

One of the many benefits of being a Stampin’ Up! Demonstrator is that you have access to the supply list of products used for catalog samples. That was a helpful starting place!
STAMPIN’ PRETTY STEP-BY-STEP TUTORIAL:
Begin with a 5 1/2 x 4 card base of Whisper White Thick card stock.

Cut a second piece of Whisper White Thick card stock to 5 1/2 x 4. Use snipped-to-size Stamping Sponges to add the following classic ink colors to create the “galaxy background”: Highland Heather, Flirty Flamingo, Balmy Blue, Rich Razzleberry, Pacific Point, Night of Navy, and Bermuda Bay.

TIP: When sponging ink onto cardstock, start with an extremely light touch in a circular motion. This is the best way to prevent ‘hard’ sponge marks on your card stock.
Squeeze an Aqua Painter filled with water and gently flick water droplets onto the background. Let soak for 30 seconds, then dab with a paper towel.
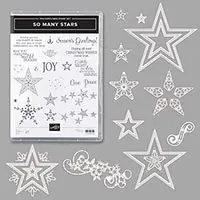
Once the ink is dried completely, rub with an Embossing Buddy. Stamp the stars in Versamark ink onto the background, several times until you have desired coverage. Cover with Gold Stampin’ Emboss Powder. Flick to remove the excess and set with a Heat Tool.

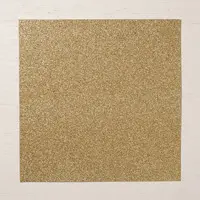
Use a die-cutting and embossing machine to crop a piece of Whisper White card stock with the largest Stitched Nested Labels Die and a piece of Gold Glimmer Paper with the Stitched Stars Die.
Rub the label die with an Embossing Buddy. Use a Stamparatus to position and stamp the sentiment (So Many Stars) in Versamark Ink as shown. Cover with Gold Stampin’ Emboss Powder, flick to remove the excess and set with a Heat Tool. Adhere to the card base with Stampin’ Dimensionals.
 Adhere the star die-cut and the cropped stars to the stitched label die as shown with Multipurpose Liquid Glue.
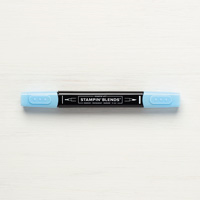
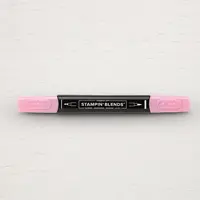
POP OF PERSONALITY! Color 5 Clear Epoxy Droplets with the following Stampin’ Blends (left to right): Balmy Blue Dark, Flirty Flamingo Dark, Night of Navy Dark, Bermuda Bay Dark, & Highland Heather Dark.


The Stampin’ Up! Clearance Rack was JUST REFRESHED with oodles of additional products. You’ll discover lovely die sets, punches, embellishments, pretty paper, ribbon, ink and more with BIG discounts (up to 60%). Discounted products sell quickly and are ONLY AVAILABLE WHILE SUPPLIES LAST.
SHOP the clearance rack thru me now by clicking here! Please don’t delay if you don’t want to miss out on your favorites.
 Want to see the new catalog now? Click to view the new catalog on-line! Here’s a FREE Wish List to print and help you keep track of your favorites!
Get a copy of the 2019 Holiday Catalog! If you are not a current Stampin’ Pretty customer and you plan to shop through me, you can request a copy of the holiday catalog free by visiting my page here.
Click on the images below to see details of each special offer!


I love hearing from you! Please leave me your questions or comments about the project for today.

If you enjoyed this post, please be sure to . . .
- Receive a FREE PDF tutorial when you subscribe to my daily blog updates here.
- Click for my Monthly Host Code and how you can earn up to a $50 shopping spree with my Tulip Rewards Loyalty Program.
- Check out the clearance rack and save up to 70%.
- Save 10% on coordinating product bundles!
- The $99 Starter Kit is the best deal of ALL! Discounts & benefits here.
- Visit my gallery for 1000+ paper crafting ideas.
- View my FREE PDF Project Tutorials.
- Follow me on Pinterest.
- Subscribe to my YouTube paper crafting video tutorials.


My project supply list. Click products to shop on-line!


I am have problems…
I flick the water – let it dry – paper towel
Cover with emboss buddy powder
cover with versamark – whole thing
Gold Powder – covers the whole thing – flick not much comes off
Heat set – I haVE a gold paper embossed?
Help .
So sorry, the instructions missed the part about using the Stars Stamp to stamp in Versamark ink onto the background:
Once the ink is dried completely, rub with an Embossing Buddy. Stamp the stars in Versamark ink onto the background, several times until you have desired coverage. Cover with Gold Stampin’ Emboss Powder. Flick to remove the excess and set with a Heat Tool.
Oooh, yes this card is so pretty , love all those colors , Tfs
Hugs Frenchie ♥️
GORGEOUS! This card was a standout in the catalog. Love that you’ve recreated it and given some great tips for how we can recreate it.
Great tutorial, thank you
Beautifully done Mary. Love all the colors you chose for the background. Stunning !!! TFS.