
Many of the gorgeous new products used on today’s thank you card are currently available in the Share What You Love – Gotta Have It All Bundle. Learn more about the Stampin’ Up! Share What You Love early product release bundles and promotion here. Don’t miss the FREE products included in each limited-time bundle! May 1 – 31.
Enabler Alert! This video by Brandi Barnard of Stampin’ Up! shows off the Share What You Love products as well as the promotion details! Ends May 31.
The beautiful new Stampin’ Up! colors combined with Basic Black are Petal Pink and Grapefruit Grove. Discover everything you need to know about the Stampin’ Up! Color Revamp (including FREE resources and a new color comparison) here.
New products in the tutorial will be available individually when the Stampin’ Up! 2018-2019 Annual Catalog begins June 1.
STAMPIN’ PRETTY STEP-BY-STEP TUTORIAL:
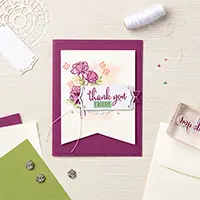
Create a 5 1/2″ 4 1/4″ card base using Thick Whisper White Card Stock and the Stampin’ Trimmer. The Stampin’ Trimmer cuts and scores.
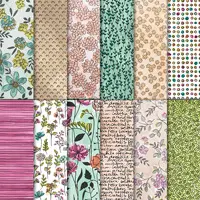
Layer and adhere a pretty 3 1/2″ x 3 3/4″ “pearlized” pattern from Share What You Love Specialty Designer Series Paper on the left side of a 5 1/4″ x 4″ piece of Basic Black card stock.

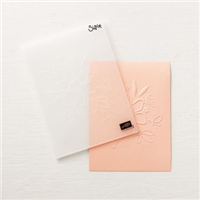
Emboss a 1 3/8″ x 3 3/4″ piece of Petal Pink card stock using a Big Shot and the Lovely Floral Dynamic Textured Impressions Embossing Folder. Adhere to the right side of the Basic Black card stock above.
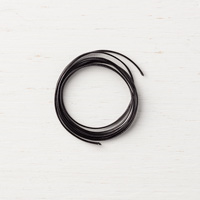
Wrap Black 1/8″ Cord around the Basic Black layer as shown. The cord has a gorgeous “patent leather” sheen with a hint of bronze. It looks stunning with these peachy pinks. Adhere the Basic Black layer to the Whisper White card base with Stampin’ Dimensionals.

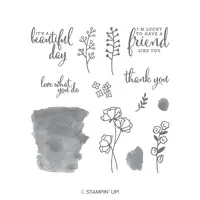
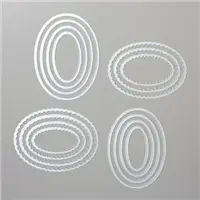
Stamp “thank you” sentiment from Love What You Do photopolymer stamp set in Tuxedo Black Memento Ink on Whisper White card stock. Using the Big Shot Die-Cutting Machine and Magnetic Platform (to keep the die in place over the image), crop with the second smallest oval from Stitched Shapes Framelits Dies.
Crop Basic Black card stock using the third smallest scalloped oval of the Layering Ovals Framelits Dies. Adhere the “thank you” oval with Snail Adhesive to the scallop oval.

Add the “thank you” sentiment to the front of the card with Stampin’ Dimensionals. TIP: Add the dimensionals near the top and bottom so that the black cord sits neatly in between.
Stampin’ Up! Whisper White Medium Envelopes are a luxurious quality and a perfect match for Whisper White card stock. Adhere a coordinating pattern from Share What You Love Specialty Designer Series Paper to the envelope flap. Snip the excess with Paper Snips. Watch my video demonstration with tips here.
Enjoy my FREE PDF Step-By-Step Tutorials (and supply list) for the Gotta Have it All card here.

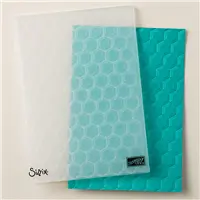
MAILING TIPS: Use the Stampin’ Up! Hexagons Dynamic Textured Impressions Embossing Folder, the Big Shot and a 4″ x 5 1/2″ piece of card stock (I used Basic Black) to create faux “bubble wrap” and cover for the top of cards you mail.

You’ll still want to use the $.71 Eastern Tailed-Blue Butterfly stamp (designed for non-machinable cards/envelopes) when you mail a hand stamped card USPS. More info on the stamp here.

GREAT TIMING! Purchase the $99 Starter Kit now and add select new pre-order products from the 2018-2019 Annual Catalog to the kit. Check out the fabulous discounts and benefits you’ll enjoy with your demonstrator status (when you purchase the kit and join Stampin’ Up!) here.

As you build your $99 kit, you’ll see this screen (above). I have highlighted where you can see and select new products!
I love hearing from you! Please leave me your questions or comments about the project for today.

If you enjoyed this post, please be sure to . . .
- Receive a FREE PDF tutorial when you subscribe to my daily blog updates here.
- Click for my Monthly Host Code and how you can earn up to a $50 shopping spree with my Tulip Rewards Loyalty Program.
- Check out the clearance rack and save up to 70%.
- Save 10% on coordinating product bundles!
- The $99 Starter Kit is the best deal of ALL! Discounts & benefits here.
- Visit my gallery for 1000+ paper crafting ideas.
- View my FREE PDF Project Tutorials.
- Follow me on Pinterest.
- Subscribe to my YouTube paper crafting video tutorials.


My project supply list. Click products to shop on-line!







BEAUTIFUL! Such a classically gorgeous showcase of this paper. <3
Thanks, BK. One of the things I’m the most WOW’d by in the new catalog is the designer series paper. Seeing it in person is very enabling!
Mary, I love this card! It has such a pleasant vibe to it…the colors are gorgeous. I think the pearlized paper is incredible! Thank you for pointing out the special details on your product videos and in your blog posts…I feel like I am able to notice even more of these special details in the new products. Have a great day!
That’s a delight to hear, Amy G. You make my day!
Lovely card, Mary. Great tip o the faux bubble wrap. Amazing!
Thanks, Roxanne. Glad the tip was helpful!
Thank you so much for the mailing tip. I love the idea of using the hexagon folder to make a cushion for the card. The postal clerk told me it is better if you actually take the cards that need to be hand cancelled to the post office and hand them to the clerk. This way they will not go through the machine by mistake. She said you didn’t need to wait in line, but just hand them to her. Each post office might differ on this.
I agree, Jana. Best to take a card to the post office to be sure. However, I don’t always have time and the non-machinable stamp technically should not go through a machine since you are paying more for it (but I’m sure it happens).
Hi Mary! I am not familiar with the butterfly stamp you suggested to use when mailing handmade cards via USPS. What exactly is this?
Here’s a link to more info, Jennifer: https://store.usps.com/store/product/buy-stamps/eastern-tailed-blue-butterfly-71%C2%A2-S_119504
Vary pretty ,I love that dsp , no matter what you do with it or pair it with , it makes a beautiful card or projects, thank you SU ,
And thank you MsMary for sharing, I hear you had a wonderful time out there , love that movie with Lucy, lol, my fav , I can still see her eating them to catch up, lol, do you think they were peanut clusters, ? ?, I think it’s time I make u some ♥️
Hugs Frenchie,
I’m glad your back , it’s too quiet when your gone ?
Thanks, Frenchie. Had a delightful evening with Brandi Barnard of Stampin’ Up! and look forward to a day of brainstorming with her. Hoping you’ll be on our Facebook Live event later today (in our private group). So lucky to have you as a member of my Pals Community.