
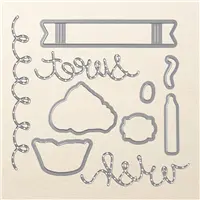
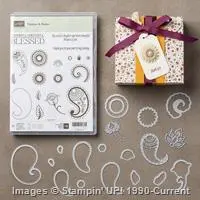
The Stampin’ Up! Paisley Framelits Dies can bring gorgeous color and texture to your fall table setting. Creating place cards and napkin rings is a snap and will make an impression on your guests.

STAMPIN’ PRETTY TIPS:
- Measuring up! Rich Razzleberry card stock cut to 4 1/2″ x 3 1/2″ is the base for the place card. Score at 2 1/4″ and fold over. The Whisper White card stock layer measures 1 3/4″ x 3″.
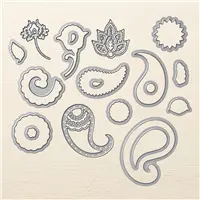
- Using the Precision Base Plate and the Paisley Framelit Dies cut the detailed paisley die and the middle sized solid paisley. The solid paisley nests beautifully under the first cut paisley. Cut the intricate leaf for the napkin ring.

- Rich Razzleberry card stock trimmed to 7″ x 1 1/2″ is the base for the napkin ring. Run a Bone Folder along the length of the card stock to breakdown the paper fibers and allow the paper to curl.
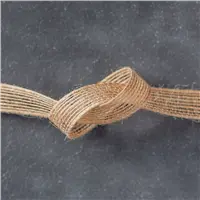
- Cut a 7″ piece of 5/8″ Burlap Ribbon and adhere to the center of the Rich Razzleberry card stock with Mini Glue Dots.
- A 7″ x 1/8″ piece of Island Indigo card stock (also curled using the bone folder) was then adhered to the center of the burlap ribbon.
- On one end of the card stock place a piece of Tear & Tape Adhesive. Wrap the card stock around your napkin and adhere. Finish with the cut paisley leaf and a Metallic Enamel Shape (love these little guys for adding the perfect touch)!

- Hover and Pin it! The photo below shows key products for today’s Paisley Framelits Dies place setting that you can save or pin to Pinterest. If you are viewing this post by email, you’ll need to click the title of the post to access my blog and pin. See ALL my labeled product photos in one spot on my How to Make Simple Cards board on Pinterest.

This project was created by my Stampin’ Pretty Design Group.

STAY TUNED FOR SEPT. 13! The Stampin’ Up! clearance rack will be updated with more inventory and big savings!

SPECIAL OFFERS! Save 25% on these select Stampin’ Up! products September 8 – 14. Watch for more special offers to come throughout the month of September! TIP: These 25% off products are the perfect add-on items to your holiday catalog order!
Save 25% on these select items September 8-14 only.

I love hearing from you! Please leave me your questions or comments about the project for today.

If you enjoyed this post, please be sure to . . .
- Receive a FREE PDF tutorial when you subscribe to my daily blog updates here.
- Click for my Monthly Host Code and how you can earn up to a $50 shopping spree with my Tulip Rewards Loyalty Program.
- Check out the clearance rack and save up to 70%.
- Save 10% on coordinating product bundles!
- The $99 Starter Kit is the best deal of ALL! Discounts & benefits here.
- Visit my gallery for 1000+ paper crafting ideas.
- View my FREE PDF Project Tutorials.
- Follow me on Pinterest.
- Subscribe to my YouTube paper crafting video tutorials.


My project supply list. Click products to shop on-line!


What a unique way to use these framelits.
FANTASTIC idea Mary. Might have to do this for our Thanksgiving table this year.
Mary, these colors are perfect. Choosing colors is one of my greatest challenges in stamping and scrapbooking.
Good Morning Mary, Very nice idea and a very pretty set. The colors are perfect.
🙂