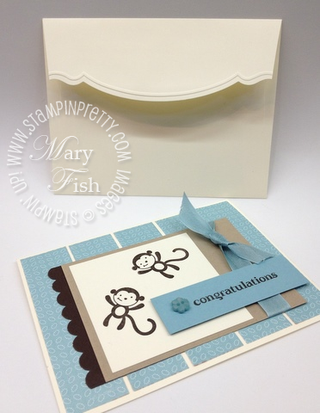
As I promised on yesterday’s post, here’s a new 1 Minute to WOW! Video Tutorial demonstrating how to create the snappy little edge on the envelope flap for the card project below. Love to learn? Check out my Stampin’ Pretty Tutorial Library!
TRY STAMPIN’ UP! MY DIGITAL STUDIO FREE! Click here for details and frequently asked questions about MDS.


loooooooooooove this video. have to run right down to my card room and try it!!! and i also would like to know about the glue-on-the-envelope thing? aaaaaaaand … that word you use (joooje??) how do you spell it??? i made a stab but, i am sure there is a better way!!
hugs, jo ann.
loooooooooooove this video. have to run right down to my card room and try it!!! and i also would like to know about the glue-on-the-envelope thing? aaaaaaaand … that word you use (joooje??) how do you spell it??? i made a stab but, i am sure there is a better way!!
hugs, jo ann.
Great video! Makes the envelope so much nicer. I too would like to know how much glue is left on the envelope. Tks!
what is the trick with the post it? How do you place it on the paper??
thanks jackie
Mary, one quick question…how much glue is there left on the back side of the envelope since it seems that some or most of it gets “cut/embossed” off by this technique? hmmm, just curious (it seems to be the part that curves up towards the outer part of the envelope has the most cut off)
either way, its simply a GORGEOUS looking envelope that I would love to receive or give to someone!!
hi annette: it’s a little snippet of spanish guitar music i purchased from istockphoto so that i could legally add music to my videos (without any copyright issues). it’s less than 30 seconds long. i get a chuckle out of how often i’m asked about it. i don’t know the title or artist 🙂 glad you like it! hugs, m
Hi Amy:
The Paper Doily is a little trickier . . . I have to add a piece of Whisper White card stock as a shim and then use tab 1 on the multi-purpose platform. It’s a little tight going through but not enough that it’s being forced. I recommend anyone start with less tension and build a little at a time by adding a shim. Be sure to right down your best sandwich recipe for the doily for the next time! Hugs, M
Hugs, M
Mary, This is a wonderful video. I just ordered the two tools that you used. I did not know how to use them. You are so creative. Thank You Mary. I learn so much from you. Have a great stamping day, Ellen
Another helpful video, but I have a non-stamping question….what is that great music you play at the beginning of your videos? Thanks Mary!!
thanks for this great tutorial, I do hope when I ordered this I ordered the embossing folder to go with this 🙂
thanks Mary! very pretty!
I love that look; so classy!
Wow!! I have a neice that is expecting a baby boy and I just received her shower invite in the mail – this card and envelope are just what I have been looking for this special occasion!! Thank you, Mary 🙂
Now that is one fancy envelope that would make me squeal if I received it. Many thanks Mary for yet another awesome video.
Fancy envelope … thanks for the great video, Mary!
Thanks for the video, Mary – very helpful! The tip about “no flaps” was great as my machine is too tight and I couldn’t figure it out. I’m curious…what is your sandwich for the Paper Doily die? Thanks!
It is a look I hope to recreate.Thank you.