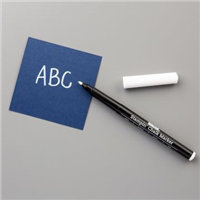
Just as I promised on yesterday’s post, I have a 1 Minute to WOW! video tutorial for you today sharing how to use the White Stampin’ Chalk marker to accent leaves. So easy and fun! Click on the image above to watch the video. You’ll get a sneak peek of my card for this Saturday’s (Simple Saturday) post, too!

Get full details on this card from yesterday’s post using the Chalk Marker.
Shop for the White Stampin’ Chalk Marker
Built for Free Using: My Stampin Blog

NEW WEEKLY DEALS START TODAY! Discover what Stampin’ Up! has discounted 25% this week HERE. New pricing ends Sept. 28.
I love hearing from you! Please leave me your questions or comments about the project for today.

If you enjoyed this post, please be sure to . . .
- Receive a FREE PDF tutorial when you subscribe to my daily blog updates here.
- Click for my Monthly Host Code and how you can earn up to a $50 shopping spree with my Tulip Rewards Loyalty Program.
- Check out the clearance rack and save up to 70%.
- Save 10% on coordinating product bundles!
- The $99 Starter Kit is the best deal of ALL! Discounts & benefits here.
- Visit my gallery for 1000+ paper crafting ideas.
- View my FREE PDF Project Tutorials.
- Follow me on Pinterest.
- Subscribe to my YouTube paper crafting video tutorials.


My project supply list. Click products to shop on-line!


That white chalk pen makes a big impact for such a small amount of effort. Really pretty, yet simple, card. Thanks for sharing.
It’s the perfect 1 Minute to WOW! project, Sherry. Literally just a minute to really add a new look. Thanks!
The photopolymer trick with the Stampin’ Pierce Mat is a biggie. Really makes it easier to get better ink coverage, especially with solid stamps.
Haven’t used my chalk marker yet but this will definitely get me going. Really love the tip with the photopolymer. I am definitely going to give that a try.
Thank you! There are a lot of uses when you think about it as a highlight, Hldeko. The new images that are “coloring-friendly” are especially nice for it. Dove of Peace is another example!
Thank you so much for sharing this chalk marker accent idea! I haven’t used the marker for a long time, so I’m glad that I got to know how to use it this way!
Thank you so much for your great feedback. The Gel Pen is another way to do this . . . gives a whiter look and sharper contrast. I like both!
Mary, What a great card. I love the simplicity of the card. The real red really pops with the black, The leaves look so sweet with the white chalk marker. I guess that is going on my next order. Great at job Mary. Thank you for all the grrat tips Have a great stamping day, hugs, Ellen Hinds
Wow is right! I could not believe the difference using the chalk marker on those leaves in the video. I loved that you used the Real Red for the background card in the video. It was really eye catching! Thanks for the tips and videos!
I’m a REAL FAN of the white chalk marker…….Just adds that little something something to my stamped images. THANKS for sharing my friend.
Wow! Love these suggestions, Maria. Thank you!
Hello Mary: Great tips on the Photopolymer stamps, specially having the piercing mat underneath. I also found out that, when you are going to use this stamps for the first time or, if you haven’t use them in a while, and you are going to use Stazon black ink, it’s good to make sure your ink pad is nice and juicy, then you stamp your image several times on a piece of scrap paper until the image is perfectly stamped, with no missing areas, before you stamp it on your project, I use the MISTI but the Stamp-a-majig works great too.
Thank you again for sharing this tips.