earn tulip loyalty rewards with every $50 purchase! - host code: KVDWCCRM

Background Check Part 2: Background Stamps

I'm a pushover for pretty patterned paper.  However, it's so simple to create your own custom versions that I thought I would share some more tips and ideas in this post and in the coming days.  Please see Background Check (Part I) for other custom background paper ideas.  All photos may be clicked for a closer peek.
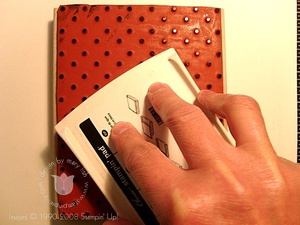
Stampin_up_cheers_6
A background stamp should be flipped on it's "back," rubber side up.  Think of a turtle.  Next, ink it up thoroughly. 
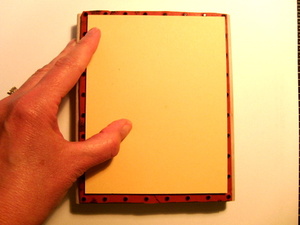
S73014151
Place card stock directly onto inked stamp, carefully aligning it.  If you move it on the stamp, the image will smear.  Lay a piece of scratch paper on top of the card stock.  Stampin_up_cheers_8
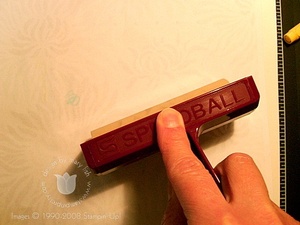
TIP:  For uniform inking, use a Brayer (Stampin' Up! Spring/Summer Collection, p. 185) to roll over the entire stamp, making sure to keep one hand holding the paper and card stock steady on the background stamp.
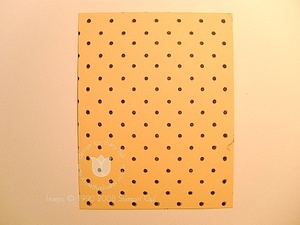
Stampin_up_cheers_9
TIP:  I always use a larger piece of card stock than I need and do my cutting later in case there are any imperfections (which is exactly what happened to me on the right hand side as I was trying to hold everything in place and take the photo at the same time–always rather humorous for my family to witness this balancing act). 

Here's the finished project!

Hugs and Pretties . . . .M

Stamps:  Polka Dot Background
Paper:  So Saffron
Ink:  Basic Black
Cool Tools:  Brayer

3 thoughts on “Background Check Part 2: Background Stamps”

  1. It is always refreshing to see your designs, You are very talented and full of life, thanks so much for your help!!

    Reply

Leave a Reply to colleen kramer Cancel reply

Subscribe to my daily email & BE FIRST to receive my simple card ideas, FREE tutorials, sweet Stampin’ Up! deals & new product drops!  

I’m proud to be known as the “Fearless Leader” to the Stampin’ Pretty Pals community, an enthusiastic, friendly group of 700+ hobby and business demonstrators from across the U.S. that are part of my team.  I offer a resourceful, virtual environment where members can participate in the stamping conversation at any level they choose.  Learn more about my Pals Community Perks here.

Unauthorized use and/or duplication of this material without express and written permission from this site’s author and/or owner is strictly prohibited. Excerpts and links may be used, provided that full and clear credit is given to Mary Fish, Stampin’ Pretty, with appropriate and specific direction to the original content.

The content in this blog is the sole responsibility of Mary Fish as an Independent Stampin' Up! Demonstrator and the use of and content of classes, services or products offered is not endorsed by Stampin' Up!

Disclosure of Material Connection: I have an “affiliate link” with Stamp-n-Storage, craft storage solutions.  This means if you click on the link and purchase the item, I will receive an affiliate commission. Regardless, I only recommend products or services I use personally and believe will add value to my readers. I am disclosing this in accordance with the Federal Trade Commission’s 16 CFR, Part 255: “Guides Concerning the Use of Endorsements and Testimonials in Advertising.”

BE FIRST!

Receive a FREE Step-by-Step Card Tutorial when you subscribe to my daily blog emails and be first to receive:

✓ My simple card ideas
✓ FREE step-by-step tutorials
✓ Sweet Stampin’ Up! deals!
✓ New product drops!

No, thanks! (click to close)